
What Makes a DAW Right for Beat Making
This is not another generic "top 10 DAWs" list. If you make beats, you already know that most software roundups spend 90% of their time talking about recording quality, mixing consoles, and plugin counts. That is useful information for mixing engineers and podcasters. It is almost useless for someone trying to program a hard-hitting drum pattern at 2 a.m.
This guide evaluates every recommendation through one lens only: how well does this software help you build beats? Rhythm programming, sample chopping, pattern construction. That is the filter. Everything else is secondary.
What a DAW Actually Does for Beat Makers
So what is a DAW in music, exactly? A digital audio workstation is software that lets you record, edit, arrange, and produce audio on your computer. Think of it as your entire studio compressed into a single application. It handles everything from sequencing drums to layering melodic samples to arranging a full track with intros, verses, and drops.
For beat makers specifically, the DAW serves as a rhythm laboratory. You load drum sounds into a sequencer, program kick and snare patterns, stack hi-hats and percussion on top, then build melodic layers underneath. The whole process happens inside this one environment. Understanding the daw meaning music producers assign to it is simple: it is the creative hub where raw sounds become finished beats.
Why Generic DAW Advice Falls Short
Here is the problem with most DAW guides. They rank software by features that matter to recording artists and audio engineers, like comping tools, crossfade precision, and surround sound support. A beat maker choosing a DAW based on those criteria is like a drummer shopping for a guitar amp.
When you are picking a daw for beat making, the features that actually matter look completely different:
- Built-in step sequencers for programming drums quickly
- Pattern editors that let you think in loops, not linear timelines
- Drum racks or pad instruments for layering one-shots
- Fast sample browsers for auditioning sounds without breaking your flow
- Swing and groove controls that make programmed drums feel human
A digital audio workstation can be world-class for recording a live band and still feel clunky for building a trap beat from scratch. The distinction matters, and it is exactly where most buying guides fall apart.
The real question is not "what is the best DAW?" It is "how does this DAW handle the specific way beat makers work?" That answer starts with understanding two fundamentally different workflow philosophies.
Pattern-Based vs Linear Workflows and Why It Matters
Those two workflow philosophies are not a minor preference. They shape how you think about music inside the software. Before you compare pricing, plugin counts, or even sound libraries, you need to answer one question: do you naturally build beats in loops or do you compose left to right? The answer eliminates half the daw programs on your shortlist immediately.
How Pattern-Based Workflows Power Beat Production
Imagine building a beat the way you actually hear it in your head. You create a two-bar kick pattern. Then a separate hi-hat loop. Then a snare groove. Each element lives in its own short, repeating cell. Once every piece sounds right on its own, you drag those cells onto a playlist and arrange them into a full track.
That is exactly how pattern-based daw programs like FL Studio and MPC Beats operate. FL Studio's Channel Rack lets you build individual patterns, each containing one or more instrument layers, and then sequence those patterns on the Playlist timeline. MPC Beats follows the same logic inherited from decades of Akai's hardware sequencers: build short patterns, then chain them in Song mode to form a complete arrangement.
The real advantage here is flexibility. If you decide your chorus needs a different snare pattern, you edit that one pattern and every chorus in the song updates automatically. With a linear approach, you would need to copy and paste that edit into every instance manually. For producers who think in loops and repetitions, pattern-based sequencing feels like the software is reading your mind.
When a Linear Timeline Makes More Sense
Not every beat starts as a loop. Some producers prefer laying down a chord progression that evolves over 16 bars, recording a bass line in one pass, and building the arrangement as they go. This is where a linear timeline shines.
DAWs like Logic Pro, Pro Tools, and Ableton Live's Arrangement View present your project as a continuous left-to-right timeline. Audio and MIDI regions flow chronologically, much like tape. If you record live instruments over your beats, or if you compose longer-form pieces where sections morph gradually rather than snapping between discrete loops, a linear music daw keeps everything visible and intuitive.
The ableton live vs fl studio debate often comes down to this exact split. FL Studio's pattern system feels more natural for pure drum programming and loop stacking, while Ableton's Arrangement View rewards producers who want to sculpt a track from start to finish in one continuous flow.
Hybrid Approaches Worth Knowing
Here is where things get interesting. Some of the best daw options refuse to pick a side. Ableton Live's Session View gives you a grid of clips you can trigger freely, jam with in real time, and then record directly into the linear Arrangement View. It is pattern-style creativity feeding into timeline-based structure.
Bitwig Studio software takes a similar approach with its clip launcher. Producers can build a pool of scene variations, each with small creative differences, and audition combinations before committing to a final arrangement. The clip launcher essentially becomes a resource panel where you stockpile ideas and then assemble them into a finished track.
Understanding where you fall on this spectrum, pattern thinker, linear composer, or somewhere in between, narrows the field dramatically. You are no longer comparing ten music daw options. You are comparing three or four that actually match how your brain works. And that is when the real feature comparison begins.
Essential Beat-Making Features Every DAW Should Have
Workflow style gets you halfway to the right choice. The other half comes down to specific features, the tools you will actually touch every time you open a session. Not every music production program advertises these clearly, so knowing what to look for gives you a serious edge when evaluating your options. Think of this section as a checklist you can hold up against any daw for beat making before you commit.
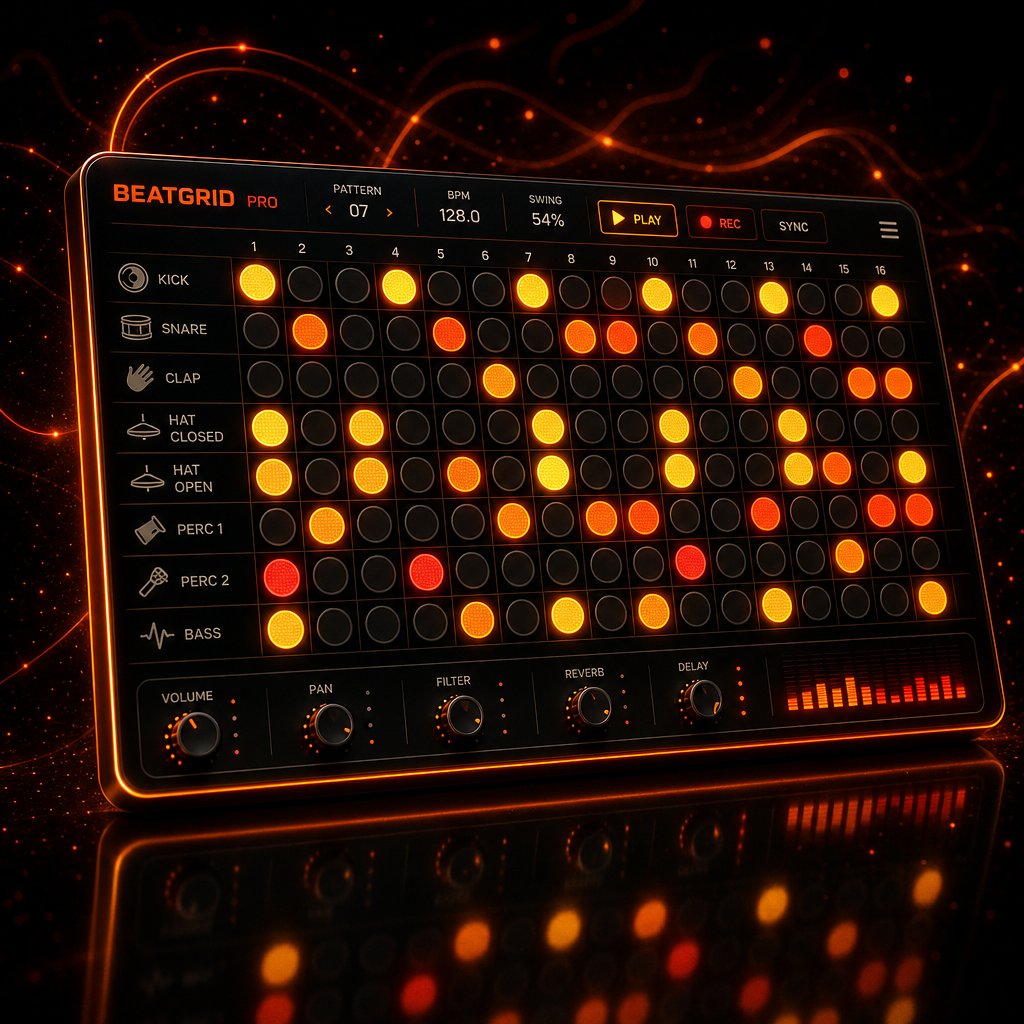
Step Sequencers and Drum Machines
A step sequencer is a grid. Each column represents a beat division, typically sixteenth notes, and each row represents a sound: kick, snare, closed hat, open hat. You click cells to activate them, hit play, and the pattern loops. It is the fastest way to sketch a drum groove from nothing, and it is the reason FL Studio's Channel Rack became iconic for beat makers worldwide.
How does this differ from a piano roll? A piano roll is a midi sequencer where you draw individual notes at any pitch and any length on a vertical keyboard grid. It is more flexible but slower for drums. When you just need a punchy eight-bar loop, a dedicated step sequencer gets you there in seconds. Dedicated drum machine plugins accelerate this further. FL Studio's FPC maps sounds to velocity-sensitive pads. Ableton's Drum Rack lets you drag samples onto a 4x4 grid and process each pad independently. Logic Pro's Drum Machine Designer, introduced alongside its dedicated Step Sequencer in version 10.5, automatically assigns kit pieces to sequencer rows so you can start programming immediately.
One detail that separates good music production software from great: groove quantization and swing controls. Programmed drums can sound stiff and mechanical. Swing shifts certain hits slightly off the grid, adding a subtle push-pull feel that makes patterns breathe. If a DAW buries this setting three menus deep, or lacks it entirely, your drums for beginners and veterans alike will sound robotic no matter how good the samples are.
Sample Chopping and Slicing Tools
Sample chopping is where beat making meets crate digging. You grab a funk break, a soul vocal, or a dusty piano loop, slice it into pieces, map those pieces to pads, and rearrange them into something entirely new. This technique sits at the heart of hip-hop, lo-fi, and any sample-based genre.
The core workflow, as Sound On Sound details, follows a consistent pattern across platforms: load a sample, chop it using transient detection or manual slicing, tempo-match it to your project, convert the slices into a playable instrument, then sequence the pieces into a new groove. MPC-style pad workflows pioneered this approach, and modern DAWs replicate it in software. Ableton's Simpler lets you slice a sample and convert it directly into a Drum Rack. MPC Beats offers dedicated chop modes inherited from decades of Akai hardware. Even time-stretching and audio-to-MIDI conversion, which extracts melodic content from a sample and turns it into editable notes, have become standard in the best music production software.
If you plan to flip samples regularly, pay close attention to how quickly a DAW lets you audition, slice, and remap audio. A clunky sample workflow kills creative momentum faster than almost anything else.
Built-In Sound Libraries and Drum Kits
When you are just starting out, you probably do not own third-party sample packs or premium drum kits. The sounds that ship with your DAW are all you have, and their quality directly affects whether your early beats sound inspiring or discouraging. This is where stock libraries earn their keep.
The range varies dramatically across music production programs. Logic Pro ships with roughly 80 GB of content, including acoustic drum kits, electronic one-shots, and thousands of Apple Loops. FL Studio includes strong synthesizer presets through instruments like FLEX, Harmor, and Sytrus, though its raw sample library is smaller at around 5 GB. Ableton Live Intro offers approximately 4 GB, while GarageBand provides about 2 GB of surprisingly usable sounds. For anyone searching for the best music beat making software on a budget, these stock libraries can make or break the experience.
Before you evaluate any DAW, run through this checklist of features that matter for beat production:
- Step sequencer for fast drum programming
- Pattern editor for loop-based composition
- Drum rack or drum machine plugin for layering one-shots
- Sample browser with preview and drag-and-drop support
- Swing and groove quantization controls
- Pad controller mapping for hands-on performance
- Built-in drum kits and quality one-shot samples
Any DAW that checks most of these boxes is a serious contender for beat production. Any DAW that misses several is built for a different audience, no matter how many five-star reviews it has. With this checklist in hand, you are ready to see how the major platforms actually stack up against each other, feature by feature.
Top DAWs for Beat Making Compared Side by Side
A checklist tells you what to look for. A comparison table tells you where to find it. The table below evaluates eight of the best daws through a beat-making-only lens, ignoring recording specs and mixing features that do not affect how quickly you can program a drum pattern and arrange a loop.
| DAW | Step Sequencer | Pattern Workflow | Drum Machine Plugin | Sample Chopping | Pad Controller Support | Built-In Drum Kits |
|---|---|---|---|---|---|---|
| FL Studio | Yes (best-in-class) | Yes | FPC | Slicex, Edison | Yes | Yes |
| Ableton Live | No (clip-based) | Hybrid | Drum Rack | Simpler, warp engine | Yes (Push, Launchpad) | Yes (Suite) |
| Logic Pro | Yes | Hybrid (Live Loops) | Drum Machine Designer | Quick Sampler | Yes | Yes (80 GB library) |
| MPC Beats | Yes | Yes | Built-in pads | Full MPC chop modes | Yes (Akai native) | Yes |
| Maschine | Yes | Yes | Built-in pads | Auto-slice engine | Yes (Maschine hardware) | Yes (expansions) |
| Reason | Limited (Drum Sequencer) | No | Kong, Dr. Octo Rex | Dr. Octo Rex slicing | Yes | Yes |
| Bitwig Studio | Yes | Hybrid (clip launcher) | Drum Machine | Yes | Yes | Yes |
| LMMS | Yes (Beat + Bassline) | Yes | Built-in editor | Basic | Limited | Minimal |
A few things jump out immediately. The dedicated beat-making platforms, FL Studio, MPC Beats, and Maschine, check nearly every box. General-purpose DAWs like Reason and LMMS cover the basics but leave gaps in sample chopping or stock sound libraries. Your choice depends on which row matches your priorities.
FL Studio for Beat Makers
There is a reason FL Studio dominates hip-hop production. The Channel Rack and step sequencer let you build drum patterns in seconds, the FPC plugin maps samples to velocity-sensitive pads, and the piano roll is widely considered the most precise of any DAW. The pattern-based playlist, where you chain individual loops into a full arrangement, mirrors how most beat makers naturally think.
Then there is the pricing model. FL Studio includes lifetime free updates across all editions, from the $99 Fruity tier to the $499 All Plugins bundle. Buy once, receive every future version at no extra cost. If you are searching for the best daw for windows and your focus is beat production, FL Studio is the default starting point. It also runs on Mac, though the Windows version has a longer track record.
The ableton live vs fl studio debate usually comes down to this: FL Studio's pattern workflow is more direct for pure beat programming, while Ableton rewards producers who want deeper sound design and live performance tools.
Ableton Live for Beat Makers
Ableton Live approaches beat making differently. Session View gives you a grid of clips you can trigger, layer, and rearrange in real time, making it ideal for producers who like to jam their way into an arrangement. Drum Rack lets you load samples onto a pad grid and process each sound independently with its own effects chain.
The ableton live 12 suite tier ($749) unlocks the full instrument library, Max for Live for custom devices, and generative MIDI tools that suggest pattern variations. For producers on a tighter budget, ableton live intro starts at $99, though its 16-track limit means you will likely outgrow it quickly. Standard at $349 is the realistic entry point for serious work. In the pro tools vs ableton conversation, Ableton wins for beat-focused production because Pro Tools is built around recording and mixing, not loop-based creation.
Logic Pro, Reason, and Bitwig
If you are on Apple hardware, the logic daw is hard to ignore. Logic Pro costs $199 as a one-time purchase and ships with roughly 80 GB of sounds, including Drum Machine Designer, a dedicated Step Sequencer, and Beat Breaker for glitch-style rhythmic effects. As a daw for mac users, nothing else matches its price-to-content ratio. The limitation is obvious: Windows producers cannot use it at all.
Reason daw software takes a unique approach with its virtual rack interface. Kong drum machine and Dr. Octo Rex loop player handle beat duties, while the modular patching system lets you route audio and CV signals between devices like physical hardware. It is powerful for sound design but less streamlined for quick beat sketching than FL Studio or Ableton. Pricing sits at $499 outright or $19.99 per month through Reason+.
Bitwig Studio splits the difference with a clip launcher for session-style jamming, a built-in Drum Machine, and The Grid, a modular environment for building custom instruments from scratch. Its modulation system lets you connect virtually any parameter to any source, which opens up rhythmic possibilities that static DAWs simply cannot replicate. Editions range from a free 8-Track version to $399 for the full Studio release.
Each of these platforms handles beat making capably, but they serve different producers. The real question is not which one ranks highest on a generic list. It is which one disappears into the background while you create. And for many producers, especially those just starting out, the answer might not cost anything at all.
Free and Budget DAWs That Deliver Real Beat-Making Power
Spending nothing does not mean settling for nothing. The free daw landscape has matured to the point where several options ship with real step sequencers, sample tools, and sound libraries that can produce release-worthy beats. The catch is that not all free software is built equally for beat production. Some excel at recording or audio editing but leave you fighting the interface the moment you try to program a drum pattern.
Ranked by pure beat-making capability, here is where the strongest free daw software stands right now:
- MPC Beats (Windows/Mac) — Full MPC-style workflow with pad performance, sample chopping, a step sequencer, and eighty effects plugins at zero cost. If you want a digital audio workstation free of charge that was purpose-built for making beats, this is the top pick.
- GarageBand (Mac/iOS) — Drummer tracks generate realistic, customizable drum patterns. A solid sound library, clean interface, and seamless upgrade path to Logic Pro make it the best free option on Apple hardware.
- BandLab (Web/Mobile) — Runs entirely in your browser with no installation. Built-in loops, over 200 virtual instruments, and real-time collaboration features. Less granular control than desktop options, but zero barrier to entry.
- LMMS (Windows/Mac/Linux) — Open-source with a beat editor and step sequencer inspired by FL Studio. Ships with capable built-in synthesizers like ZynAddSubFX. The strongest fl studio free alternative for producers who want a pattern-based workflow without paying.
MPC Beats and GarageBand Lead the Free Tier
MPC Beats deserves special attention as the best free daw for beat makers specifically. Akai built it around the same pad-based, pattern-sequencing philosophy that defined decades of hip-hop production hardware. You get three VST instrument plugins, dedicated chop modes for slicing samples, and native auto-mapping with any Akai controller. The limitation is real but manageable: only eight instrument track channels. For straightforward beat production, that is usually enough.
GarageBand punches above its weight in ways that surprise even experienced producers. Steve Lacy famously released music made entirely in GarageBand, and the Drummer feature alone gives beginners access to intelligent, genre-aware drum patterns they can tweak without programming a single note. The iOS version uses the same project files as the Mac version, so you can sketch ideas on your phone and finish them on a laptop.
BandLab, LMMS, and Browser-Based Alternatives
BandLab removes every technical excuse for not starting. Open a browser tab, pick a loop kit, and start layering. It is the best free daw for producers on Chromebooks or shared computers where installing desktop software is not an option. The trade-off is a closed plugin ecosystem: you cannot load third-party VSTs, so you are limited to what BandLab provides.
LMMS fills a different gap as a free daw for windows and Linux users who want offline, desktop-grade production. Its Beat + Bassline editor and piano roll handle drum programming and melodic sequencing well. The major shortcoming is the absence of audio recording, so if you need to track vocals or live instruments, you will need a separate tool.
Beyond installed software, browser-based music tools let you experiment with beat creation without committing to any platform. MakeBestMusic's Online Tools curate a collection of browser-based utilities for rhythm programming, sound design, and production experiments. They are especially useful for testing ideas on unfamiliar machines or when you want to sketch a groove quickly before opening a full desktop session.
When Free DAWs Hit Their Limits
Honesty matters here. Free music production software will eventually bump into ceilings: smaller sound libraries, limited or no third-party plugin support, fewer export formats, and missing advanced features like audio comping or detailed automation. For learning the fundamentals and finishing your first beats, these tools are more than capable. For iterative mixing across multiple sessions or building a professional template library, you will feel the constraints.
That is where affordable stepping stones come in. FL Studio's trial deserves a special mention: it gives you access to the full application, every plugin, every export option, with no time limit. The single restriction is that you cannot reopen saved project files until you purchase a license. If you can finish a beat in one session and export it before closing, the trial is genuinely production-capable at no cost. Ableton Live Intro at $99 removes track limits you would hit in the free Lite version, and the $199 Producer Edition of FL Studio unlocks audio recording alongside those lifetime free updates.
The gap between free and paid is real, but it is narrower than most people assume. A cheap daw or even a completely free one can carry you through dozens of finished beats before you ever need to upgrade. The smarter move is to pick one, learn it deeply, and let your actual production needs, not marketing pressure, tell you when it is time to spend money.
Of course, software is only half the equation. Many beat makers pair their DAW with physical hardware, and that pairing can either supercharge your workflow or create frustrating compatibility headaches.
Pad Controllers and Hardware Integration for Beat Makers
Picking a DAW is really picking an ecosystem. The software you choose determines which pad controllers feel native, which knobs map automatically, and whether your hardware acts as a creative instrument or a glorified mouse replacement. For anyone building out home studio equipment around beat production, this relationship between software and hardware matters more than spec sheets suggest.
Akai MPC and Native Instruments Maschine Integration
Akai's MPC controllers pair natively with MPC Beats, meaning pads, knobs, and transport controls map instantly with zero configuration. Load a kit, start chopping, and the hardware responds like it was designed for exactly that workflow — because it was. Any akai midi key controller also works as a standard MIDI device inside Ableton, FL Studio, or Logic, though you lose the deep auto-mapping and have to configure assignments manually.
Native Instruments Maschine operates differently. It functions as both standalone software and a VST plugin inside other DAWs. Run it inside Ableton or Logic and you get Maschine's pattern-based sequencer, pad workflow, and sound library layered on top of your main daw workstation. The Maschine MK3 requires a computer but includes a built-in 96kHz/24-bit audio interface, dual color displays, and KOMPLETE SELECT with premium instruments. The Akai MPC One Plus, by contrast, runs fully standalone with a 7-inch touchscreen, 16 GB of internal storage, and Wi-Fi connectivity — no laptop required. The distinction is fundamental: Maschine is a controller that enhances your DAW, while MPC hardware can replace it entirely.
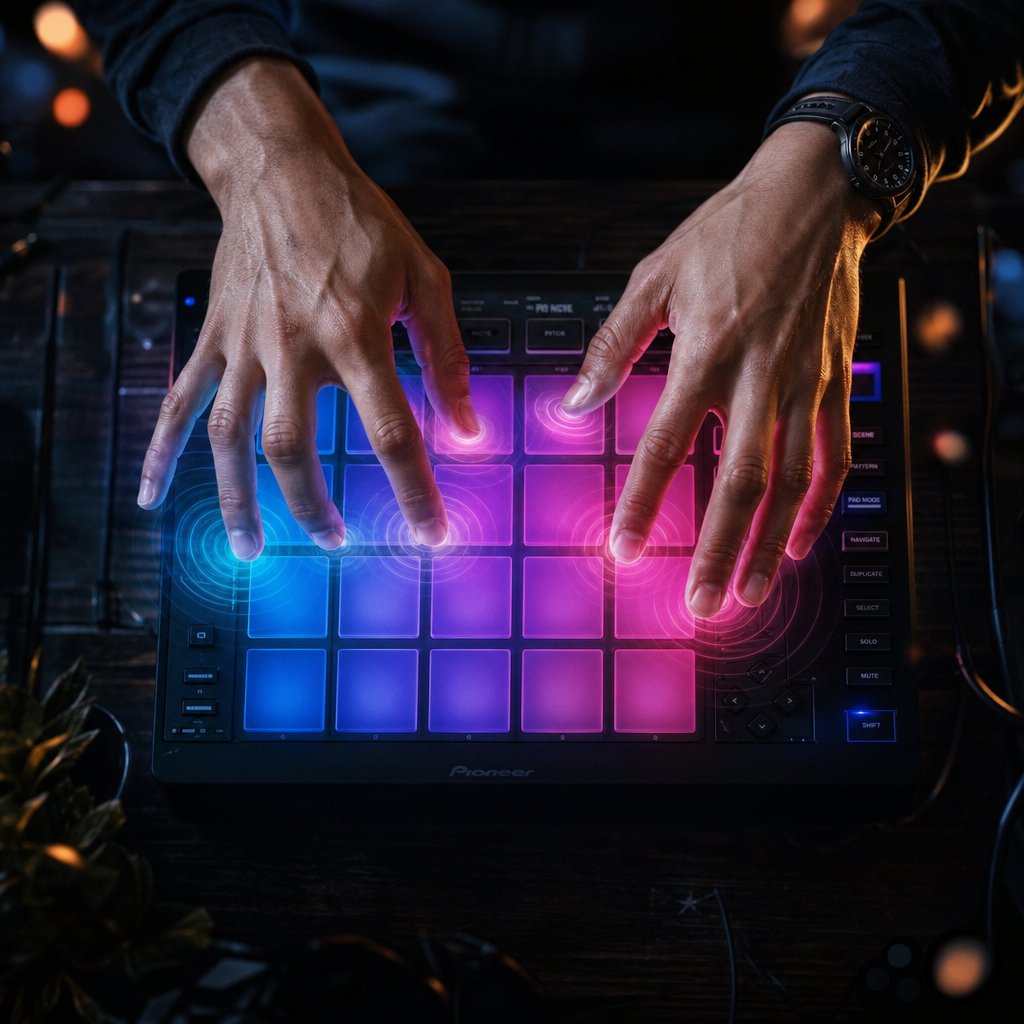
Ableton Push and Novation Launchpad
Ableton Push was designed exclusively for Ableton Live. It offers hands-on beat programming, step sequencing, sample browsing, and even standalone operation with Push 3. You can sequence external synths and drum machines using MIDI, CV, and ADAT outputs, build patterns with scale-aware pads, and layer MIDI effects like arpeggiators and chord generators — all without touching a mouse. For producers who want the tightest possible hardware-software integration in a single brand ecosystem, Push is hard to beat.
The Novation Launchpad offers a more affordable grid controller alternative. It lacks Push's built-in displays and encoders, but its 64-pad grid handles clip launching, drum programming, and note input at a fraction of the cost. If you already own Ableton and want tactile control without a major investment, Launchpad is a smart entry point.
Choosing Hardware That Matches Your DAW
Practical guidance comes down to what you already own and how you prefer to work. If an Akai MPC pad is already on your desk, MPC Beats or any DAW with strong MIDI mapping keeps your workflow intact. If you want to produce your own music with the least friction between hardware and software, Ableton plus Push or Maschine as a standalone system offer the deepest integration available.
Many beat makers land on a hybrid dawless setup where hardware handles performance and sound design while the DAW handles arrangement, mixing, and final export. The MPC One Plus, for example, can run completely standalone for initial beat creation, then connect to a computer in controller mode when it is time to mix. This kind of flexibility means you are not locked into one way of working.
The key takeaway: buy hardware that matches your software, not the other way around. A $700 controller paired with the wrong DAW creates more frustration than a $150 pad controller that maps perfectly to your existing setup. Get the pairing right, and the gear disappears — leaving you focused on the only thing that actually matters: building the beat.
From Blank Canvas to Finished Beat Loop
Hardware matched, DAW installed, controller mapped. You are staring at an empty project file. What happens next? Surprisingly few guides walk through the actual process of daw music production from first click to finished loop. Features and comparisons only matter if you know how to use them. This section covers the real workflow, step by step, in a way that applies to virtually any platform.
Setting Up Your Session and Loading Sounds
Every beat starts with two decisions: tempo and sounds. Open your DAW and set the BPM. Trap typically sits around 130 to 150 BPM. Lo-fi hovers between 70 and 90. Boom-bap lands near 85 to 95. House and dance music cluster around 120 to 130. Pick a tempo that matches the energy you are going for, and do not overthink it — you can always adjust later.
Next, create a drum track or instrument channel and load your sounds. In FL Studio, this means opening the Channel Rack and dropping kick, snare, hi-hat, and percussion samples into individual channels. In Ableton, you would create a MIDI track, load a Drum Rack, and drag one-shots onto individual pads. In Logic Pro, Drum Machine Designer handles the same job. MPC Beats maps sounds directly to its pad grid.
This is where a strong sample browser pays off. The best music making software lets you audition sounds in context, previewing kicks and snares while the project plays, so you can hear how each sample sits before committing. FL Studio's browser, Ableton's file manager, and Maschine's tag-based search all speed up this step significantly. If your DAW forces you to stop playback, navigate folders, and import files manually, sound selection becomes a momentum killer instead of a creative act.
Organize your sounds before you start programming. Label your channels or pads: Kick, Snare, Closed HH, Open HH, Perc. A clean session at the start saves confusion when the arrangement gets dense later.
Programming the Core Drum Pattern
Drums are the skeleton. Everything else hangs from the rhythmic framework they create, so getting this right is worth your full attention.
Start simple. Place a kick on beat 1 and beat 3, a snare on beat 2 and beat 4. That four-on-the-floor foundation works across genres. From there, add syncopation: shift the second kick slightly off-grid, add a ghost kick on the "and" of beat 2, or remove the kick on beat 3 entirely for a half-time feel. Small changes to the kick pattern alone can shift a beat from pop to hip-hop to drill.
You have two ways to input these hits. A step sequencer lets you click cells on a grid, toggling individual sixteenth-note positions on or off. It is visual, precise, and fast for repetitive patterns. Finger drumming on a pad controller takes the opposite approach: you play the pattern in real time, capturing the natural timing variations of your hands. Grid programming gives you control. Pad performance gives you feel. Most producers use both, programming the backbone on the grid and recording fills or hi-hat rolls live on pads.
Hi-hats add motion. Eighth-note hats create a steady pulse. Sixteenth-note hats produce the rapid, rolling texture common in trap. Vary the velocity of individual hits so the pattern breathes instead of sounding like a machine gun. A slight accent on every downbeat or a gradual crescendo across each bar adds life without adding complexity.
Once the raw pattern is in place, apply groove quantization or swing. This nudges certain notes slightly off the rigid grid, creating the push-pull feel that separates a stiff loop from a groove you actually want to nod your head to. Most good music production programs let you dial in a swing percentage — start around 55 to 60% and adjust by ear. Legendary beat makers like J Dilla built entire careers on the feel that swing settings create.
Layering Melodic Elements and Arranging
A drum pattern alone is a rhythm. Add melody and harmony, and it becomes a beat. Load a virtual instrument — piano, synth pad, plucked string — onto a new track and play or draw a simple chord progression or melodic phrase. Four bars is enough. The melody does not need to be complex. It needs to sit in a pocket with the drums and leave room for a vocalist or rapper.
Bass locks everything together. In trap production, the bass often IS the kick — a tuned 808 that sustains and carries pitch. In boom-bap or lo-fi, a separate bass instrument follows the root notes of the chord progression. Either way, keep it simple until the arrangement is solid. A root-note bass line that moves with the chords is always a valid starting point.
This is where the pattern-based versus linear workflow choice from earlier becomes tangible. In FL Studio or MPC Beats, you have been building individual patterns — a drum loop, a melody loop, a bass loop — each living in its own container. Arranging means dragging those containers onto a playlist and deciding which patterns play during the intro, which stack together for the chorus, and which drop out for the verse. In Ableton's Arrangement View or Logic Pro's timeline, you are duplicating regions, muting sections, and sculpting the structure directly on a left-to-right canvas.
A practical arrangement framework for anyone learning how to create songs from beat loops looks like this:
| Section | Typical Length | What Happens |
|---|---|---|
| Intro | 4 – 8 bars | Stripped-down elements. Sets the mood. |
| Verse | 8 – 16 bars | Drums and melody present. Space left for vocals. |
| Build / Pre-Chorus | 4 bars | Energy rises. New element enters (hi-hat roll, riser, filter sweep). |
| Chorus / Hook | 8 – 16 bars | Full arrangement. All elements playing. Peak energy. |
| Bridge / Breakdown | 4 – 8 bars | Elements removed. Creates contrast before the final section. |
| Outro | 4 – 8 bars | Elements drop out. Beat winds down. |
A useful shortcut: build the fullest version of the beat first — the chorus with every element active — then subtract. Mute the melody for the intro. Pull the hi-hats out of the verse. Remove the bass for the breakdown. This subtractive approach, as Orphiq's production guide recommends, guarantees cohesion because every section comes from the same source material. It is faster than building each part from scratch, and it teaches you arrangement through editing rather than composition.
At this stage, you have a structured beat with drums, melody, bass, and distinct sections. It is not mixed, not mastered, and not perfect. That is fine. Recording software for music and song mixing software handle the polish later. The creative work — the part that actually defines whether a beat connects — lives in these steps. Export a bounce, call it done, and start the next one. Fifty finished beats will teach you more than five hundred half-built loops ever could.
Of course, knowing the process does not immunize you against bad advice. A handful of persistent myths steer new producers toward expensive mistakes and unnecessary self-doubt, and clearing them up saves both money and creative energy.
Beat-Making DAW Myths That Hold Producers Back
Bad advice travels fast in production forums. A few stubborn myths keep circulating, convincing new beat makers they need to spend more money, buy more gear, or use a specific brand before they can create anything worth sharing. Each one deserves a direct correction.
You Need FL Studio or Ableton to Make Professional Beats
Only premium DAWs like FL Studio or Ableton Live can produce professional-quality beats.
This is the most expensive myth in beat making. MPC Beats, GarageBand, and even LMMS can output release-quality audio. The DAW does not add magic to your drums — it just plays back the sounds you give it. Rihanna's "Umbrella" used a drum loop straight from GarageBand, and Soulja Boy's "Crank That" was built entirely with FL Studio stock sounds. The producer's ear, sample selection, and arrangement decisions shape the final product far more than the software brand on the splash screen. Plenty of the best free music production software available right now can get you to the same finish line.
Free DAWs Are Too Limited for Serious Work
Free music making programs lack the tools needed for anything beyond demos and rough sketches.
Some free daws genuinely are limited — but not in the ways that matter most for beat production. MPC Beats ships with a step sequencer, full sample chopping workflow, three plugin instruments, and eighty effects. GarageBand includes Drummer tracks, a usable sound library, and AU plugin support. LMMS offers a pattern-based beat editor and built-in synthesizers like ZynAddSubFX across Windows, Mac, and Linux. The real limitations — smaller sound libraries, fewer export options, restricted track counts — are genuine, but they rarely block you from finishing a beat. You will hit creative walls long before you hit technical ones.
You Need Expensive Plugins to Get Good Sounds
Stock plugins sound cheap, and you need premium third-party instruments to compete.
Stock plugins and free plugins have improved dramatically. FL Studio's FLEX engine covers dozens of genres with production-ready presets. Ableton's Operator and Drift synthesizers handle everything from sub bass to textured pads. Logic Pro's Alchemy alone rivals standalone synths that cost hundreds of dollars. Beyond stock options, free VSTs like Vital, Dexed, and Spitfire LABS deliver sounds that show up on commercial releases regularly. The best free music making software paired with a handful of quality free plugins covers more sonic ground than most producers will ever need. Invest in learning sound design before investing in premium instruments — the return is significantly higher.
These myths share a common thread: they shift focus from creativity to spending. The producers who improve fastest are the ones who stop comparing tools and start finishing beats with whatever they already have. And once you have cleared that mental clutter, the only decision left is matching the right DAW to the way you personally like to work.
Finding the Right DAW for Your Beat-Making Style
Myths cleared, features compared, workflows explained. The only thing left is the actual decision. Rather than handing you a ranked list and calling it a day, here is a different approach: match the DAW to how you already think about making beats. What software do producers use? Whatever fits the way their brain works. Your answer should follow the same logic.
Match Your DAW to Your Production Style
Every production style leans toward a different set of tools. Find your workflow below and start there:
- Pattern-based producers who build beats in loops and arrange later — FL Studio or MPC Beats. Both offer dedicated step sequencers and pattern playlists that mirror how loop-oriented producers naturally think.
- Sample-based and chopping producers who flip breaks, soul records, and found sounds — Ableton Live, MPC Beats, or Maschine. Their slicing engines and pad workflows make crate-digging production fast and intuitive.
- Live performance and jamming producers who want to trigger clips, improvise, and capture happy accidents — Ableton Live with Push or Bitwig Studio. Session View and clip launchers turn the DAW into a playable instrument.
- Budget-conscious beginners who want real capability at zero cost — GarageBand on Mac, MPC Beats on Windows, or BandLab in any browser. Each one is genuine music production software for beginners, not a stripped-down demo disguised as a free product.
There is no single best digital audio workstation for every producer. FL Studio might be the most popular daw in hip-hop circles, but that does not make it the right choice for someone who thinks in clips rather than patterns. The best software for music production is the one that disappears while you create.
Start Making Beats Without Overthinking It
The biggest trap for new producers is not picking the wrong DAW. It is never picking one at all. Weeks spent reading comparison articles, watching YouTube reviews, and lurking in Reddit threads are weeks you could have spent finishing beats. Pick one option from the list above, install it tonight, and commit to learning it for at least six months before you even consider switching.
If commitment feels like too much right now, browser-based music production tools offer a zero-risk starting point. MakeBestMusic's Online Tools collect browser-based utilities for rhythm programming and beat creation that run without installing anything. They are useful for testing ideas on any machine, sketching grooves during a lunch break, or simply proving to yourself that you can make something worth hearing before you invest in a full desktop setup.
The best daw for beginners is whichever one you actually open and use. Finish five beats. Then ten. Then twenty. Somewhere around beat number fifteen, you will know exactly what your DAW does well and where it frustrates you — and that firsthand experience is worth more than every comparison guide on the internet, including this one. Bookmark your favorite music production tools, revisit your DAW choice only after you have a folder of finished exports, and remember: the software is never the bottleneck. You are the instrument. The DAW is just the studio.