

Can AI Actually Make Music Videos Worth Watching
Short answer: yes, AI can make music videos. The longer answer is that what you get depends heavily on how you approach it. An ai music video generated with the right prompts, editing, and creative direction can look genuinely impressive. One generated by clicking a single button and walking away? It'll probably look like AI made it.
That distinction matters. Artificial intelligence music video tools have matured quickly, but they haven't erased the gap between automated output and intentional creative work. They've just made the creative work cheaper and faster to produce.
What AI Music Videos Look Like Today
Here's an honest breakdown of where music video ai tools deliver strong results and where they still fall short:
- Abstract and reactive visuals — Flowing shapes, colors, and textures synced to beats. This is where AI shines brightest. Think visualizer-style content for electronic, ambient, or lofi tracks.
- Stylized imagery and animation — Anime-inspired characters, surreal landscapes, painterly environments. AI handles non-realistic aesthetics well because small imperfections read as artistic choices rather than errors.
- Lyric videos — Text-driven visuals with dynamic backgrounds. Clean, effective, and easy to generate with consistency.
- Realistic human movement and narrative storytelling — Still the weak spot. Hands look wrong, faces drift between frames, and maintaining a coherent character across scenes requires significant manual effort.
The quality gap between AI and traditional production has closed significantly for performance-driven content like social ads and product videos, according to Lemonlight's 2025 comparison research. For premium content that depends on real human presence and emotional performance, traditional production still wins. But for the kind of visual content most independent musicians actually need, AI is a genuinely competitive option.
AI music videos don't need to look like a Hollywood production to be effective. They need to match the energy of your song and hold a viewer's attention. A stylized, intentional AI video outperforms a mediocre traditional video every time.
Who Benefits Most From AI-Generated Visuals
How can you make a music video when you don't have a budget for a director, a camera crew, or post-production? That's exactly the problem these tools solve. The creators who benefit most from AI-generated visuals include:
- Independent musicians releasing tracks on streaming platforms who need visual content for YouTube and social media but can't justify spending $5,000 to $25,000 on traditional production.
- YouTubers and content creators who produce music or remixes and want visuals that elevate their uploads beyond a static image.
- Producers and beatmakers looking to showcase instrumentals with reactive visuals that make their tracks more shareable.
- Artists releasing frequently — if you're dropping a track every two weeks, you need a workflow that matches that pace. AI delivers from concept to finished video in hours rather than weeks.
The cost-time-quality tradeoff is straightforward. Traditional production runs $5,000 to $25,000 or more for even a basic brand video once you factor in crew, talent, and post-production. AI production can deliver comparable output for a fraction of that, especially for stylized and abstract content. The best ai music video results come from creators who treat AI as a creative tool they direct, not a replacement for creative thinking.
What to Expect From This Guide
This guide walks you through the full workflow of creating a free ai music video from scratch — choosing a visual style, writing effective prompts, picking the right tool, preparing your audio, editing the output, handling copyright questions, and publishing for maximum reach. Each step builds on the last, designed for creators who want practical results rather than theoretical overviews.
You don't need video production experience. You do need a song, a rough idea of what you want it to look like, and the willingness to iterate on AI output until it matches your vision. The tools handle the technical heavy lifting. Your job is creative direction.
The first decision — and arguably the most important one — is choosing what type of AI music video actually fits your track.
Step 1 Choose Your AI Music Video Style
Every song has a visual language waiting to be unlocked — but that language varies dramatically depending on whether you're working with a downtempo lofi beat or an aggressive rap track. Choosing the right style before you open any tool is the single best thing you can do for your final result. It shapes your prompts, your tool selection, and ultimately whether viewers feel like the visuals belong with the music.
AI music videos fall into four distinct categories, each suited to different genres, moods, and creative goals. Think of these as creative lanes. Picking the wrong one is like pairing a slow ballad with a fast-cut action sequence — technically possible, but visually jarring.
Abstract Visualizers for Electronic and Ambient Tracks
Abstract visualizers are reactive animations that pulse, shift, and morph in response to your audio's frequency, tempo, and amplitude. No characters, no storyline — just shapes, colors, and textures moving with the music. This is the category where AI genuinely excels, and the results often look better than what a human motion designer would produce at a comparable budget.
Imagine fractal geometry that blooms on every kick drum, or nebula-like color washes that swell with a pad synth. These visuals work because imperfection is invisible. There's no "wrong" way for abstract art to look, which means AI artifacts disappear into the aesthetic rather than breaking immersion.
Audio-reactive visuals can increase viewer engagement by up to 50% compared to static imagery on social media platforms, according to research cited by Vibesdrop. That's a significant edge for artists who currently upload tracks with nothing more than album art.
Best fit: electronic, ambient, techno, lofi, synthwave, and instrumental hip-hop. If your track is built on texture and atmosphere rather than lyrics and narrative, this is your lane. Tools like Kaiber and Neural Frames specialize in generating lofi images and reactive visuals that sync directly to beat elements like kicks, snares, and basslines.
Lyric Videos and Text-Driven Visuals
Lyric videos place your words front and center, layered over stylized backgrounds that complement the mood of the track. They're one of the most accessible formats — viewers engage because they can sing along, and the visual layer adds polish without demanding complex generation.
The approach ranges from minimal (clean typography over color gradients) to elaborate (kinetic text with animated environments behind each line). A music visual maker designed for lyric content can handle the text synchronization automatically, matching word appearance to vocal timing without frame-by-frame manual work.
For artists wondering how to make a lyric video free, several AI tools offer basic lyric video generation at no cost, though free tiers typically cap resolution at 720p or add watermarks. A free ai lyric video generator handles the core workflow — text timing, background generation, and export — but upgrading to a paid tier unlocks higher resolution and removes branding. Platforms like Rotor Videos and Kaiber both support lyric-focused outputs, with costs ranging from $10 to $30 per video on their entry tiers.
Best fit: hip-hop, rap, pop, singer-songwriter, and any genre where lyrics carry emotional weight. Rap music videos particularly benefit from lyric-style visuals because the density of words gives the screen constant motion and keeps viewers locked in.
Narrative Storytelling With AI-Generated Scenes
Narrative videos tell a story across scenes — a journey, a relationship, a transformation. This is the most ambitious category for AI generation and the one where limitations become most visible. Maintaining character consistency across multiple scenes, logical spatial continuity, and coherent cause-and-effect sequencing still challenges even the most advanced text-to-video models.
That said, narrative AI videos can work beautifully when you lean into stylization. Think illustrated storybook aesthetics, watercolor sequences, or surreal dreamscapes where visual discontinuity reads as intentional. An animated music video in a painterly or graphic novel style sidesteps the uncanny valley entirely because viewers don't expect photorealism from illustration.
The key is planning your scenes in advance. A typical 3-4 minute narrative video needs 8 to 15 distinct scenes, each generated separately and edited together. Without a pre-written storyboard, you'll burn through generation credits producing disconnected imagery that doesn't assemble into anything coherent.
Best fit: indie, folk, alternative, and singer-songwriter tracks with strong lyrical narratives. If your song tells a story or evokes a specific emotional arc, this format lets you visualize that journey scene by scene.
Matching Your Genre to the Right Visual Approach
Performance and character-driven videos round out the fourth category. These feature stylized figures — often with anime aesthetics, cel-shaded looks, or 3D-rendered characters — performing or moving through environments. Anime music videos have a massive audience on YouTube, and AI tools now generate anime-style character animations that rival hand-drawn quality at a fraction of the production time.
Pop and high-energy genres pair well with this format because the visual intensity matches the sonic energy. Character-driven content also performs strongly on social platforms where faces (even animated ones) boost engagement and watch time.
Here's how the four types compare across practical dimensions:
| Video Type | Best Genres | Difficulty Level | Typical Output Quality | Scenes Needed (3-4 min) |
|---|---|---|---|---|
| Abstract / Visualizer | Electronic, ambient, lofi, techno, synthwave | Low | High — AI artifacts are invisible in abstract styles | 1-3 continuous generations |
| Lyric Video | Hip-hop, rap, pop, singer-songwriter | Low-Medium | Medium-High — dependent on text sync accuracy | 4-8 background scenes |
| Narrative / Storytelling | Indie, folk, alternative, acoustic | High | Medium — consistency between scenes is the challenge | 8-15 distinct scenes |
| Performance / Animated | Pop, rap, EDM, rock, anime-adjacent genres | Medium-High | Medium-High — stylized aesthetics mask imperfections | 6-12 character scenes |
Notice the pattern: the more realistic and narrative your concept, the harder AI has to work and the more human direction you'll need to provide. Abstract visualizers practically run themselves. Narrative storytelling requires you to function as a director, storyboard artist, and editor simultaneously.
Pick your lane based on two factors: what your song actually sounds like, and how much creative effort you're willing to invest in the generation process. A lyric music video maker handles most of the work for a text-driven approach. An animated music video demands more prompting and iteration but produces more distinctive results.
Whichever type you choose, the next challenge is the same: translating the visual concept in your head into prompts and scene plans that AI tools can actually execute on.
Step 2 Develop Your Visual Concept and Write Prompts
Picking a style gives you direction. But direction without a plan produces scattered results — a collection of cool-looking clips that don't hold together as a video. The difference between creators who get polished AI music videos and those who get a random collage comes down to one shift in thinking: treat yourself as the creative director, not a button-pusher waiting for magic.
AI is a production tool. You tell it what to make. The more specific and structured your instructions, the more cohesive your output. This means doing real creative work before you generate a single frame — identifying mood, mapping scenes to song sections, and writing prompts precise enough that every clip feels like it belongs to the same visual world.
Building a Scene-by-Scene Storyboard
You don't need drawing skills. A storyboard for AI generation is just a written plan that maps what happens visually during each section of your song. Think of it as a music video concept template that keeps every generation connected to your creative vision.
Start by breaking your track into its structural sections and assigning an emotional function to each one. A typical 3-4 minute song divides roughly like this:
| Song Section | Typical Duration | Emotional Function | Visual Direction |
|---|---|---|---|
| Intro | 10-20 seconds | Sets tone before the first word | Establishing shot, slow movement, world-building |
| Verse 1 | 30-45 seconds | Introduces story or perspective | Lower energy, medium shots, subtle motion |
| Chorus 1 | 20-35 seconds | Peak energy or emotion | Wider angles, faster cuts, saturated color |
| Verse 2 | 30-45 seconds | Develops the narrative, builds tension | New angle or location, escalating visuals |
| Chorus 2 | 20-35 seconds | Repetition with escalation | Bigger movement, more intensity |
| Bridge | 15-30 seconds | The shift — new perspective | Visual break, different palette or setting |
| Final Chorus/Outro | 20-40 seconds | Resolution or climax | Visual payoff, callback to opening, or fade |
Play your song on repeat and write one sentence per section describing the feeling: "Verse 1 feels lonely. Chorus 1 feels defiant. Bridge feels uncertain." Those emotional notes become your visual guide. According to Orphiq's storyboard guide, a typical 3-4 minute video needs 20-40 frames — roughly 3-6 frames per song section. For AI generation, that translates to 8-15 distinct scene prompts depending on your style and pacing.
This is how to make a music video that flows rather than lurches between disconnected clips. Each scene serves a purpose tied to the song's emotional arc. Without this map, you'll generate visually interesting moments that don't add up to anything.
Writing Prompts That Produce Consistent Visuals
Prompt engineering for music videos is different from prompting for a single image. You're not generating one beautiful frame — you're generating dozens of clips that need to look like they belong in the same world. The key is building a system of reusable descriptive anchors that constrain the AI's output across every generation.
Effective video prompts follow a structured framework. Based on established prompt engineering principles, every prompt needs three core components: Subject (who or what), Action (what's happening), and Style (the aesthetic treatment). For music videos specifically, you'll add two more layers: environment and camera behavior.
Here's the sequential process for writing prompts that maintain visual consistency across your entire video:
- Define your style anchor — Write a 2-3 sentence description of the overall aesthetic that you'll append to every prompt. Example: "Cinematic, muted teal and amber color palette, soft volumetric lighting, shallow depth of field, 35mm film grain." This anchor is your consistency glue.
- Describe the subject with fixed details — If your video features a character, lock their appearance in specific terms. Don't say "a woman." Say "a young woman with short dark hair, olive skin, wearing a faded denim jacket over a white t-shirt." Reuse this exact description in every prompt featuring that character.
- Specify the action with dynamic verbs — Static descriptions produce static video. Use verbs that imply motion and duration: "slowly walking toward camera," "turning to look over shoulder," "rain falling across the frame." This is what separates video prompts from image prompts.
- Set the environment — Describe the setting with enough detail that the AI doesn't improvise. "Empty rooftop at dusk, city skyline in the background, warm golden-hour light from the left" gives the model clear constraints.
- Direct the camera — Use actual cinematography terms: slow pan, tilt up, orbit, tracking shot, static wide. AI models understand these terms and translate them into specific motion behaviors. A "slow orbit around the subject" produces dramatically different results from an unspecified camera.
- Lock the lighting — Lighting inconsistency between clips is one of the fastest ways to break cohesion. Specify your light source and quality: "Rembrandt lighting from the upper right," "diffused overcast daylight," or "neon pink and blue rim lighting." Keep this consistent within scenes.
When you want to create music video with ai and maintain a coherent look, the trick is treating your style anchor and character description as constants while varying only the action, camera, and environment between scenes. This gives you visual variety without visual chaos.
A practical example: if your style anchor includes "watercolor illustration, soft edges, pastel color palette, Studio Ghibli-inspired," every scene will share that aesthetic even when the content changes from a forest path to a city street. The consistency lives in the style language, not in the subject matter.
Planning Transitions and Pacing Around Song Structure
Knowing how to make a music video with ai means understanding that raw clips don't automatically flow into each other. You need to plan transitions at the prompt level, not just in post-production.
Match your visual pacing to the energy of each section. Verses typically work with longer, slower shots — 5-8 second clips with minimal camera movement. Choruses call for faster cuts, wider angles, and more dynamic motion. Bridges benefit from a complete visual shift: a new color palette, a different environment, or a change in camera perspective that signals something has changed in the song.
For transitions between scenes, plan visual connections that will smooth the edit:
- Color continuity — End one scene and begin the next with similar dominant colors so the cut doesn't jar the viewer.
- Motion matching — If a scene ends with a camera panning right, start the next scene with movement in the same direction.
- Element callbacks — Repeat a visual motif (a recurring object, shape, or light source) across scenes to create subconscious continuity.
- Energy mapping — Don't cut from a high-energy chorus clip directly into a static, quiet scene unless the song does the same thing musically.
If you want to add a background to a band video with ai or layer generated environments behind existing footage, the same principles apply — your transitions and pacing still need to follow the song's rhythm. AI handles the visual generation, but you handle the editorial logic that makes those visuals feel intentional.
How do you make a music video that feels directed rather than random? You plan it like a director would. The prompts are your shot list. The storyboard is your blueprint. The style anchor is your visual bible. With these in place, the generation phase becomes execution rather than experimentation — and your output transforms from "AI made this" to "someone made this with AI."
Step 3 Pick the Right AI Music Video Tool
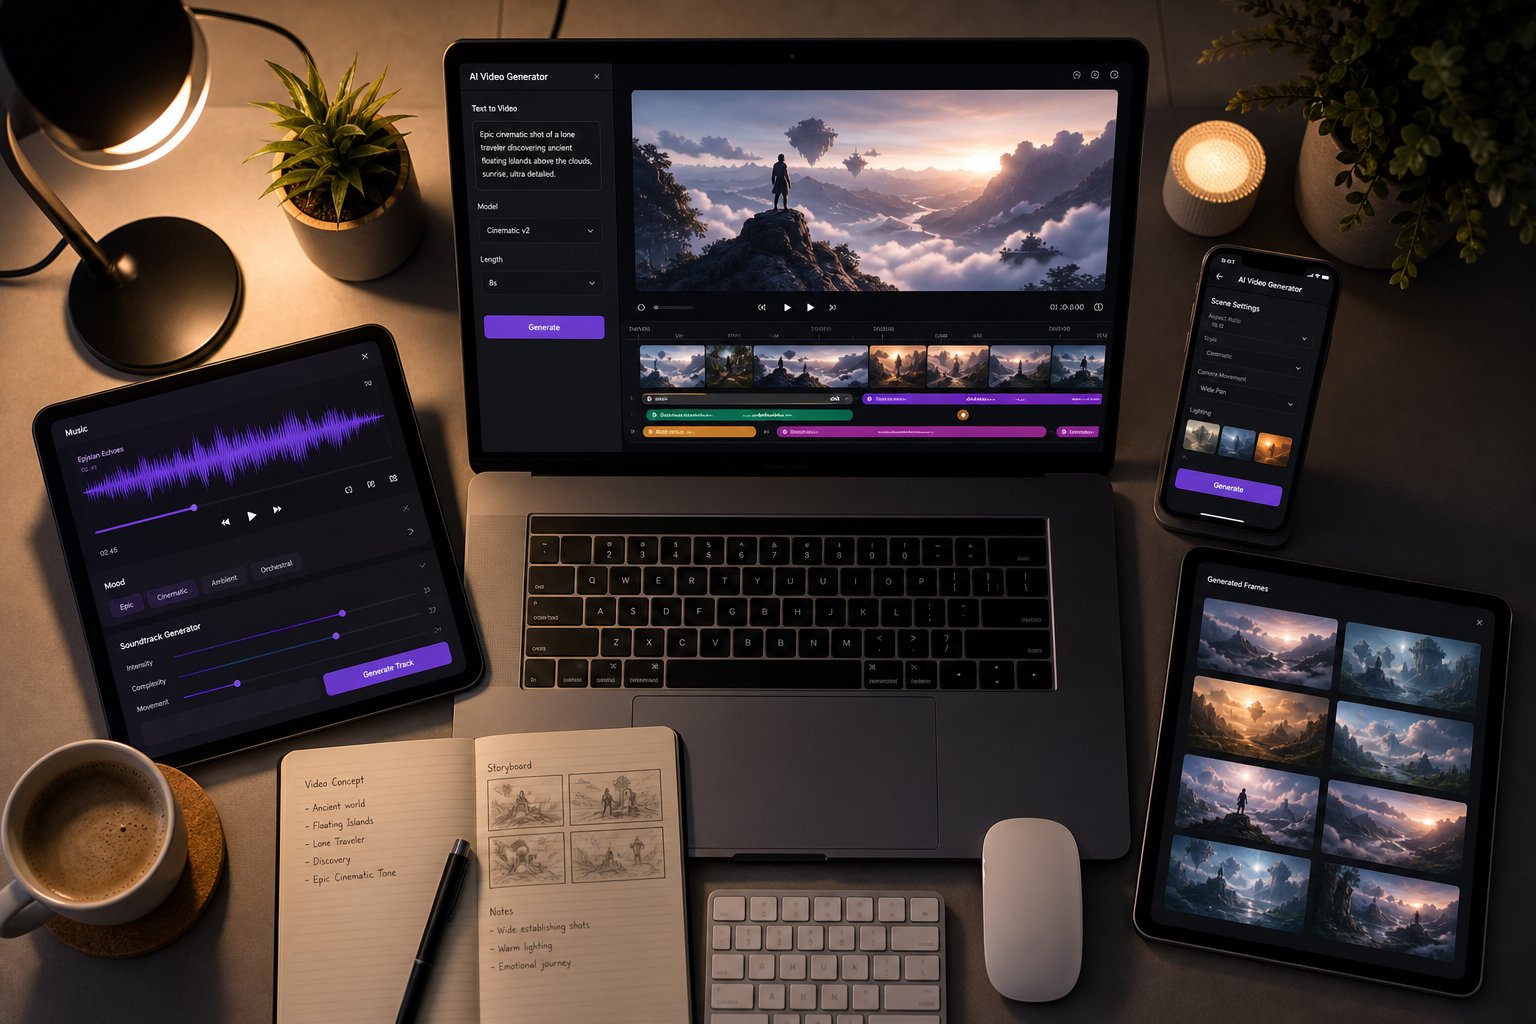
You've chosen a visual style and written your prompts. The next question is practical: which tool actually turns those ideas into video? The AI music video generator landscape splits into three distinct categories, each built around a different workflow. Understanding which category matches your creative process saves you from signing up for five platforms and getting frustrated with all of them.
The best ai for music videos isn't a single answer — it depends on whether you want to upload a track and let AI handle the creative decisions, prompt each scene manually for maximum control, or combine generation with built-in editing. Let's break down what's actually available and what the price tags mean in practice.
Free AI Music Video Tools and Their Limitations
Every creator wants the same thing: a free ai music video generator that produces professional output without watermarks or restrictions. The reality is less generous. Free tiers exist across most platforms, but they come with constraints that matter.
Here's what you'll typically encounter on a free plan:
- Watermarks — Most free tiers stamp visible branding on your export. For a personal test render, that's fine. For something you're publishing on YouTube or sending to a playlist curator, it's a dealbreaker.
- Resolution caps — Free output is commonly limited to 720p. On a phone screen that's barely noticeable, but on a desktop YouTube player or a TV, the quality gap is obvious.
- Generation limits — Some tools give you a handful of one-time credits that never refresh. Others provide daily or monthly caps that reset but only allow short clips — 15 to 30 seconds rather than full song-length videos.
- Feature lockouts — Advanced capabilities like beat sync, audio-reactive generation, lyric timing, and high-quality style modes sit behind the paywall. The free version gives you a taste, not a meal.
Does that mean free tools are useless? Not at all. A free ai music video creator is perfect for testing workflows, experimenting with visual styles, and generating short clips for social media. If you're looking for other free sites like musicvid to produce quick reactive visuals, platforms like Neural Frames and Kaiber both offer limited free access that's enough to evaluate their output quality before committing money.
The honest assessment: truly free, full-length, watermark-free AI music video generation doesn't exist yet. Every tool monetizes somewhere. The question is whether the free tier gives you enough to decide if the paid version is worth it for your needs.
Paid Platforms and What Extra Budget Gets You
Paid tiers typically unlock three things that free plans withhold: length, quality, and speed. Here's what each price range generally delivers:
- $5-$15/month — Removes watermarks, bumps resolution to 1080p, increases monthly generation limits. Entry-level paid plans on most platforms. Enough for creators releasing one or two videos per month.
- $15-$30/month — Adds advanced features like beat sync accuracy, style customization, faster render queues, and longer video duration. The sweet spot for independent musicians who publish regularly.
- $30-$50+/month — Professional tiers with priority rendering, 4K export, advanced camera controls, character consistency tools, and commercial licensing. Suited for creators running music channels as a business or producing content for clients.
The tool category matters as much as the price point. An ai video generator free to music might give you reactive visualizer clips at no cost but charge for narrative scene generation. Knowing what type of video you're making — which you decided in Step 1 — tells you exactly which features you actually need to pay for.
Choosing Based on Your Workflow and Output Needs
The three tool categories map to three different creative workflows. Choosing the right one means matching the tool's strengths to how you prefer to work.
Upload-and-generate platforms are the simplest path. You provide your audio file, select a style or mood, and the platform handles scene creation, beat detection, and assembly. MakeBestMusic's AI Music Video Generator fits squarely in this category — it's built specifically for the song-to-video conversion workflow, analyzing your uploaded track and generating visual content directly from the audio. For musicians, YouTubers, and social creators who want quick turnaround without learning complex prompting systems, this purpose-built approach eliminates the multi-step friction of general-purpose tools. You upload a song and get a video, rather than generating isolated clips and assembling them yourself.
Text-to-video generators give you maximum creative control. Tools like Runway Gen-4 and Google Veo 3 let you prompt scene by scene, specifying exactly what each clip should contain. The output quality can be exceptional, but the workflow is slower and more hands-on. You'll generate each scene individually, review results, regenerate what doesn't work, and assemble everything in a separate editor. If you're wondering how to add sound to sora ai or similar general-purpose generators — that's exactly the challenge. These tools produce silent video clips, and syncing them to music becomes your responsibility in post-production.
Hybrid tools combine generation with editing. Platforms like Kaiber and Neural Frames sit in this space — they generate visuals from audio input and provide some editing controls within the same interface. Neural Frames analyzes up to 8 audio stems and drives visual animation from each frequency signal independently, which produces impressive results for electronic music. The tradeoff is less narrative control and slower rendering speeds during peak usage.
For creators asking what is invideo — it represents yet another approach: stock-footage assembly rather than original generation. InVideo AI pulls from a library of 16M+ clips and assembles them based on your text prompt. It's effective for certain content types but doesn't generate original AI visuals the way dedicated music video tools do.
Here's how the tool categories compare for the best ai platform to make music videos for social media:
| Tool Category | Example | Cost Range | Best Use Case | Output Quality | Effort Required |
|---|---|---|---|---|---|
| Upload-and-Generate (Music-Specific) | MakeBestMusic | Free tier available; paid plans vary | Musicians needing fast song-to-video conversion | Medium-High (audio-synced, styled) | Low — upload and configure |
| Audio-Reactive Specialist | Neural Frames | $19/month+ | Electronic/ambient artists wanting reactive abstract visuals | High for abstract; limited for narrative | Medium — style selection, parameter tuning |
| Text-to-Video Generator | Runway Gen-4, Google Veo 3 | $12-$15/month+ | Creators wanting scene-by-scene cinematic control | High visual fidelity per clip | High — prompt per scene, manual assembly |
| Hybrid (Generation + Editing) | Kaiber | ~$25-$30/month | Visual artists experimenting with style-transferred content | Medium-High for stylized content | Medium-High — creative sandbox approach |
| Stock-Footage Assembly | InVideo AI | Free tier; $25/month+ for full access | Explainer-style or mood-based compilations | Medium (stock quality, not AI-generated) | Low — prompt and export |
A few practical decision points to guide your choice:
- If you have a finished song and want a complete video with minimal technical work, start with an upload-and-generate platform like MakeBestMusic. The workflow matches what most musicians actually need: song in, video out.
- If you're producing electronic or ambient music and want visuals that react to specific audio frequencies, Neural Frames or similar audio-reactive tools deliver the most musically connected output.
- If you have a specific cinematic vision and the patience to generate scene by scene, text-to-video tools give you the most creative control — but expect to spend significantly more time in the editing phase.
- If you're looking for a free ai music video generator to test before committing budget, try the free tiers of two or three tools in different categories. Generate the same 30-second segment of your song on each platform and compare the results side by side.
The tool you choose shapes the preparation work ahead. Upload-and-generate platforms need clean audio files and style preferences. Text-to-video generators need your storyboard and written prompts from Step 2. Hybrid tools fall somewhere in between. Whichever route you take, the next step is the same: getting your audio file ready for the best possible generation results.
Step 4 Prepare Your Audio and Generate Scenes
Your tool is chosen, your prompts are written, and your storyboard maps each song section to a visual direction. The gap between planning and output is preparation — the practical steps that determine whether AI generates something usable or something you'll immediately discard. Garbage in, garbage out applies to audio just as much as it does to prompts.
Most creators skip straight to the upload button. Taking ten extra minutes to prep your audio file properly can mean the difference between beat-synced visuals that feel intentional and random clip generation that ignores your song's rhythm entirely.
Preparing Your Audio File for Best Results
AI video generators analyze your audio to detect tempo, beats, energy shifts, and frequency content. The cleaner and higher-quality that audio signal, the more accurate the analysis. Here's your preparation checklist before you upload anything:
- File format — WAV (uncompressed, 16-bit or 24-bit, 44.1kHz or 48kHz) delivers the best results for audio analysis. MP3 works on every platform but compresses frequency data that some tools use for visual syncing. If you have both, upload WAV.
- Mastered vs. unmastered — Use your mastered track. Mastering compresses the dynamic range and balances frequencies, which gives AI tools a more consistent signal to analyze. Unmastered mixes with dramatic volume swings can confuse beat detection.
- Loudness levels — Aim for -14 LUFS to -10 LUFS (standard streaming loudness). Tracks that clip or sit too quiet may trigger inconsistent visual intensity mapping.
- Trim silence — Remove any dead air at the beginning and end of your file. Many generators start analyzing immediately, and leading silence produces blank or static opening frames.
- Full song vs. sections — Upload-and-generate platforms typically want the full track. Text-to-video workflows benefit from splitting your song into sections (verse, chorus, bridge) so you can prompt each segment individually and control generation credit spending.
If you're building an ai lyric video, you'll also need a clean lyrics file. Prepare your text with line breaks matching how you want words to appear on screen — not how they're structured in a document. Include timestamps for each line if your platform supports timed text import (LRC format is the most widely accepted). Accuracy here prevents awkward mismatches where words appear too early or linger too long after you've moved to the next phrase.
Consider extracting stems. Many AI tools generate more responsive visuals when they can analyze individual elements — vocals, drums, bass, and instruments — separately rather than processing a full mix. Splitting your track into stems lets beat-reactive tools sync animations to specific kick hits or vocal phrases rather than reacting to the combined signal.
Stem separation has become remarkably accessible. MusicRadar's 2025 comparison of 11 stem separation tools found that Apple Logic Pro's built-in Stem Splitter delivered the best overall results, extracting vocals, drums, bass, guitar, piano, and other instruments with minimal artifacts. Free options exist too — Ultimate Vocal Remover is open-source and produces excellent vocal isolation using its MDX-Net mode. For most AI music video workflows, separating just vocals and instrumentals is enough to give your generator better audio intelligence to work with.
If you're using reference images for style consistency — character designs, color palette swatches, or environment references — export them as PNG files at a minimum of 1024x1024 pixels. Blurry or low-resolution references produce blurry outputs. Name them clearly (verse1_forest.png, chorus_character.png) so you don't waste time searching during the generation session.
Uploading and Configuring Your Generation Settings
The generation process varies by tool category, but the core steps follow a consistent pattern whether you're using an upload-and-generate platform to convert song to video ai or prompting scene by scene in a text-to-video generator.
For upload-and-generate workflows, the process typically looks like this:
- Upload your audio file — Drag your prepared WAV or MP3 into the platform. Most tools display a waveform and begin analyzing tempo, beats, and energy mapping automatically.
- Select or write your style prompts — Some platforms offer preset moods (dark cinematic, neon abstract, anime journey). Others let you write custom prompts. Use the style anchor and scene descriptions from your storyboard.
- Choose style parameters — Aspect ratio (16:9 for YouTube, 9:16 for vertical platforms), color palette preferences, motion intensity, and visual complexity. Higher complexity means longer render times.
- Set duration — Match the generation length to your audio. Most tools detect track length automatically, but double-check that it aligns with your full song or selected section.
- Initiate the render — Hit generate. Walk away for a bit.
For text-to-video generators, you'll repeat a shorter cycle for each scene: upload (or reference) your audio section, enter your scene-specific prompt with style anchor appended, configure duration to match that song section's length, and generate. You might run this loop 8 to 15 times for a full video.
Typical generation times range from 2-5 minutes per short clip on most platforms. A full-length video on an upload-and-generate tool might take 10 to 30 minutes depending on resolution and complexity settings. Some tools like Suno generate video content alongside their music creation features, though those outputs tend toward simpler visualizer-style content rather than cinematic scenes. Suno videos work well as quick social clips but usually lack the depth needed for a standalone YouTube upload.
While you wait, use the downtime productively. Review your storyboard. Prepare alternative prompt variations for scenes you're uncertain about. Organize your project folder. Generation time is thinking time — use it to anticipate which scenes might need re-generation and what you'd change in the prompt.
Iterating on Results Until Scenes Match Your Vision
Here's the reality most guides don't mention: your first generation rarely produces your final video. The creators who make an ai video from a song for free or paid and get polished results aren't luckier — they iterate more deliberately.
Treat each generation as a draft. When results come back, evaluate each clip against three criteria:
- Does it match the mood? — Does the visual energy align with what the music does in that section? A calm verse scene that looks frantic is a prompt problem, not a quality problem.
- Is it stylistically consistent? — Does this clip look like it belongs in the same video as your other generated scenes? Check color temperature, lighting direction, and aesthetic treatment against your style anchor.
- Is the motion coherent? — Does camera movement flow naturally? Do subjects maintain recognizable form throughout the clip rather than morphing into something else? Motion breakdown is the most common reason to regenerate.
When a scene fails, diagnose why before regenerating. If the mood is wrong, adjust your action verbs and environmental descriptors. If the style drifts, reinforce your style anchor with more specific language. If motion breaks down, simplify — ask for less movement, shorter duration, or a more static camera.
Budget your generation credits wisely. Generate two to three variations per scene rather than accepting the first result. This gives you options during editing — a wider shot and a tighter shot of the same moment, or two different interpretations of the same prompt. Having choices is cheaper than re-generating later when you realize a clip doesn't cut well with its neighbors.
An ai music video generator from lyrics specifically will need you to verify that text timing matches your vocal delivery. Generate a short test section first — 15 to 30 seconds covering one verse — and confirm that words appear and disappear in rhythm before committing to a full-song render. Fixing timing issues after a full generation wastes credits and time.
For those looking to make a music video with ai on a tight budget, here's the most efficient approach: generate your chorus first. It's the section viewers will see most (if you're making clips for social media) and the one where visual impact matters most. Get the chorus right, then use it as your quality benchmark for verses and bridge sections. If you can only afford one regeneration pass, spend it on the chorus.
Once you've generated all your scenes and selected the strongest take for each section, you're sitting on a collection of raw clips — impressive individually but not yet a finished video. The assembly and polish phase is where those clips become a free ai music video generator from song output that actually looks intentional rather than algorithmic.
Step 5 Edit and Polish Your Final Video
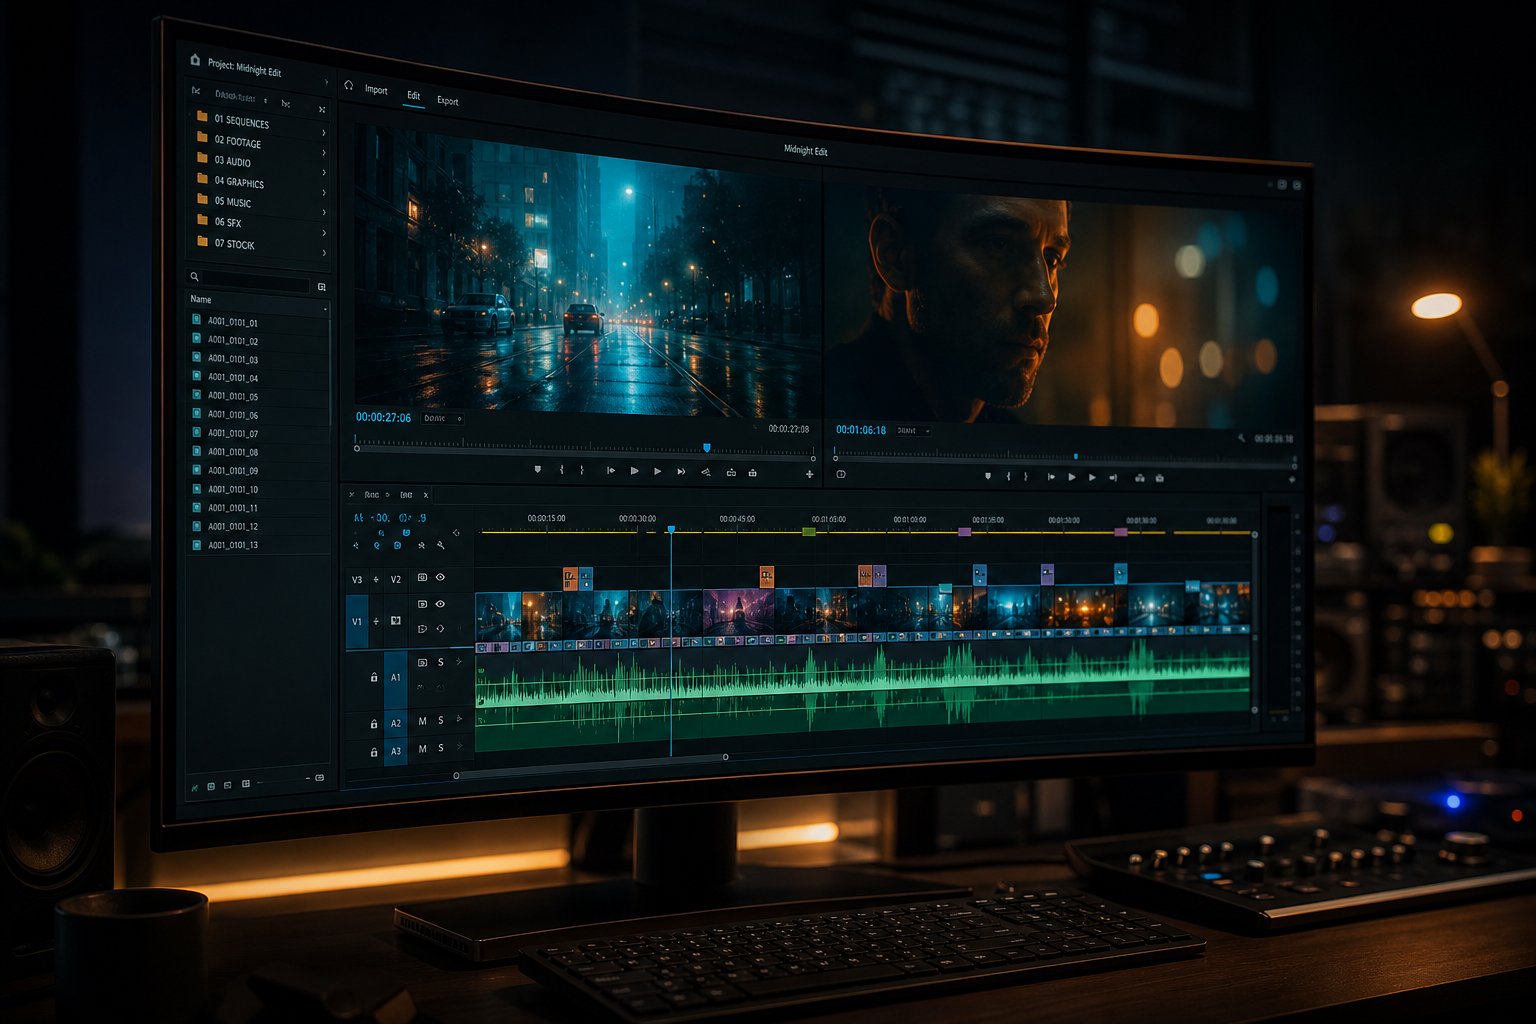
Raw AI clips sitting in a folder aren't a music video. They're raw material — the visual equivalent of unedited vocal takes. The difference between output that looks algorithmic and output that looks directed happens in the edit. Even the best AI-generated scenes need trimming, reordering, and rhythmic alignment before they feel like a cohesive piece. This is where you make a video with music that actually hits.
Think of it as a hybrid workflow: AI handles the heavy visual generation, and you handle the editorial judgment. Some creators prefer doing this assembly manually in a traditional editor. Others prefer tools that handle much of the cutting and syncing automatically — platforms like MakeBestMusic's AI Music Video Generator streamline this assembly step by generating audio-synced video that requires less manual post-production. Either route works. The right choice depends on how much editorial control you want versus how quickly you need a finished product.
Syncing Cuts to Your Song's Rhythm
The single most important editing principle for music videos: visual cuts should land on musical events. A scene change that hits precisely on a snare hit feels intentional. The same cut happening half a beat late feels accidental. Your viewer might not consciously notice the difference, but their brain registers it as polish versus sloppiness.
Here's how to edit music video clips for rhythmic precision:
- Drop your audio first — Place your full song on the timeline before any video clips. The waveform becomes your visual roadmap for where cuts belong.
- Mark beat positions — Use markers at every major beat, especially kick hits, snare accents, and transition points between song sections. In DaVinci Resolve or Premiere Pro, tap M on each beat during playback to build a marker grid.
- Align clip boundaries to markers — Trim or slip each AI-generated clip so its start and end points fall on your beat markers. Even a 2-3 frame adjustment makes a noticeable difference in how "tight" the video feels.
- Match energy to intensity — Use longer clips during verses (4-8 seconds) and shorter, faster cuts during choruses (1-3 seconds). This mirrors how professionally edited music videos pace themselves — quiet sections breathe, energetic sections pulse.
- Use beat drops as transition triggers — The biggest visual shift in your video should coincide with the biggest musical moment. Save your most striking scene for the drop, the final chorus, or the bridge entrance.
If you're wondering how to make a video with pictures videos and music in a way that feels musical rather than random, this beat-syncing approach is the answer. Even a slideshow of AI-generated still images becomes compelling when cuts land on rhythm. The music does the emotional work — your editing just needs to get out of its way by not fighting the tempo.
For mobile creators asking how to add music to a video on my iphone, apps like CapCut and InShot offer auto-beat detection that places cut markers on your timeline automatically. These aren't as precise as manual marking, but they get you 80% of the way there in seconds rather than minutes.
Color Grading AI Clips for Visual Consistency
Here's a problem unique to AI-generated content: even when you use the same style anchor in every prompt, individual clips often come back with slightly different color temperatures, contrast levels, or saturation. Scene one might lean warm amber while scene three drifts toward cool blue. Individually they look fine. Cut together, the inconsistency screams "these were generated separately."
Color grading solves this. You don't need professional colorist skills — just a few basic corrections applied uniformly:
- Match white balance across clips — Pick one clip as your reference and adjust the color temperature of every other clip to match. If your reference scene has warm golden tones, shift cooler clips toward the warm end until they harmonize.
- Unify contrast and exposure — AI clips sometimes vary in brightness. Bring shadows, midtones, and highlights into the same ballpark using curves or levels. Consistency matters more than perfection.
- Apply a single LUT or color preset — A Look-Up Table acts like a color filter applied across your entire timeline. Free LUTs are available everywhere. Pick one that matches your intended mood — cinematic teal-orange, moody desaturated, vibrant pop — and apply it globally. This single step can make disconnected clips feel like they belong together.
- Add a subtle film grain or texture overlay — A light grain at 5-15% opacity applied across the full video acts as visual glue. It softens the "too clean" AI look and adds a unifying texture layer that ties every scene together regardless of source differences.
Free editing tools that handle these tasks well: DaVinci Resolve (the most powerful free editor available, with professional-grade color tools), CapCut desktop (simpler but effective for basic grading), and Shotcut (open-source, cross-platform). Paid options like Premiere Pro and Final Cut Pro offer more advanced workflows but aren't necessary for this level of correction.
If you want to know how to make a picture video with music that looks polished, the same grading principles apply. AI-generated still images assembled as a slideshow benefit enormously from a unified color treatment — it transforms separate images into a visual sequence that reads as intentionally curated.
Exporting for YouTube, TikTok, and Instagram
You've synced your cuts, graded your clips, and added any text overlays or lyric elements. The final step before publishing is exporting at the right settings for each platform. Wrong export settings can undo all your editing work — a beautiful video that looks blocky, pixelated, or incorrectly cropped on upload.
Each platform has specific requirements for resolution and aspect ratio:
| Platform | Aspect Ratio | Resolution | Recommended Bitrate | Max Length |
|---|---|---|---|---|
| YouTube (standard) | 16:9 | 1920 x 1080 (Full HD) or 3840 x 2160 (4K) | 8-50 Mbps (VBR) | 12 hours |
| YouTube Shorts | 9:16 | 1080 x 1920 | 8 Mbps+ | 3 minutes |
| TikTok | 9:16 | 1080 x 1920 | 15 Mbps | 10 minutes |
| Instagram Reels | 9:16 | 1080 x 1920 | 2-3 Mbps | 90 seconds (in-app); longer via upload |
| Instagram Feed | 1:1 or 4:5 | 1080 x 1080 or 1080 x 1350 | 2-3 Mbps | 60 minutes |
For codec and format, H.264 in an MP4 container is the universal standard across all platforms. It balances file size with quality and is natively supported everywhere. Use VBR (Variable Bit Rate) encoding for better quality-to-size ratio. For audio, export at AAC format, 48kHz sample rate, stereo, 320kbps — this preserves your track's quality through the upload compression each platform applies.
A practical tip: export your master edit at the highest quality first (16:9, 1080p or 4K for YouTube), then create platform-specific versions by cropping and re-exporting. Most editors let you duplicate your timeline and adjust the frame size without re-editing. This is far more efficient than building separate projects for each platform.
For anyone looking to add song to video online free, browser-based editors like CapCut's web version and Clipchamp handle basic assembly and export without software installation. They won't match DaVinci Resolve's color tools, but they're more than sufficient for trimming clips, syncing audio, and exporting at correct platform specs — especially useful as a quick app to make a video with music when you're working from a phone or tablet.
Your editing checklist before hitting export:
- All cuts land on beat positions or musical transitions
- Color temperature and contrast are consistent across clips
- Text overlays (if any) are readable and properly timed
- No black frames or flash frames between clips
- Audio levels are consistent (-14 LUFS for streaming platforms)
- Aspect ratio matches your target platform
- Export format is H.264 MP4 with AAC audio at 320kbps
- File is named descriptively (not "final_v3_REAL_final.mp4")
A polished edit transforms AI-generated material into something viewers engage with rather than scroll past. But before you upload, there's one more consideration that most creators overlook entirely — and it can affect whether you actually own what you've made, whether platforms will monetize it, and whether you need to disclose anything about your process.
Step 6 Navigate Copyright and Licensing
Your video is edited, color graded, and ready to publish. But there's a legal question sitting underneath everything you've built: do you actually own it? And can platforms pay you for it? Most creators skip this entirely. Music video producers working in traditional production never question ownership — they hired the crew, directed the shoot, they own the footage. AI-generated visuals exist in a murkier space, and understanding where you stand protects both your revenue and your creative rights.
Who Owns AI-Generated Video Content
The core issue is straightforward: U.S. copyright law requires human authorship. In March 2025, the D.C. Circuit Court affirmed in Thaler v. Perlmutter that the Copyright Act "requires all eligible work to be authored in the first instance by a human being." Purely AI-generated content — where you click generate and walk away — has uncertain copyright protection at best.
But that's not how you've been working if you followed this guide. The U.S. Copyright Office's 2023 Registration Guidance clarifies that "what matters is the extent to which the human had creative control over the work's expression." Your prompting decisions, scene-by-scene storyboarding, editorial curation, color grading, and rhythmic editing all constitute human-directed creative choices that strengthen your ownership claim. The Copyright Office has registered hundreds of works containing AI-generated material where the human author's contribution was sufficiently creative — things like selection, arrangement, and modification of AI output.
What does this mean practically? If you wrote detailed prompts, curated from multiple generations, edited and assembled the final cut, and applied your own creative judgment throughout the process, you have a far stronger ownership position than someone who uploaded a song and accepted the first automated result unchanged.
Music licensing works the same as it always has. If you created the song, you own both the composition and the recording — AI visuals don't change that. If you're using someone else's music, generating AI visuals doesn't bypass licensing requirements. You still need sync rights. You can't download music videos for free, set AI visuals on top of someone else's track, and claim it as original work. The visual layer being AI-generated doesn't create a licensing loophole for the audio layer.
Platform Policies on AI-Labeled Content
Every major platform now has specific policies around AI-generated content disclosure. Here's where things stand:
YouTube updated its AI labeling system in May 2026, introducing more visible labels and automatic detection. Creators must disclose when content is photorealistic and meaningfully AI-altered or generated. If you don't disclose and YouTube's systems detect significant AI use, they'll apply the label automatically. Stylized, animated, or clearly non-realistic AI content — which describes most AI music videos — gets a lighter-touch disclosure visible only in the expanded description rather than a prominent on-screen banner.
TikTok requires disclosure for any content depicting realistic synthetic people, events, or voices. Their system also auto-detects AI provenance metadata embedded by generation tools. For stylized or obviously animated music video content, TikTok's built-in AI effect tags apply automatically without creator action.
Instagram and Facebook use Meta's C2PA-powered detection system that reads provenance metadata from AI generation tools. If your exported video retains that metadata, it may receive an automatic "Made with AI" label. Stripping metadata before upload is possible but runs counter to the transparency direction these platforms are heading.
The consistent theme: platforms aren't penalizing AI content. They're requiring transparency about it. A disclosure label alone does not change how a video is recommended or whether it earns money.
Monetization Eligibility and Disclosure Requirements
Can AI music videos earn ad revenue? Yes — with conditions. YouTube's monetization policies don't exclude AI-generated content from the Partner Program. Videos with AI disclosure labels remain eligible for youtube ads for music videos and standard ad placements. The key requirements are the same as any other content: you must be in the YouTube Partner Program, the content must follow community guidelines, and it can't be reused content without meaningful transformation.
Where music video producers run into trouble is the "reused content" policy. If your AI video looks generic — the kind of output anyone could generate with a default prompt — YouTube's review team may flag it as lacking sufficient original contribution. Videos that demonstrate creative direction, editing choices, and intentional visual storytelling pass this threshold. The more human judgment visible in the final product, the safer your monetization status.
TikTok and Instagram don't restrict monetization based on AI disclosure either, though their creator fund and bonus structures evolve frequently. The safest position across all platforms: disclose AI use when prompted, maintain quality standards, and ensure your content reflects genuine creative effort rather than unedited automated output.
Keep records of your creative process — saved prompts, generation logs, before-and-after comparisons, storyboards, and editing timelines. This documentation serves as evidence of human authorship if ownership is ever questioned and demonstrates the creative control that separates copyrightable work from raw AI output.
Copyright law in this space is evolving fast, and court decisions will continue shaping what's protected and what isn't. The practical takeaway: the more creative work you put in — the prompting, the curation, the editing, the intentional decisions documented along the way — the stronger your legal and commercial position. Treat free music videos to download from AI generators the same way you'd treat stock footage: raw material that becomes yours through the transformation you apply.
Legal footing secured, the final step is getting your finished video in front of the right audience — and making sure platform algorithms actually surface it.
Step 7 Publish and Promote Your AI Music Video
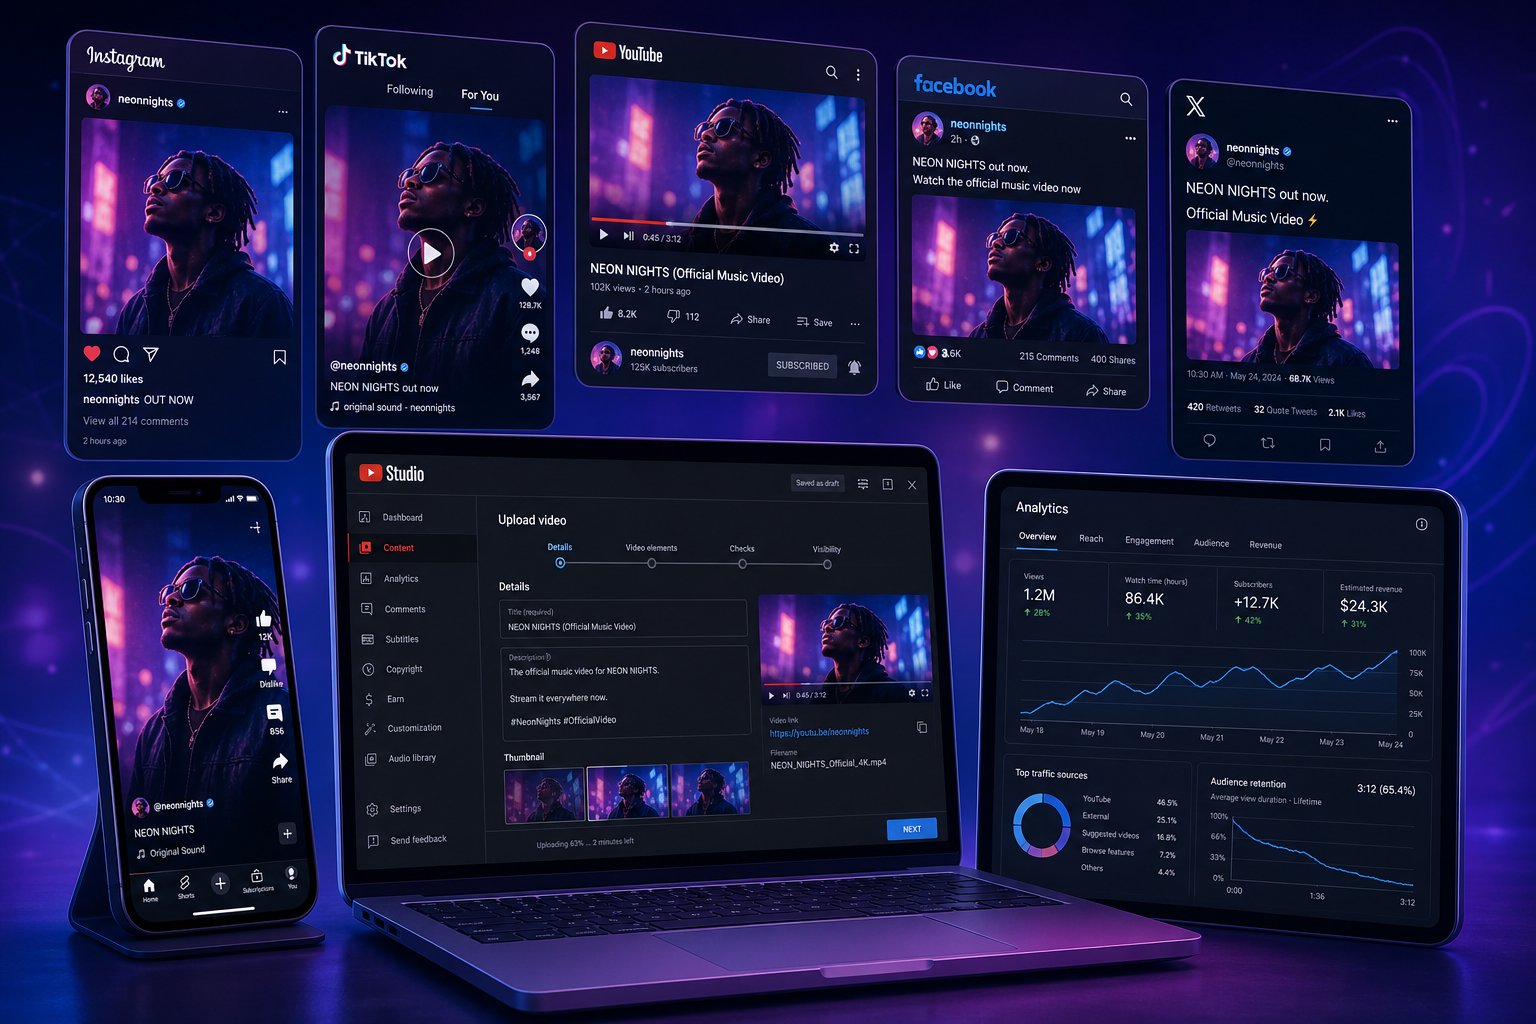
A finished video sitting on your hard drive earns exactly zero views. The publishing strategy you apply in the first 48 hours after upload shapes whether your AI music video gains traction or disappears into algorithmic obscurity. Knowing how to make a music video on youtube is only half the equation — knowing how to make that video discoverable is where most creators drop the ball.
Platform algorithms reward specific signals: metadata relevance, click-through rate, watch time, and cross-platform engagement. Every decision from your title to your thumbnail to your posting schedule either feeds those signals or starves them. Here's how to get it right.
Optimizing Your Upload for Maximum Discovery
YouTube processes over 3 billion searches per month — more than Bing, Yahoo, and DuckDuckGo combined. Your video needs to speak the algorithm's language before it can reach human eyes.
Title structure: Place your primary keyword within the first 50 characters. YouTube truncates titles on mobile and in search results, so front-loading matters. A structured format like "Artist Name – Song Title (Official Music Video) | Genre 2026" targets search queries while signaling professionalism. For tutorials or behind-the-scenes content, flip it — lead with the search phrase. This is how to create a music video for youtube that actually gets found rather than buried.
Description: The first 2-3 lines appear above the "Show more" fold and function as your search snippet. Include your primary keyword, a compelling one-sentence hook about the video, and your top streaming link. Below the fold, write 300-500 words of genuine prose incorporating secondary keywords naturally. Add timestamps if the video runs longer than 5 minutes, social links, and 3-5 hashtags at the bottom (genre, mood, format). YouTube indexes every word — a thin description is wasted ranking potential.
Tags: Use 8-12 targeted tags. Place your exact primary keyword first, followed by variations, your artist name, genre terms, and 1-2 similar artists whose audiences overlap with yours. Total character limit is 500 — use them deliberately rather than stuffing generic terms that confuse the algorithm about what your video actually is.
Custom thumbnail: Pull the strongest single frame from your AI-generated video and enhance it. High contrast, minimal text (3 words maximum), and consistent brand colors. Chartlex's analysis of 2,400+ campaigns found that artists with consistent thumbnail branding see 15-25% higher click-through rates than those with inconsistent or text-heavy thumbnails. Your AI video already produced dozens of visually striking frames — select the most eye-catching one and crop it to 1280x720 for your thumbnail.
Ideal youtube video length depends on the content type. For a full music video, match your song length — typically 3-4 minutes. For best youtube music videos that rank well, watch time percentage matters more than raw duration. A 3-minute video with 80% average view duration outranks a 10-minute video with 20% retention every time. Don't pad your video with unnecessary intros or outros. Cut straight to the music.
Repurposing One Video Into Multi-Platform Content
One AI music video generates weeks of content across platforms if you approach it strategically. Repurposing means adapting one creation for multiple platforms — not posting the same file everywhere. Each platform has different audiences, different algorithms, and different format expectations. Your audience on TikTok is largely different from your audience on YouTube. Most will never see the same post twice.
Here's how a single AI music video branches into multiple content pieces:
- Full video (3-4 minutes) — YouTube as your primary long-form platform. This is the anchor piece everything else feeds from.
- 15-60 second clips — Pull your chorus or the most visually striking section for TikTok, Instagram Reels, and YouTube Shorts. Each clip needs a different opening hook — the first frame determines whether someone stops scrolling.
- Still frames for feed posts — Export 5-10 of the best single frames as high-resolution images. These work as Instagram feed posts, Twitter/X visuals, or promotional graphics.
- Behind-the-scenes content — Screen-record your AI workflow: prompting, generation, before-and-after comparisons. This "making of" angle performs surprisingly well because audiences are curious about the AI process itself.
- Process breakdown — A short-form video explaining how you made the music video with AI. Educational content about your creative tools attracts a secondary audience of fellow creators.
When adapting for vertical platforms, don't just crop your 16:9 video to 9:16. Re-frame it intentionally — choose the vertical section of each scene that contains the most visual interest. The instagram story video length caps at 60 seconds per segment, so chop your best moments into digestible pieces and add interactive elements like polls or question stickers to drive direct engagement.
For anyone wanting to know how to add music to reels — if you're using your original track, upload the audio directly through Instagram's music tool or add it in your editor before export. Original audio creates a reusable sound that other creators can attach to their content, which feeds organic discovery back to your profile.
A practical posting schedule from one video:
- Day 1: Full video on YouTube with complete SEO metadata, custom thumbnail, end screens, and cards configured.
- Day 2: Best 30-60 second clip on TikTok with trending hooks and relevant hashtags.
- Day 3: Adapted version on Instagram Reels (adjusted text placement, different caption, original audio tagged).
- Day 4: Behind-the-scenes process clip on TikTok or YouTube Shorts.
- Day 5: Still frame post on Instagram feed with song link in bio and caption telling the story behind the visuals.
- Day 6: YouTube Short using a different section of the video with a fresh hook.
- Day 7: Share the Reel to Stories with added context, poll, or countdown to next release.
One creation session. A full week of presence. This is how to make music videos for youtube and social simultaneously without burning out on content production.
Common Mistakes That Kill Visibility
Even well-made AI music videos underperform when creators sabotage their own reach through avoidable publishing errors. Here are the patterns that consistently tank visibility:
Uploading without metadata. A video titled "Final Export v2" with an empty description and no tags is invisible to search. YouTube can't recommend what it can't categorize. Spend 15 minutes on metadata before clicking publish — it's the highest-ROI time investment in your entire workflow.
Ignoring thumbnail quality. Your thumbnail competes against every other result on the page. A dark, blurry, text-heavy thumbnail gets scrolled past regardless of video quality. Use your best AI frame, boost the contrast, keep text to 3 words maximum, and ensure it reads clearly at 120px wide on mobile.
Not cross-promoting. Publishing on YouTube alone and hoping the algorithm delivers is passive. Every platform you neglect is an audience you never reach. Rap music videos on youtube that gain traction almost always have supporting short-form content on TikTok and Reels driving viewers back to the full upload.
Publishing at random times. Your existing audience has peak activity hours. Check YouTube Studio analytics for when your subscribers are online and schedule uploads accordingly. The first hour of engagement signals — likes, comments, watch time — heavily influence how aggressively YouTube distributes your video to new viewers.
Skipping the YouTube ads option. For release campaigns, even a modest $10-20 daily budget on skippable in-stream ads places your video in front of targeted viewers who are already watching similar content. You only pay when someone watches past 30 seconds or engages. AI-generated content performs well in ad contexts because the first 5 seconds — the critical hook before the skip button — tend to be visually striking. Target custom audiences of viewers who searched for artists in your genre for the highest return on spend.
Realistic timeline from concept to published video: Following the full workflow in this guide — choosing a style, writing prompts, generating scenes, editing, and publishing with proper optimization — expect 4-8 hours of active work spread across 1-3 days. That's the gap between "I have a song" and "I have a fully promoted music video live across multiple platforms." Compare that to 4-6 weeks and thousands of dollars for traditional production. The speed advantage is real, and it compounds with every track you release.
