
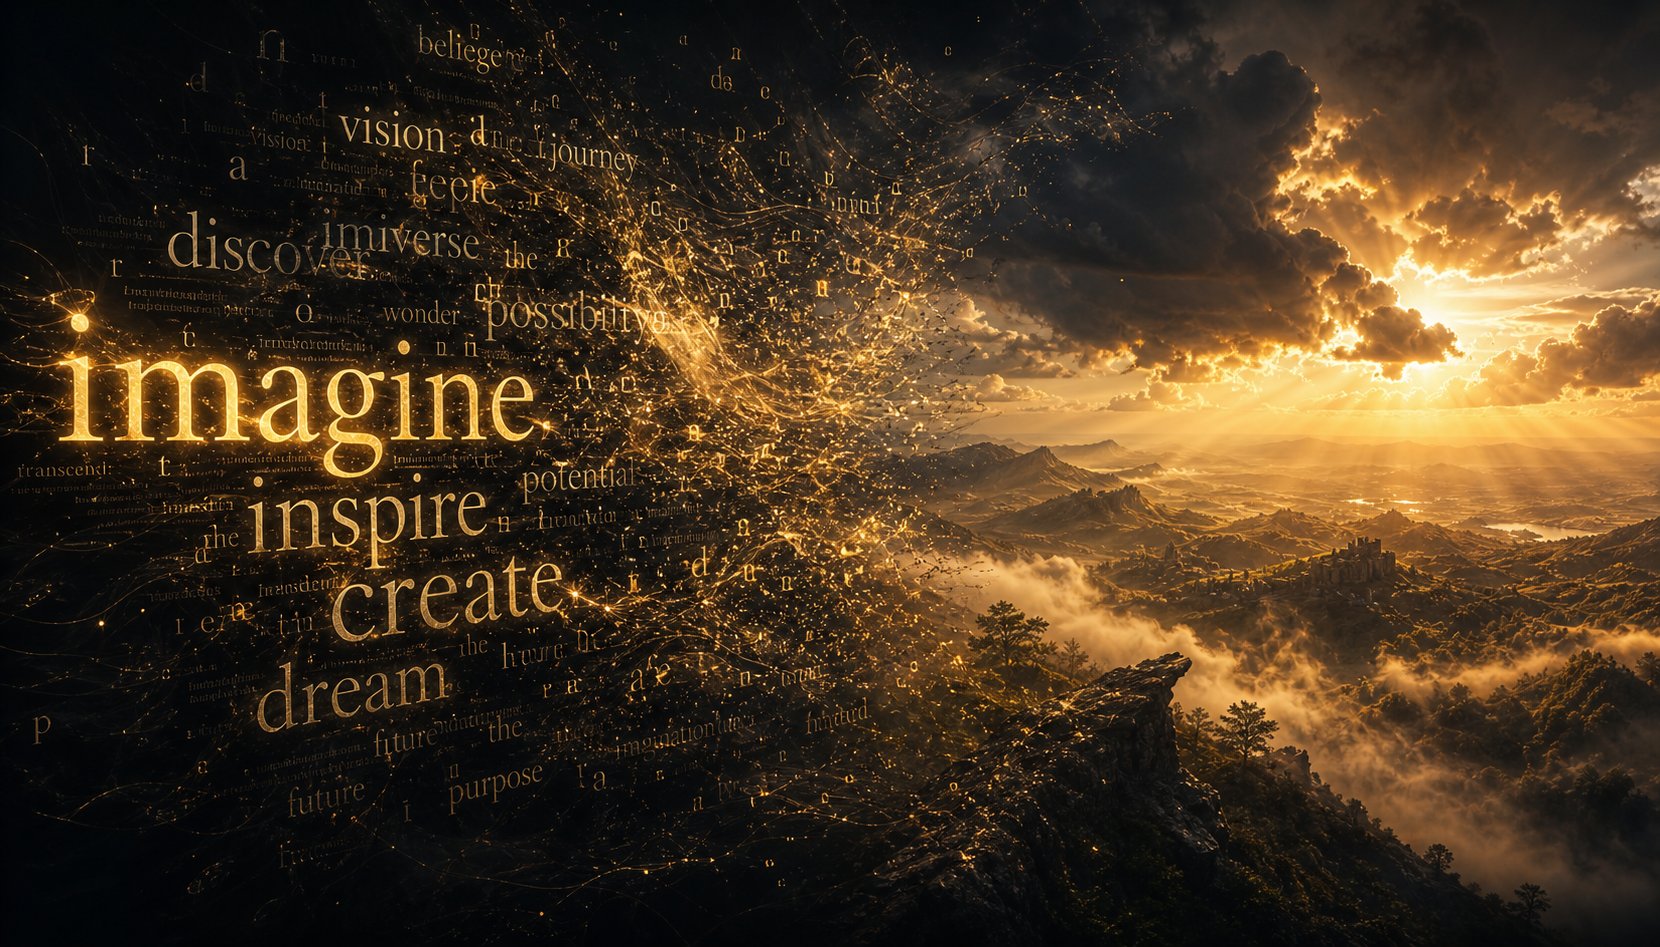
What You Need to Make an AI Music Video
Creating a music video used to mean hiring a director, booking locations, coordinating actors, and burning through a budget that most independent artists simply don't have. That barrier is gone. AI generation tools now let solo musicians, YouTubers, and social creators turn a finished track into a polished ai music video, sometimes in a single afternoon.
This guide walks you through the full pipeline: analyzing your song's structure, planning visuals, writing effective prompts, generating clips, syncing everything to the beat, and exporting for every major platform. Whether you're an indie artist releasing your first single, a content creator building a channel, or a hobbyist exploring a new creative outlet, you'll find a workflow that fits.
A realistic time expectation: your first video will take a few hours from concept to export. Skill level needed? If you can drag files into a timeline, you're qualified. No film school background required.
What You Need Before You Start
Gather three things before you touch any generation tool:
- A finished audio file - MP3 or WAV, fully mixed. AI tools need clean audio to analyze rhythm and energy.
- A basic concept or mood - Even a single sentence like "neon city at night, lonely and cinematic" gives you direction.
- Access to at least one AI image or video generation tool - Free or paid, browser-based or desktop. You'll choose which one in a moment.
Choose Your Workflow Based on Budget and Skill
Not every creator needs the same setup. Here's a framework to match your situation to the right approach so you can make a music video with ai without overspending or underdelivering:
- Free tools only - Use a free ai music video generator to produce basic visuals, pair with a free editor like CapCut or DaVinci Resolve. Best for testing the waters and learning how to make an ai music video for free. Expect watermarks or resolution limits on some platforms.
- Freemium mix - Combine free-tier image generators with a paid video animation tool (typically $5-15/month). This unlocks higher resolution, longer clips, and more control without a large commitment.
- Professional paid pipeline - Subscribe to premium generation tools for cinematic clip quality, consistent characters, and ai music video free of the common artifacts that scream "AI made this." Ideal when the final product represents your brand.
The right tier depends on where your project lives. A Spotify Canvas loop has different needs than a four-minute narrative piece on YouTube. What matters most is starting with a clear creative direction, and that begins with listening to your track differently than you ever have before.
Step 1: Analyze Your Song and Plan the Visual Concept
Most people learning how do you make a music video with AI skip straight to the generation step. They open a tool, type a vague prompt, and hope for something usable. The result? A string of disconnected clips that look impressive individually but feel like a slideshow when played together over the track.
The fix starts before you generate a single frame. It starts with listening.
Put your headphones on and play your track from beginning to end, but this time listen like a visual director, not a musician. You're identifying structure: where does the energy rise? Where does it pull back? Where's the emotional peak? Note the tempo, the mood shifts between sections, any drops or builds, and the transitions from verse to chorus to bridge. These musical landmarks become your visual cut points.
Translating musical elements into visual language is the skill that separates forgettable AI videos from ones that feel intentional. Think of it this way: a minor key passage naturally calls for darker palettes and slower camera movement. An uptempo chorus with driving percussion wants fast cuts and dynamic angles. A sparse acoustic bridge might translate to a single wide shot with minimal motion, giving the viewer breathing room that mirrors the music's restraint.
Color temperature in your visuals works the same way. As Audio Network's mood board guide explains, warm tones like amber and gold suggest organic warmth and intimacy, while cooler blues and silvers lean toward synthetic textures and emotional distance. Matching your visual palette to the sonic character of each section creates coherence that viewers feel even if they can't articulate why.
Break Your Song Into Visual Scenes
Every song already has a built-in scene structure. Your job is to map it. Play the track again and write down each section with its timestamp and emotional function:
- Intro (0:00-0:15) - Sets the world. Low energy, establishing tone before the first lyric lands.
- Verse 1 (0:15-0:55) - Introduces the story or perspective. Restrained visuals, building curiosity.
- Chorus 1 (0:55-1:25) - The hook. Peak energy or peak emotion. Your strongest visual moments live here.
- Verse 2 (1:25-2:05) - Develops the narrative. Builds tension toward the next chorus with escalating imagery.
- Bridge (2:05-2:30) - The shift. A new visual element, location, or perspective that breaks the pattern.
- Final Chorus/Outro (2:30-3:15) - Resolution or climax. The visual payoff that leaves the viewer with a lasting impression.
Your timestamps will differ, but the principle holds for any genre. Write one sentence describing the feeling of each section. "Verse 1 feels isolated. Chorus 1 feels defiant. Bridge feels uncertain." Those emotional notes become prompts later. You don't need fancy storyboarding software to create a video from a song effectively. Even bullet points in a notes app work. What matters is that every section has a planned visual identity before you start generating.
A practical storyboard framework suggests planning 3-6 visual frames per song section, giving a typical 3-4 minute track somewhere between 20-40 planned scenes. Each frame only needs a brief description: subject, environment, camera angle, and motion. Stick figures are fine. This isn't art. It's a communication tool between your creative vision and your AI prompts.
Define Your Color Palette and Mood
Before generating anything, lock in 3-5 anchor colors and a single overarching mood. Cinematic. Dreamy. Gritty. Surreal. Pick one word that captures the visual world your track lives in, then choose colors that support it.
Why does this matter so much? When you're creating a music video scene by scene with AI, each generation is independent. The tool doesn't remember what it made for your verse when it generates your chorus. Without a defined palette, you end up with a jarring patchwork: warm golden tones in one clip, icy blues in the next, neon pink in another. A pre-selected color palette acts as guardrails that keep every generated clip feeling like it belongs in the same visual universe.
A useful approach borrowed from film: choose one dominant color (60% of screen presence), one supporting color (30%), and one accent color (10%). If your track is melancholic and atmospheric, that might be deep navy, muted gray, and a single streak of amber. If it's energetic and playful, maybe electric purple, white, and lime green. You'll reference these colors directly in every prompt you write.
The biggest mistake beginners make is jumping straight into generation without a plan — this leads to a disjointed video that fights the music instead of serving it.
Spending twenty minutes on this planning phase saves hours of regenerating clips that don't match, rewriting prompts that miss the mark, and trying to fix inconsistencies in post-production. When you know exactly how to create a song video that serves the music's emotional arc, the generation step becomes execution rather than experimentation. And that's where making music videos with AI starts to feel less like gambling and more like directing.
Step 2: Pick the Right Video Style for Your Track
You've mapped your song's structure and locked in a mood. The next decision shapes everything that follows: what kind of artificial intelligence music video are you actually making? Not every track calls for the same visual approach, and choosing the wrong style before you start generating means hours spent fighting the tools instead of working with them.
Four distinct styles are achievable with today's music video ai tools. Each one demands different skills, different time commitments, and different software. Picking the right match for your genre, budget, and experience level is the single fastest way to avoid frustration.
Narrative and Performance Style Videos
Narrative videos tell a story. AI-generated characters move through environments, interact with objects, and convey emotion across scenes. Think of it as a short film set to your track. This style works best for songs with strong lyrical content, clear emotional arcs, or storytelling that benefits from visual interpretation.
The challenge? Consistency. AI tools generate each clip independently, so your protagonist's face, clothing, and proportions can shift between scenes. Maintaining a recognizable character across a three-minute video requires hyper-specific prompt descriptions, style references, and often a platform with built-in character consistency features. Tools like LTX Studio handle this better than general-purpose generators, offering recurring character support and cinematic camera controls up to 4K at 50fps.
Performance-style videos take a similar approach but center on a virtual artist or band performing the song. Imagine an animated singer on a stage, a digital version of yourself in an impossible environment, or a stylized avatar performing with a full band. This leans into the virtual artist music concept that's gaining traction in electronic and pop genres. Lip-sync generators like Pika's Pikaformance feature can animate a portrait image to match your vocals, creating short performance clips for social media.
Both narrative and performance styles are the most prompt-intensive options. Expect to write unique, detailed prompts for every scene, regenerate frequently to get usable takes, and spend significant time in post-production ensuring visual continuity. If you're learning how to create an animated music video for the first time, these styles have the steepest learning curve but also the highest creative ceiling.
Abstract Visualizer and Lyric Videos
Abstract visualizers are where AI genuinely shines. Flowing shapes, color gradients, particle systems, and reactive geometry that pulses with your audio's energy. No characters to keep consistent, no story logic to maintain. The visuals exist purely to amplify the feeling of the music.
This style works especially well for electronic, ambient, lo-fi, and hip-hop tracks where the sound design carries more emotional weight than specific lyrical narratives. Audio-reactive tools like Neural Frames let you map individual instrument stems to visual parameters. Your bass controls zoom intensity, your hi-hats trigger color shifts, your vocals modulate brightness. The result feels like the music is literally generating the visuals in real time.
Lyric videos sit in a related space but serve a different function. Here, text is the visual centerpiece. Words appear, animate, highlight, and dissolve in sync with the vocals, layered over AI-generated backgrounds or abstract motion. A free ai lyric video generator can handle this workflow almost entirely automatically: upload your audio, confirm the transcribed lyrics, choose an animation style, and render.
For creators searching for a music video maker ai free option to get started, lyric and abstract styles deliver the best results-to-effort ratio. You can produce something genuinely watchable in under an hour with minimal prompt engineering. The visual quality ceiling is lower than narrative work, but the floor is much higher. Even a mediocre abstract visualizer looks intentional in a way that a mediocre narrative video simply doesn't.
Wondering which style fits your situation? This comparison breaks it down across the dimensions that actually matter:
| Style | Difficulty Level | Best Music Genres | Tools Typically Used | Time to Produce (3-min track) |
|---|---|---|---|---|
| Narrative | Hard | Pop, indie, singer-songwriter, R&B | LTX Studio, Runway Gen-3, Kaiber | 6-12 hours |
| Performance | Medium-Hard | Pop, rock, hip-hop, electronic | Pika (Pikaformance), LTX Studio, Neural Frames | 4-8 hours |
| Abstract Visualizer | Easy-Medium | Electronic, ambient, lo-fi, instrumental | Neural Frames, Plazmapunk, Kaiber | 1-3 hours |
| Lyric Video | Easy | Any genre with vocals | Rotor Videos, Kaiber, dedicated lyric tools | 30 min - 1 hour |
A few patterns worth noting. Difficulty correlates directly with how much character consistency your style demands. Abstract and lyric videos sidestep that problem entirely, which is why they produce reliably good output even from beginners. Narrative and performance videos require you to solve the hardest problem in AI video generation: making the same thing look the same twice.
Time estimates assume you've already completed the planning phase from Step 1. Without that groundwork, add 50% or more to each figure as you circle back to figure out what you actually want mid-generation.
There's no wrong answer here. A lo-fi beat doesn't need a cinematic narrative. A deeply personal singer-songwriter track might lose its intimacy buried under abstract particle effects. The best ai video generator for music videos is whichever one matches your track's personality and your available time. You can also find ai music videos free of charge across all four styles if you're willing to work within free-tier limitations like watermarks, lower resolution, or daily credit caps.
Once you've committed to a style, the real craft begins: writing prompts that translate your musical vision into language an AI can interpret and execute.
Step 3: Write Prompts That Capture Your Music
Your storyboard holds the vision. Your prompts communicate that vision to an AI model. This is the single most impactful skill when you create a music video with ai, because the gap between what you hear in your head and what appears on screen lives entirely in the language you use. Vague input produces generic output. Precise, structured prompts produce clips that feel like intentional creative choices.
The good news: prompt writing for music videos follows a learnable formula. You don't need to be a filmmaker to describe a shot. You just need to know which elements to specify and in what order.
Anatomy of an Effective Video Prompt
Every strong video prompt contains six core components. Think of them as layers you stack together to give the AI a complete picture of what you want:
- Subject - Who or what is in the frame. Be specific about appearance: "a woman in a torn denim jacket with silver rings" beats "a person."
- Action - What the subject is doing. "Walking slowly through rain" gives the AI motion to render.
- Environment - Where it happens. "Abandoned subway platform with cracked tiles and fluorescent flicker" sets a world.
- Lighting - The quality, direction, and color temperature of light. "Warm backlight at 3200K, deep shadows on face" creates mood.
- Camera movement - How the viewer's perspective shifts. "Slow dolly-in at eye level" or "static wide shot" tells the AI exactly how the frame behaves.
- Style modifier - The aesthetic filter. "Kodak Portra 400 film emulation," "anime cel-shaded," or "photorealistic cinematic" locks the visual language.
When you stack these layers with intention, the AI stops guessing and starts executing. The difference is dramatic. Here's how that plays out across genres:
Lo-fi hip-hop track prompt:
"Close-up of a young man in a hoodie writing in a notebook, warm lamplight 2700K, cozy bedroom with rain on window, slow push-in, lo-fi analog film grain, muted earth tones, shallow depth of field."
Metal track prompt:
"Wide shot of a lone figure standing on a cliff edge, storm clouds rolling, dramatic rim lighting with cold blue 6500K, fast zoom-out revealing vast barren landscape, high contrast, desaturated except deep red accent, gritty handheld camera shake."
Dreamy pop track prompt:
"Medium shot of a woman spinning in a field of wildflowers, golden hour backlight with lens flare, slow orbit around subject, soft focus, pastel color palette, Wes Anderson symmetry, 35mm anamorphic."
Notice how each prompt encodes the energy and emotional tone of its genre directly into the visual description. The lo-fi prompt is intimate and warm. The metal prompt is vast and aggressive. The pop prompt is romantic and stylized. Your song's mood dictates the vocabulary you reach for.
Translating Musical Mood Into Visual Language
This is where making music video with ai becomes genuinely creative rather than technical. Every musical moment has a visual equivalent. Your job is to find it.
Here are concrete translations to build your instincts:
- Heavy bass drop = dramatic zoom-out revealing a vast landscape, or a sudden shift from tight close-up to extreme wide shot
- Soft acoustic verse = slow dolly shot through a sunlit forest, shallow depth of field, minimal motion
- Building synth pad = gradual aerial rise over a cityscape, increasing in altitude as the sound swells
- Snare-driven chorus = fast cuts between three or four dynamic angles, each clip only 1-2 seconds
- Vocal break or silence = static wide shot, empty environment, negative space dominating the frame
- Distorted guitar solo = aggressive handheld movement, high contrast, saturated color bleed, motion blur
You'll notice the pattern: energy in the music maps to motion and scale in the visual. Quiet moments call for stillness and intimacy. Loud moments call for dynamism and scope. This isn't a rigid rule, breaking it intentionally creates powerful contrast, but it's the default grammar that makes AI-generated visuals feel like they belong with the track.
With those translations in mind, here are the core principles that consistently produce better results when you create ai music videos:
- Specify camera movement explicitly. "Slow dolly-in" or "static tripod" gives the AI a clear directive. Leaving it unspecified produces random, often jarring motion.
- Name your art style directly. "Photorealistic cinematic" and "watercolor illustration" produce radically different outputs. Never assume the AI knows what you want aesthetically.
- Include lighting direction and color temperature. "Warm sidelight from the left, 3200K" creates dimension. Without lighting cues, you get flat, generic illumination.
- Avoid contradictory descriptors. "Bright and cheerful" paired with "dark moody shadows" confuses the model. Pick one emotional direction per prompt.
- Use negative prompts to exclude unwanted elements. Adding "Negative: blurry, distorted hands, text, watermark, low resolution" removes common AI artifacts before they appear.
- Keep each prompt focused on a single moment. Don't describe an entire scene change within one generation. One prompt, one shot, one clear visual idea.
- Reference real cinematography when possible. "Blade Runner 2049 color palette" or "A24 film framing" gives the model a concrete reference point that's more effective than abstract adjectives.
One last reality check: your first prompt attempt for any scene will rarely nail it. That's normal, not a failure. The iterative refinement process is built into how AI generation works. Generate, evaluate, adjust the language, regenerate. Each round teaches you which words the model responds to and which it ignores. After three or four videos, you'll develop a personal vocabulary that reliably produces the style you want, and writing prompts will shift from frustrating guesswork to confident direction.
Strong prompts get you strong individual clips. The next challenge is turning those clips into a flowing sequence that actually responds to your music's rhythm and energy.
Step 4: Generate AI Video Clips From Your Audio
Prompts are ready. Storyboard is mapped. Now you generate. This is where your planned vision becomes actual footage, and where the choice of workflow determines both the quality of your output and how many hours you spend getting there.
Two fundamental approaches exist for turning a song into visual clips, and understanding when to use each one is the difference between a smooth production day and a frustrating one.
Approach 1: Keyframe-first workflow. Generate still images with an AI image tool (Midjourney, DALL-E, Flux, Stable Diffusion), then feed those images into a separate video animation tool (Runway, Kling, Seedance) that adds motion. This two-step method gives you the most control. You can perfect the composition, lighting, and color of each frame as a still before any movement enters the picture. If the keyframe looks wrong, you fix it before spending video generation credits. According to emerging production workflows documented by AI Magicx's long-form video guide, this image-to-video pipeline is currently the best practice for maintaining character consistency across dozens of clips.
Approach 2: Direct generation. Upload your audio or enter a text prompt into a tool that outputs video clips directly. Some platforms analyze your track's BPM, energy, and structure to generate visuals that react to the music without you manually prompting each scene. This is faster and requires less technical skill, but you trade fine-grained control for speed. If you want to make an ai video from a song for free without learning multiple tools, this is often the more accessible starting point.
Many experienced creators combine both approaches. They use direct generation for abstract or audio-reactive sections (choruses, drops) where the music drives the visuals, and the keyframe-first method for narrative or character-heavy scenes (verses, bridges) where composition matters more than reactivity.
Generate Clips That Match Your Storyboard
Resist the urge to generate one clip per scene and move on. Batch generation is your friend. For each scene in your storyboard, produce 3-5 variations using slightly different prompt wording, seed values, or motion settings. Then curate the strongest take.
Why multiple variations? AI generation is stochastic. The same prompt produces different results each run. Your third generation might nail the mood perfectly while the first two felt off. Generating in batches and selecting the best output is standard practice among creators who produce polished work. A typical production workflow for a 3-4 minute music video involves 60-120 total generations to yield 20-40 usable clips.
Key generation settings to pay attention to:
- Clip duration - Most tools generate 3-5 second clips. Shorter clips (2-3s) work for fast-cut choruses. Longer clips (5-10s) suit slow verses and establishing shots.
- Resolution - Generate at 1080p minimum for YouTube. Some tools offer 720p free tiers that work fine for TikTok and Instagram Reels but look soft on larger screens.
- Motion intensity - Controls how much movement the AI adds. High motion fits energetic sections but introduces more artifacts. Low motion keeps visuals clean for intimate moments. Match this setting to your storyboard notes about each section's energy.
- Aspect ratio - Generate in your final delivery format from the start. Cropping 16:9 footage to 9:16 later loses composition. If you're publishing to multiple platforms, generate key scenes in both orientations.
Batch similar scenes together during generation. All close-up character shots in one session, all wide landscape shots in another. This keeps your reference images, style settings, and prompt vocabulary consistent within each batch, reducing visual drift between clips that will sit adjacent in the final edit.
Tools That Turn Songs Into Visuals
The tool landscape splits into four distinct categories, each serving a different part of the workflow. Choosing the right category depends on whether you want hands-on control or an automated pipeline, and whether your budget is zero or flexible.
- Audio-reactive generators - These analyze your track's waveform, BPM, and energy curve to drive visual changes automatically. Neural Frames and Kaiber fall here. Visuals pulse, shift, and evolve in direct response to what the music is doing. Best for abstract and visualizer-style videos.
- Text-to-video platforms - Runway Gen-4, Kling AI, and Seedance generate clips from written prompts. No audio input. You describe each shot, generate it, and sync to music manually in post. These deliver the highest individual clip quality but require the most assembly work.
- Image-to-video animators - Tools that take a still image and add motion: camera pans, zooms, subtle character movement, parallax effects. Useful when your keyframe-first workflow produces a perfect composition you want to bring to life with minimal AI interpretation.
- Dedicated music video makers - Platforms built specifically for the audio-in, video-out workflow. MakeBestMusic's AI Music Video Generator lets creators upload a song and generate matching visuals directly, streamlining the process for those who want audio-reactive results without managing separate tools for each step. Freebeat offers a similar song-to-video pipeline with BPM detection and structure-aware generation. These are the fastest path from finished track to finished video.
If you primarily use Suno for music creation and want to generate video from those tracks, dedicated music video platforms often accept direct links, so you can suno generate video output without downloading and re-uploading files manually. This integration saves steps when you're iterating quickly on visual concepts for AI-generated tracks.
For creators hunting a music video ai generator free option, most categories include free tiers with limitations. Audio-reactive tools typically offer a few free generations per day. Text-to-video platforms provide limited credits monthly. Dedicated music video makers often let you preview results before paying for watermark-free exports. A realistic free workflow: use a song to video ai generator free tier to produce your core visual direction, then upgrade only for the final export pass at full resolution.
The best ai music video generator from audio depends entirely on your style choice from Step 2. Abstract visualizers pair naturally with audio-reactive generators. Narrative videos need text-to-video platforms and image-to-video animators. If you want a complete, synced result without editing expertise, dedicated music video makers handle the entire pipeline. There's no single tool that dominates every use case, which is why understanding these categories matters more than chasing a specific product recommendation.
With your clips generated and curated, the raw material exists. The footage looks good in isolation. But playing clips back-to-back over your track will immediately reveal the gap between individual clip quality and a cohesive music video: timing. Your visuals need to breathe with the rhythm, cut on the beat, and flow with the song's momentum.
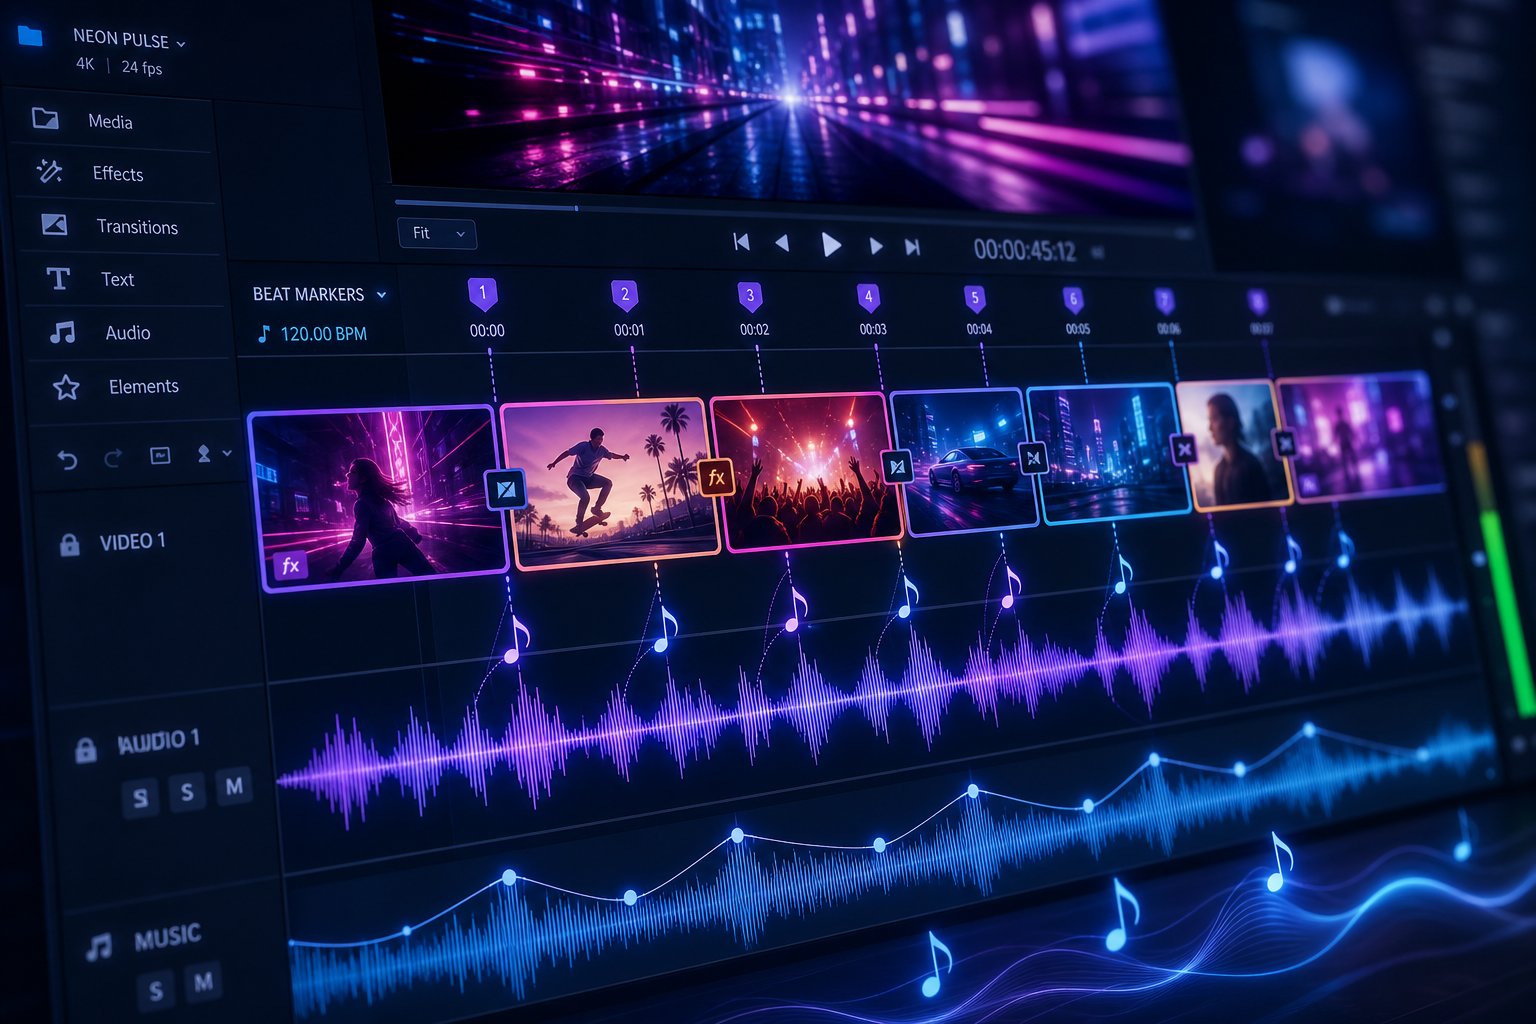
Step 5: Sync Your Visuals to the Beat
You have a folder full of AI-generated clips that look great on their own. You drop them on a timeline, hit play, and something feels wrong. The visuals float over the music like two separate experiences sharing the same screen. Nothing lands. Nothing hits. The disconnect isn't about clip quality. It's about timing.
Beat-syncing is what transforms a collection of pretty clips into an actual music video. It's the difference between visuals that serve the track and visuals that happen to play alongside it. And here's the thing: a music to video generator free tool might hand you clips, but it won't teach you the rhythm of editing. That part is on you.
Find Your Beat Markers and Cut Points
Before you touch the timeline, you need a map of your song's rhythm. Specifically, you need to know exactly where the strong beats, downbeats, and transition points fall in real time.
The most reliable method: import your track into a DAW or free audio tool and let it detect the BPM automatically. Ableton, Logic Pro, and DaVinci Resolve's Fairlight page all offer BPM detection. Free browser-based options like Beat2Cut's Audio Studio analyze your track and export beat markers you can bring directly into your editing timeline. Don't estimate BPM by feel. As the Tools for Film BPM guide explains, cutting by feel rather than by calculated frame position causes drift that compounds over the length of the video. By the 90-second mark, your cuts can land a full beat off the music with no obvious fix.
Once you know your BPM, the math is straightforward. The formula for frames per beat is: (frame rate / BPM) x 60. At 120 BPM and 24fps, each beat falls exactly every 12 frames. At 128 BPM and 24fps, it's 11.25 frames per beat, which means rounding errors accumulate over time. Knowing this number tells you exactly how long each clip segment needs to be.
Which beats should you actually cut on? Not all of them. Cutting on every single beat feels frantic and exhausts the viewer. Here's a practical framework:
- Downbeats (beats 1 and 3) - Your major cuts. New scenes, new angles, big visual changes. These carry the structural weight of the edit.
- Snare hits (beats 2 and 4) - Secondary cuts or subtle changes. Flash effects, color shifts, or overlay pulses that add texture without disrupting flow.
- Kick drums - Work well for zoom pulses or impact transitions. The viewer feels these viscerally even when the cut is subtle.
- Song section transitions - Verse to chorus, chorus to bridge. These always deserve a cut, regardless of what beat they land on. New section, new visual world.
If you don't have access to a DAW, here's the simplest approach: play your track and physically tap along. Note the timestamps where your body naturally wants a visual change. Those instinctive tap points are your cut markers. Write them down or drop markers in your video editor. This manual method works surprisingly well for songs under four minutes, especially if you're making video with music that has a clear, consistent pulse.
One nuance worth knowing: cutting 1-2 frames before the actual beat position often feels more "on the beat" to viewers. Visual processing takes slightly longer than audio processing, so an anticipation cut compensates for that cognitive lag. It's a subtle adjustment, but professional editors use it constantly.
Align Clips to the Musical Timeline
With your beat markers placed, assembly becomes methodical rather than guesswork. Open your video editor (DaVinci Resolve, CapCut, Premiere Pro, or any app to make a video with music), drop your audio on the timeline, and start placing clips at your marked cut points.
The workflow looks like this:
- Place your audio track on the timeline and make sure your beat markers are visible.
- Start with your highest-energy moments first. Drop your strongest clips at the chorus markers where impact matters most.
- Fill in verses and transitions with your remaining clips, trimming each to fit precisely between beat markers.
- Use hard cuts on high-energy sections (choruses, drops) and crossfades or dissolves on lower-energy passages (verses, bridges).
- Review the full sequence at playback speed. Listen for any moments where cuts and beats part company.
The relationship between BPM and clip length is direct. A song at 140 BPM gives you roughly 0.43 seconds per beat, meaning your clips need to be very short during fast-cut sections. A track at 80 BPM gives you 0.75 seconds per beat, allowing longer clips to breathe. If your AI-generated clips are 3-5 seconds long, a 140 BPM track might use each clip for 4-8 beats before cutting, while an 80 BPM track might hold a single clip for just 2-4 beats. Match cut frequency to energy: faster songs need shorter clips, slower songs let visuals linger.
A mediocre AI clip cut perfectly to the beat will always look better than a stunning clip that ignores the music's rhythm.
This principle is worth internalizing. Viewers forgive imperfect AI artifacts. They don't forgive visuals that feel disconnected from the audio. Every time a cut lands precisely on a kick drum or a scene change aligns with a chorus entry, the viewer's brain registers it as intentional craftsmanship, even if the imagery itself isn't photorealistic.
What happens when a clip is almost the right length but not quite? Speed ramping solves this without regenerating. If a clip runs 0.3 seconds too long for the beat window, slow it down by 5-10% rather than trimming away the ending. If it's too short, speed it up slightly or add a brief freeze frame at the end that dissolves into the next cut. Most video editors handle speed adjustments nondestructively, meaning you can experiment freely. A viewer won't notice a 10% speed change in a 4-second AI clip, but they will notice a cut that lands 6 frames late.
For creators exploring a free music to video generator that handles some of this automatically, audio-reactive tools apply basic beat-syncing during generation. But even those outputs benefit from manual refinement in a timeline editor. The automated sync gets you 70% of the way there. That last 30%, trimming individual clips by a frame or two, adding a crossfade where the energy dips, hard-cutting exactly on the snare hit, is what separates an AI video that looks assembled from one that looks edited.
Rhythm is handled. Your clips hit on the beat, your scenes change at section transitions, and the energy of the visuals tracks the energy of the audio. But play the video from start to finish and you might notice a different problem: the clips don't look like they belong together. Color temperatures shift between scenes, motion speeds feel inconsistent, and the overall piece reads as a compilation rather than a cohesive visual statement.
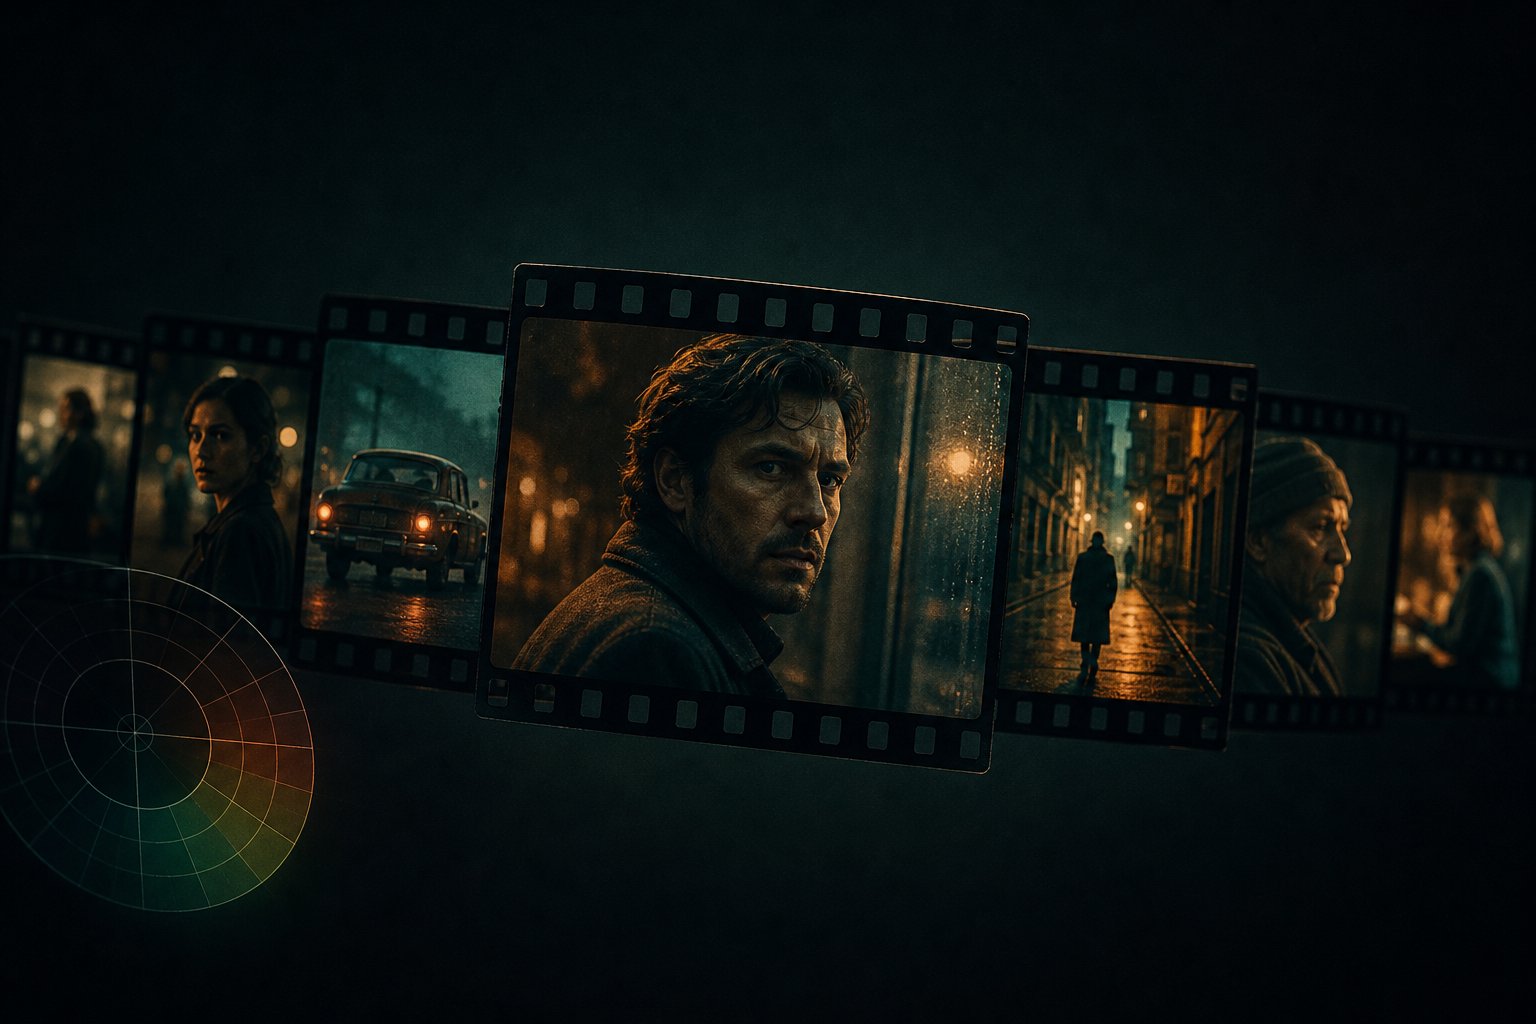
Step 6: Keep Your Video Visually Consistent
That compilation feeling is the most common giveaway that AI generated your video. Each clip might look polished in isolation, but when they sit back-to-back on a timeline, the inconsistencies stack up. One scene has warm golden tones, the next shifts to cool blue. A singing character appears in a leather jacket for the verse, then wears a hoodie in the chorus. The camera drifts at different speeds between shots. Viewers can't always name the problem, but they feel it: something looks stitched together rather than directed.
This happens because AI tools have no memory between generations. Every clip starts from scratch unless you deliberately give the model anchors to hold onto. The fix isn't better tools. It's a better process during generation and a unifying pass in post-production.
Use Style References and Seed Values
The most effective technique for visual coherence starts before you generate a single clip. Choose one style reference image, a single frame that captures the color palette, lighting quality, and overall aesthetic you want, and feed it into every generation as a visual anchor. This image becomes the DNA of your video's look. Every scene inherits its warmth, contrast, and saturation baseline from that reference, even when the subjects and environments change between shots.
Seed values add another layer of control. In AI generation, a seed is the number that determines the initial noise pattern the model starts from. Same seed, same prompt, same settings produces the same output. For music videos, reusing a consistent seed across similar scenes helps maintain color grading continuity and motion patterns. You won't get identical outputs when prompts differ, but the visual foundation stays more stable than random generation. Think of it as coordinates on a map: the same starting point leads to similar territory even when the destination shifts slightly.
The practical workflow: generate your first scene until you get a result you love. Note that seed value. For subsequent scenes with similar environments or characters, use that same seed as your starting point and adjust only the prompt elements that need to change, like action or camera angle. This method is especially powerful for maintaining an ai character singing across multiple scenes. If your video features a cartoon singer or animated performer, character drift becomes your biggest enemy. The face shifts subtly, the clothing changes, the proportions feel off.
To combat character drift when generating sing animation characters or recurring figures:
- Write one locked character description and paste it verbatim into every prompt where that character appears. "30-year-old woman, dark curly hair to shoulders, olive skin, fitted black turtleneck, silver hoop earrings" is reproducible. "A woman in dark clothing" is not.
- Use a reference portrait as an input image alongside your text prompt. Many platforms accept an image anchor that keeps facial features stable across generations.
- Separate character from context in your prompts. Describe the character in the character field (if available) and the scene's lighting, setting, and action separately. Blending everything into one paragraph dilutes the character description's influence.
- Review in batches of 5-8 scenes and compare against your reference. Catching drift at scene seven is a minor fix. Catching it at scene twenty means re-generating half your project.
For cartoon singers images or stylized characters, consistency is actually easier than photorealism. Bold visual features like exaggerated hairstyles, distinctive clothing colors, and simple silhouettes give the AI more to anchor on. The more distinctive your character design, the less it drifts between generations.
Color Grade and Unify in Post-Production
Even with perfect style references and locked seeds, your clips will have subtle differences in color temperature, exposure, and contrast. This is normal. The solution is a single unifying color grade applied across every clip in your timeline during post-production.
The simplest approach: apply one LUT (Look-Up Table) or color preset to your entire sequence. A LUT is a static color transformation that maps one set of values to another, and it acts as a visual glue that forces every clip into the same tonal family. AI-powered color grading tools take this further by letting you describe the desired look in natural language, like "warm cinematic golden hour with lifted shadows," and applying adaptive corrections to each clip while maintaining overall consistency.
Beyond LUTs, three manual adjustments make the biggest difference:
- Match brightness and contrast across all clips. If one scene is notably darker or flatter than its neighbors, the viewer registers the shift as a production error, not a creative choice.
- Align saturation levels. AI generators often produce clips at varying saturation intensities. Pull them all to a common baseline so colors feel like they exist in the same world.
- Add a consistent overlay texture. A subtle film grain, a light vignette, or a slight halation effect applied uniformly across the entire timeline acts as a unifying skin. It's like looking at every scene through the same lens. Even clips generated from completely different tools start to feel cohesive when they share this surface-level texture.
Before you export, run through this visual coherence checklist to catch anything that breaks the illusion:
- Consistent color temperature — Every clip should lean toward the same warmth or coolness. A single stray cool-toned clip in a warm-graded video breaks immersion instantly.
- Matching aspect ratios — All clips generated at the same ratio. Mixing 16:9 and 4:3 within one video looks accidental, not artistic.
- Uniform motion speed — If your verse clips have slow, gentle camera movement, a sudden fast-motion clip in the same section feels jarring. Match motion intensity to your storyboard's energy map.
- Repeated visual motifs — A recurring element (a specific color, a symbol, a lighting pattern) that appears across multiple scenes ties the video together narratively. Plant it intentionally.
- Consistent text and typography style — If your video includes titles, lyrics, or credits, use one font, one size scale, and one animation style throughout. Mixing typography is the fastest way to make a project look unfinished.
Visual consistency is what separates a video that feels directed from one that feels generated. Every technique here, from seed locking to color grading to texture overlays, serves the same goal: making twenty separately created clips feel like they came from the same creative eye. With that cohesion in place, the final step is getting your video out of the editor and onto the platforms where your audience actually watches.
Step 7: Export and Publish Your AI Music Video Across Platforms
Your video is color-graded, beat-synced, and visually cohesive. It looks like a single creative vision rather than a patchwork of AI outputs. The temptation now is to hit export and upload. But exporting the same file to every platform guarantees that at least half your audience sees a cropped, compressed, or incorrectly formatted version of your work. Each platform enforces its own specs, and ignoring them undoes hours of careful production.
Export Settings for YouTube, TikTok, and Instagram
If you're figuring out how to create a music video for YouTube, the specs differ significantly from what TikTok or Instagram Reels expect. Your editor likely offers presets for common platforms, but those presets aren't always current. Here's what each platform requires based on Sprout Social's updated specs guide:
| Platform | Resolution | Aspect Ratio | Frame Rate | Format | Ideal Length |
|---|---|---|---|---|---|
| YouTube (standard) | 1920x1080 or 3840x2160 | 16:9 | 24-30fps | MP4 (H.264) | Full song length |
| YouTube Shorts | 1080x1920 | 9:16 | 24-30fps | MP4 | Under 3 minutes |
| TikTok | 1080x1920 | 9:16 | 23-60fps | MP4 or MOV | Under 3 minutes |
| Instagram Reels | 1080x1920 | 9:16 | 23-60fps | MP4 or MOV | Under 90 seconds |
| Spotify Canvas | 720x720 or 1080x1920 | 1:1 or 9:16 | 24-30fps | MP4 (H.264) | 3-8 seconds (looping) |
A few practical notes. YouTube accepts resolutions up to 8K, but 1080p is the sweet spot for AI-generated content since most generation tools cap at that resolution anyway. Uploading in 4K only helps if your source clips were actually generated at that size. TikTok's file size limits differ by device: 72MB on Android, 278.6MB on iOS for in-app uploads, though uploading from desktop or scheduling tools allows up to 1GB. Instagram Reels can technically run up to 15 minutes when uploaded externally, but the algorithm favors content under 90 seconds for discovery.
Spotify Canvas is a special case. It's not a full music video but a looping visual clip that plays behind your track on the Spotify player. Pick your strongest 3-8 second moment, loop it seamlessly, and export as a separate file. This single asset plays every time someone streams your song, generating hundreds of thousands of impressions from one brief loop.
The smartest workflow: export a full-length 16:9 master file first. Then create platform-specific versions by cropping, trimming, or re-framing from that master. One production effort, four or five platform-ready outputs. If you planned your compositions with center-weighted framing during generation (Step 4), cropping from 16:9 to 9:16 loses minimal visual information.
Optimize Metadata and Thumbnails for Discovery
A polished video with poor metadata disappears into the algorithm. When you're learning how to make a music video on YouTube that actually gets found, the publishing details matter as much as the visuals.
Start with your title. Include the song name, artist name, and a descriptor that matches search behavior. Something like "Song Title - Artist Name (Official Music Video)" hits the standard format listeners search for. Your description should expand on that: include the song's story, credits, links to streaming platforms, and relevant tags. YouTube's algorithm parses descriptions for context, so write 2-3 sentences that naturally describe what the video contains.
Thumbnails drive click-through rate more than any other single element. Pull the most visually striking frame from your AI-generated footage, boost its contrast slightly, and add your song title in bold, readable text. Avoid cluttered thumbnails. One clear focal point with high color contrast against neighboring videos in search results outperforms busy compositions every time.
For longer videos on YouTube, add chapters using timestamps in your description. A four-minute music video benefits from markers at each section: intro, verse, chorus, bridge. This helps viewers navigate and signals to YouTube that your content is well-structured, which can improve search placement. How to make music videos for YouTube that perform well long-term comes down to these discoverability fundamentals applied consistently.
One more detail that trips up creators: music licensing. If you wrote and produced the song yourself, you're clear on every platform. If your track was generated by an AI music tool like Suno or Udio, check that platform's terms for commercial use rights before monetizing. Most AI music generators grant commercial licenses on paid plans, but free-tier outputs often carry restrictions. If you're using someone else's composition, standard music licensing applies regardless of whether the visuals are AI-generated. The video being made with AI doesn't change music copyright rules.
Uploading the same content reformatted across YouTube, TikTok, Instagram Reels, and Spotify Canvas multiplies your reach without multiplying your production time. One well-made AI music video becomes five platform-native assets. That's leverage most independent artists never had access to before, and it's the entire point of learning how do I make a music video for YouTube and beyond without a production team.
Publishing is the finish line for most creators. But if you ran into generation issues, inconsistencies, or stubborn artifacts along the way, the next section addresses the most common problems and when to fix them versus when to start fresh.
Step 8: Troubleshoot Common AI Video Problems
Even with careful planning, solid prompts, and a locked color palette, things go wrong. Faces melt between frames. Characters change outfits mid-scene. Artifacts appear from nowhere. Clips that looked perfect in your storyboard come back with an energy that fights the track instead of matching it. These aren't signs you're doing it wrong. They're the reality of working with generative AI at this stage of the technology, and every creator who's produced more than one video has hit them.
The difference between spending an afternoon fixing problems and spending a week spiraling? Knowing which issues to fix in post, which to solve by regenerating, and which signal that your prompt needs a fundamental rewrite rather than another tweak.
Fix Inconsistent and Unwanted Outputs
Here are the most common failure modes and how to solve each one:
- Flickering between frames. This happens when the AI model loses temporal consistency, each frame is technically a separate generation, and subtle differences compound into visible flicker. The fix: use longer clips (5 seconds rather than 3) so the model has more frames to stabilize. When editing, apply crossfades of 5-10 frames between clips rather than hard cuts, which masks the instability at transition points. If a specific clip flickers badly in its middle section, trim it and use only the stable opening or ending frames. Hedra's research on temporal instability confirms that consistency degrades over clip duration, so shorter, more focused generations with clear visual anchors produce smoother results than attempting long continuous takes.
- Inconsistent characters. Your protagonist's hairstyle shifts, clothing changes, or facial features drift between scenes. This is the hardest problem in AI video generation. Lock your style reference images and use the exact same reference portrait as input for every scene where that character appears. Write hyper-specific character descriptions: "woman with shoulder-length auburn hair, thin gold-frame glasses, charcoal wool coat with brass buttons" rather than "woman in dark coat." The more distinctive and anchored details you provide, the more the model has to hold onto across separate generations.
- Unwanted artifacts. Extra fingers, distorted text, floating objects, or visual noise that appears without being prompted. Two solutions work in tandem: add negative prompts ("Negative: blurry, extra limbs, distorted hands, text artifacts, watermark, low quality") and regenerate at lower motion intensity settings. High motion amplifies artifacts because the model struggles to maintain detail during fast movement. Dropping motion from 80% to 50% often eliminates artifacts while keeping the clip dynamic enough to serve the scene.
- Clips that don't match the mood. You prompted a dark, brooding scene and got something bright and cheerful. This usually means your style modifiers are too weak or conflicting with other prompt elements. Revisit the prompt language: replace vague descriptors like "moody" with concrete visual directions like "deep shadows, desaturated except cool blue highlights, single harsh overhead light." Also check whether your reference image contradicts your text prompt. A bright, warm reference image will override dark prompt language on many platforms. Align both channels toward the same emotional target.
A pattern emerges across all these fixes: specificity prevents problems better than post-production solves them. LTX's documentation on prompt mistakes reinforces this, noting that video models are highly sensitive to prompt structure, and vague descriptions produce the exact inconsistencies that frustrate creators. Every time you fix an issue by adding precision to your prompt, you're building a personal library of language that works. Over time, your first-attempt success rate climbs significantly.
For creators exploring tools like openart ai music video generators or similar platforms, be aware that each tool interprets prompts differently. A prompt structure that works flawlessly on one platform may produce inconsistent results on another. Keep notes on which phrasing each tool responds to best, and adjust your vocabulary accordingly rather than assuming universal compatibility.
When to Regenerate vs. When to Edit
This is the decision that saves the most time once you internalize it. Not every bad clip needs to be thrown out, and not every flawed clip can be saved in post. Here's the framework:
Regenerate when:
- The composition or subject is fundamentally wrong (wrong character, wrong environment, wrong framing)
- The motion direction contradicts your storyboard (camera moves right when it should move left)
- Major artifacts distort the subject's face or body in ways that can't be masked
- The overall energy or mood is completely off despite correct technical settings
Edit in post when:
- Color temperature is slightly off (fixable with a grade adjustment in seconds)
- Timing is 5-10% too fast or too slow (speed ramping fixes this without regeneration)
- Minor flickering at clip edges (crossfades and transitions hide this cleanly)
- Brightness or contrast doesn't match neighboring clips (exposure correction takes one slider)
- The clip is 80% usable but the last second degrades (trim it shorter and nobody knows)
The critical insight: diminishing returns hit fast. If you've regenerated the same scene five or more times without getting a usable result, stop tweaking and diagnose the root cause. The prompt itself needs fundamental rewriting, not minor adjustments. Something in your description is either too vague (giving the model too much room to interpret), conflicting (sending contradictory signals about mood or composition), or too complex (overloading the model with competing elements it can't satisfy simultaneously).
When you hit that wall, strip the prompt back to its three essential elements: one subject, one action, one environment. Get a clean, stable generation from that simplified foundation. Then add complexity back one layer at a time, camera movement first, then lighting, then style modifiers, regenerating after each addition. You'll quickly identify which specific element causes the breakdown. This diagnostic approach is faster than endless variations of a broken prompt, and it teaches you something about how the model interprets language that carries forward to every future project.
Searching for the best ai for music videos often leads creators to believe a different tool will solve their consistency problems. Sometimes that's true. Different models handle different styles better. But more often, the issue is prompt technique rather than platform capability. A well-written prompt produces solid results across most current-generation tools. A poorly structured prompt struggles everywhere.
That said, there's a practical reality: manual multi-tool workflows introduce complexity that compounds problems. When you're managing separate image generation, video animation, beat-syncing, and color grading across four different platforms, each handoff creates opportunities for inconsistency and error. For creators who find the troubleshooting cycle too time-consuming, platforms like MakeBestMusic's AI Music Video Generator handle coherence and syncing within a single pipeline, reducing the surface area where things go wrong. It's a tradeoff: you give up some fine-grained control in exchange for fewer failure modes and faster iteration cycles. For creators who want to be the best ai music video maker they can be but don't want to spend more time debugging than creating, that tradeoff often makes sense.
The free ai music video creator space also offers options with built-in consistency features. If you're trying to create ai music video free of the most common artifacts, look for platforms that use audio analysis to drive generation timing automatically, since manual misalignment between audio and visuals is one of the biggest sources of "something feels off" in finished projects. A free ai music video generator from song that handles BPM detection and scene transitions internally eliminates an entire category of problems before they start.
Here's a quick-reference list for the issues you'll encounter most often and their fastest solutions:
- Faces morphing mid-clip — Use shorter clip duration (3s max), add a reference portrait, lower motion intensity
- Color jumping between scenes — Apply a single LUT across all clips in post, match exposure before grading
- Motion feels jittery or stuttery — Apply frame interpolation in post, or regenerate at a lower FPS setting and let your editor conform to timeline framerate
- Background elements appearing/disappearing — Simplify environment descriptions, use "static camera" in prompt, reduce scene complexity
- Text or symbols appearing uninvited — Add "no text, no writing, no symbols" to negative prompt, regenerate
- Clips look over-processed or plastic — Remove style modifiers that conflict ("hyper-realistic" plus "illustration" confuses models), stick to one aesthetic per prompt
- Audio sync drifts over the video's length — Re-check your export framerate matches your timeline framerate, re-render with constant frame rate enabled
Every problem on this list has a fix. None of them require starting your entire project over. The skill you're building isn't just technical; it's diagnostic. You're learning to identify whether a problem lives in the prompt, the generation settings, the post-production workflow, or the tool itself. That diagnostic instinct is what transforms frustrating trial-and-error into a repeatable creative process, one where you can consistently create ai music video free of the telltale signs that betray AI involvement to viewers.