

What AI Music Production Really Is and Who This Guide Helps
Imagine typing a sentence like "upbeat lo-fi hip-hop track with warm piano chords and soft rain sounds" and hearing a finished piece of music 30 seconds later. That is AI music production in its simplest form. But here is what most people get wrong: the output is only as good as the creative direction you feed it. AI does not replace musical taste, arrangement decisions, or the ear that tells you when something just works. It accelerates the technical steps between having an idea and hearing that idea come to life.
What AI Music Production Actually Looks Like Today
So how does AI music work in practice? At its core, machine learning models trained on massive datasets of audio learn patterns in melody, rhythm, harmony, and timbre. When you give them a text prompt or a set of parameters, they generate new audio based on those learned patterns. The result is not a copy of existing songs but a statistically informed creation guided by your input. Think of it like autocomplete for music rather than a jukebox that pulls from a library.
A recent study by LANDR found that 87% of producers already use AI-powered tools somewhere in their workflow, with 66% applying them creatively for songwriting, melodies, or vocals. The technology is no longer experimental. It is a standard part of how music gets made. Still, more than 40% of those same respondents flagged concerns about output quality and ethics, which tells you something important: these tools are powerful, but they demand thoughtful use and realistic expectations.
Find Your Path Based on Your Creative Goal
Not everyone reading this guide wants the same thing. Your starting point and the sections most relevant to you depend on what you are trying to create:
- Content creators needing beats and background music — You want quick, royalty-clear tracks for YouTube videos, podcasts, or social media. Focus on Steps 2, 4, and 5 for the fastest path to usable audio.
- Aspiring songwriters who want to produce full songs — You have lyrics or melodies in your head but zero production experience. Steps 3, 4, and 5 walk you through prompt-based song creation from scratch.
- Entrepreneurs and marketers exploring AI music for business use — You need to understand licensing, monetization, and distribution. Steps 6 and 7 cover copyright, platform terms, and getting tracks onto streaming services.
Each path overlaps, and you will benefit from reading the full guide. But knowing your primary goal helps you prioritize where to spend your energy first.
What You Will Accomplish by the End of This Guide
This ai music production beginner guide step by step takes you from zero knowledge to a published track. By the final section, you will have set up a functional workspace, chosen the right tools for your goal, learned how to write effective prompts, created and edited a complete song, understood the legal landscape, and distributed your music to streaming platforms. That is the Day 1 to Done arc no other resource provides in a single walkthrough.
The tone here is honest: AI music tools are genuinely impressive, but they are not magic. You still need to make creative decisions, evaluate output critically, and refine your results. The skill shifts from playing instruments to directing AI effectively, and that skill takes practice just like any other.
Your first decision is a practical one. Before you can generate anything, you need the right setup. The hardware requirements are lower than you might expect, but a few specific details matter.
Step 1 Set Up Your Workspace and Understand the Basics
What computer do you actually need for AI music production? The answer is probably less demanding than you think. Because most AI music generators run in the cloud, the heavy processing happens on remote servers rather than your local machine. Your computer mainly needs to handle a web browser, basic audio playback, and lightweight editing software. That said, a few specs matter more than others, and understanding them upfront saves frustration later.
Minimum Hardware and Internet Requirements
The core requirements for artificial intelligence for music production come down to three things: a processor fast enough to run a modern browser smoothly, enough RAM to keep multiple tabs and an audio editor open simultaneously, and a stable internet connection for streaming audio back from cloud-based tools.
According to MusicRadar's hardware recommendations, you want at least an Intel i5 or AMD Ryzen 5 processor (or Apple M1 equivalent), 16GB of RAM on Windows or 8GB of unified memory on a Mac, and an SSD for storage. For AI music specifically, though, your internet bandwidth matters just as much as local specs. Generating a track in the cloud and streaming the result back requires a reliable connection, ideally 10 Mbps or faster for download speeds.
| Specification | Minimum | Recommended |
|---|---|---|
| Processor | Intel i3 / AMD Ryzen 3 / Apple M1 | Intel i5 / AMD Ryzen 5 / Apple M2 or newer |
| RAM | 8GB (16GB on Windows) | 16GB or more |
| Storage | 128GB SSD with 20GB free | 256GB+ SSD |
| Internet Speed | 5 Mbps download | 10+ Mbps download |
| Operating System | Windows 10 / macOS 12 / ChromeOS | Windows 11 / macOS 14+ |
Here is the good news: if you bought a computer in the last four or five years, you likely meet the minimum requirements already. Cloud-based AI tools offload the computationally expensive work, so even a modest laptop or mini PC can serve as your workstation. The real bottleneck, if there is one, tends to be a slow or unreliable internet connection rather than your hardware.
Understanding Audio Formats and Quality Settings
When you generate your first track and hit the export button, you will encounter file format options that might look unfamiliar. Knowing the basics prevents you from accidentally degrading your audio or uploading the wrong file type to a platform.
The three formats you will see most often are WAV, MP3, and FLAC. As What Hi-Fi? explains, these fall into distinct categories based on how they handle compression:
- WAV — Uncompressed audio. This is the highest quality format with no data loss, but files are large (roughly 10MB per minute at CD quality). Use WAV when you plan to edit or mix your track further.
- MP3 — Lossy compressed audio. Files are small and universally compatible, but some audio data is discarded permanently. At 320kbps, the quality loss is minimal for casual listening. At 128kbps, you will notice a significant drop.
- FLAC — Lossless compressed audio. It reduces file size to roughly half of WAV without sacrificing any quality. A strong choice for archiving finished tracks or distributing to platforms that support it.
You will also encounter two key numbers: sample rate and bit depth. Sample rate (measured in kHz) describes how many snapshots of audio are captured per second. CD quality is 44.1 kHz, and many AI tools export at 48 kHz, which is the standard for video. Bit depth (16-bit or 24-bit) determines the dynamic range. For beginners, 44.1 kHz at 16-bit is perfectly fine for streaming, while 48 kHz at 24-bit gives you more headroom if you plan to edit the file later.
Free Software You Should Install Before Starting
Most of your AI music creation happens inside browser-based tools, but a few free programs round out your workspace for editing and polishing:
- Audacity — A free, open-source audio editor available on Windows, macOS, and Linux. Use it to trim silence, adjust volume, fade in and out, or stitch multiple AI-generated clips together. It handles WAV, MP3, and FLAC natively.
- VLC Media Player — Plays virtually any audio format without codec issues. Useful for quickly previewing exports in different formats.
- Google Chrome or Firefox — Most cloud-based AI music tools are optimized for Chromium-based browsers. Keep yours updated for the best compatibility and audio playback performance.
Install these before you start generating music. Having Audacity ready means you can immediately load an AI-generated track, trim the intro, normalize the volume, and re-export in the exact format you need. It bridges the gap between raw AI output and a polished file ready for upload.
With your workspace configured and the fundamentals of audio formats clear, the next question becomes which AI tools to actually point your browser at. The landscape of generators, beat makers, and vocal tools is wider than most beginners expect, and choosing the wrong category for your goal wastes time you could spend creating.
Step 2 Choose Your AI Music Tools Wisely
You have your workspace ready and you understand audio formats. The next decision shapes everything that follows: which tool do you actually open? The best ai music generators 2026 fall into distinct categories, and picking the wrong type for your creative goal is like buying a drum machine when you needed a synthesizer. Each category of tool solves a different problem, and understanding those differences before you sign up for anything saves you from bouncing between platforms without finishing a single track.
Types of AI Music Tools and When to Use Each
The AI music landscape is not one product category. It is four overlapping ones, each designed for a different stage of the production process or a different type of output. Here is how they break down:
- Text-to-song generators — You type a prompt describing genre, mood, tempo, and instrumentation, and the tool produces a complete song with vocals, instruments, and arrangement. This is the fastest path from zero to finished audio. Ideal for beginners who want results immediately without learning production concepts first.
- AI beat makers — Focused on instrumental loops, drum patterns, and rhythmic foundations. Producers use these to generate raw material they then layer and arrange in a DAW. Best for creators who want building blocks rather than polished songs.
- AI vocal tools — Generate singing voices, harmonies, or voice clones that you layer over existing instrumentals. Useful when you have a beat but no vocalist, or when you want multilingual vocals without hiring session singers.
- AI mixing and mastering assistants — These do not generate music from scratch. Instead, they polish what you already have by adjusting EQ, compression, stereo width, and loudness to streaming-platform standards. Think of them as the final step rather than the starting point.
For someone learning how to start ai music production for beginners 2026, text-to-song generators offer the lowest barrier to entry. You need no prior knowledge of music theory, no DAW experience, and no equipment beyond your browser. The other categories become relevant as your workflow matures and you start combining multiple tools in a single project.
| Tool Category | Use Case | Skill Level Needed | Typical Output Quality |
|---|---|---|---|
| Text-to-song generators (e.g., MakeBestMusic, Suno, Udio, ElevenLabs Music) | Complete songs from a text prompt, including vocals and arrangement | Beginner-friendly, no musical knowledge required | High — full production, radio-ready in many genres |
| AI beat makers (e.g., Sonura, Soundful) | Instrumental loops, drum patterns, and beat foundations | Basic understanding of song structure helpful | Medium to high — strong rhythmic elements, may need arrangement |
| AI vocal tools (e.g., ElevenLabs Voice, ACE Studio) | Singing voice generation, harmonies, multilingual vocals | Intermediate — requires existing instrumental to pair with | High for supported languages and styles |
| AI mixing assistants (e.g., LANDR, iZotope Ozone AI) | Polishing, mastering, loudness optimization | Basic mixing vocabulary helpful | Professional-grade mastering output |
If your goal is to go from idea to finished song as quickly as possible, start in the first row. MakeBestMusic's AI Music Generator is a strong starting point here because its prompt-and-style workflow lets you describe what you want in plain language, choose a musical style, and receive a complete song without touching any production controls. For beginners who want the fastest path from concept to playable track, that simplicity matters more than advanced features you will not use yet.
Free Versus Paid Plans and What You Actually Get
Pricing in AI music generation is not straightforward. Most platforms use a credit-based system where each song generation costs a certain number of credits, and your plan determines how many credits you receive per month. The gap between free and paid tiers is not just about volume — it often determines whether you can legally use the output commercially.
Here is what the pricing landscape looks like across the top ai music generation tools 2026, based on Chartlex's verified comparison:
- Free tiers typically give you between 3 and 10 generations per day. They are perfect for experimenting and learning prompt techniques, but most restrict commercial use entirely. ElevenLabs Music offers up to 7 songs per day on its free plan, while Suno provides 50 daily credits (roughly 10 songs) without commercial rights.
- Entry paid plans ($8 to $15 per month) unlock commercial rights and increase your monthly output significantly. Suno Pro at $10 per month gives 2,500 credits (about 500 songs), and ElevenLabs Pro at $9.99 per month provides 500 tracks. This is the sweet spot for most beginners who want to publish their work.
- Premium plans ($24 to $49 per month) add advanced features like stem export, extended generation lengths, priority processing, and higher audio quality. Suno Premier at $30 per month includes a full AI-native DAW called Suno Studio. AIVA Pro at 49 euros per month grants full copyright ownership of every track you generate.
The critical detail most beginners miss: free tiers on nearly every platform explicitly prohibit commercial use. If you plan to upload tracks to Spotify, monetize YouTube videos, or sell beats, you need at minimum an entry paid plan. Read the terms of service before you publish anything generated on a free account.
Per-track costs vary too. On credit-based systems, a single song generation might consume 5 to 10 credits depending on length and complexity. At Suno Pro rates, that works out to roughly $0.02 per song. At AIVA Standard rates, each download costs closer to $1. The economics are dramatically different depending on your volume needs.
How to Pick the Right Tool for Your First Project
With dozens of options available, how do you narrow it down to one starting point? Ask yourself three questions:
- Do you want a complete song or building blocks? If you want a finished track you can publish immediately, choose a text-to-song generator. If you want raw material to arrange yourself in a DAW, look at AI beat makers with stem export.
- Do you need vocals? Not every tool generates singing. Stable Audio and AIVA produce instrumentals only. If vocals matter to your project, you need Suno, Udio, ElevenLabs Music, or MakeBestMusic.
- What is your budget for the first month? If the answer is zero, start with a free tier to learn prompt techniques and evaluate output quality. You can always upgrade once you know which platform produces results you like. If you can spend $10, that immediately opens commercial rights and higher generation limits.
For most readers of this guide, the recommendation is straightforward: begin with a text-to-song generator that offers a free or low-cost entry point, learn how prompts translate into musical output, and expand to additional tools only when you hit a specific limitation. Trying to master four different platforms simultaneously leads to scattered attention and no finished music.
Start with one tool. Finish one track. Then expand your toolkit based on what you wished that first tool could do differently.
The best free ai music generators 2026 all let you experiment without financial commitment. Use that window to develop your ear for what sounds good, learn which prompt styles produce results you connect with, and build confidence before committing to a paid plan. The money you spend should follow proof that a platform aligns with your creative direction, not precede it.
Choosing a tool is only half the equation. The other half, the part that separates forgettable output from tracks you are genuinely proud of, is how you communicate with these generators. The quality of your prompt determines the quality of your music, and most beginners underestimate how much that skill matters.
Step 3 Master Prompt Engineering for Better AI Music
Your AI music tool is ready. You have picked a platform. You type "make a cool beat" and hit generate. What comes back sounds... generic. Flat. Not what you heard in your head. This is the exact moment where most beginners get stuck, and it has nothing to do with the tool itself. The gap between disappointing output and music you actually want to use comes down to one skill: how to write better prompts for ai song generators.
AI music models interpret your text probabilistically. They map descriptive language to learned musical patterns, and the words you choose directly shape what patterns get activated. Vague instructions produce vague music. Specific, structured prompts produce focused, genre-accurate results. Learning prompt engineering for AI music is the single highest-leverage skill you can develop as a beginner because it costs nothing, requires no equipment, and immediately improves every track you generate.
The Anatomy of a Great AI Music Prompt
A well-constructed prompt is not a wish list or a mood board. It is a structured set of musical directions that reduce randomness and guide the AI toward a specific sound. According to Sonygram's prompt engineering research, AI models weight early tokens more heavily, meaning the first five to ten words of your prompt strongly influence the genre direction of the entire output. What you put first matters most.
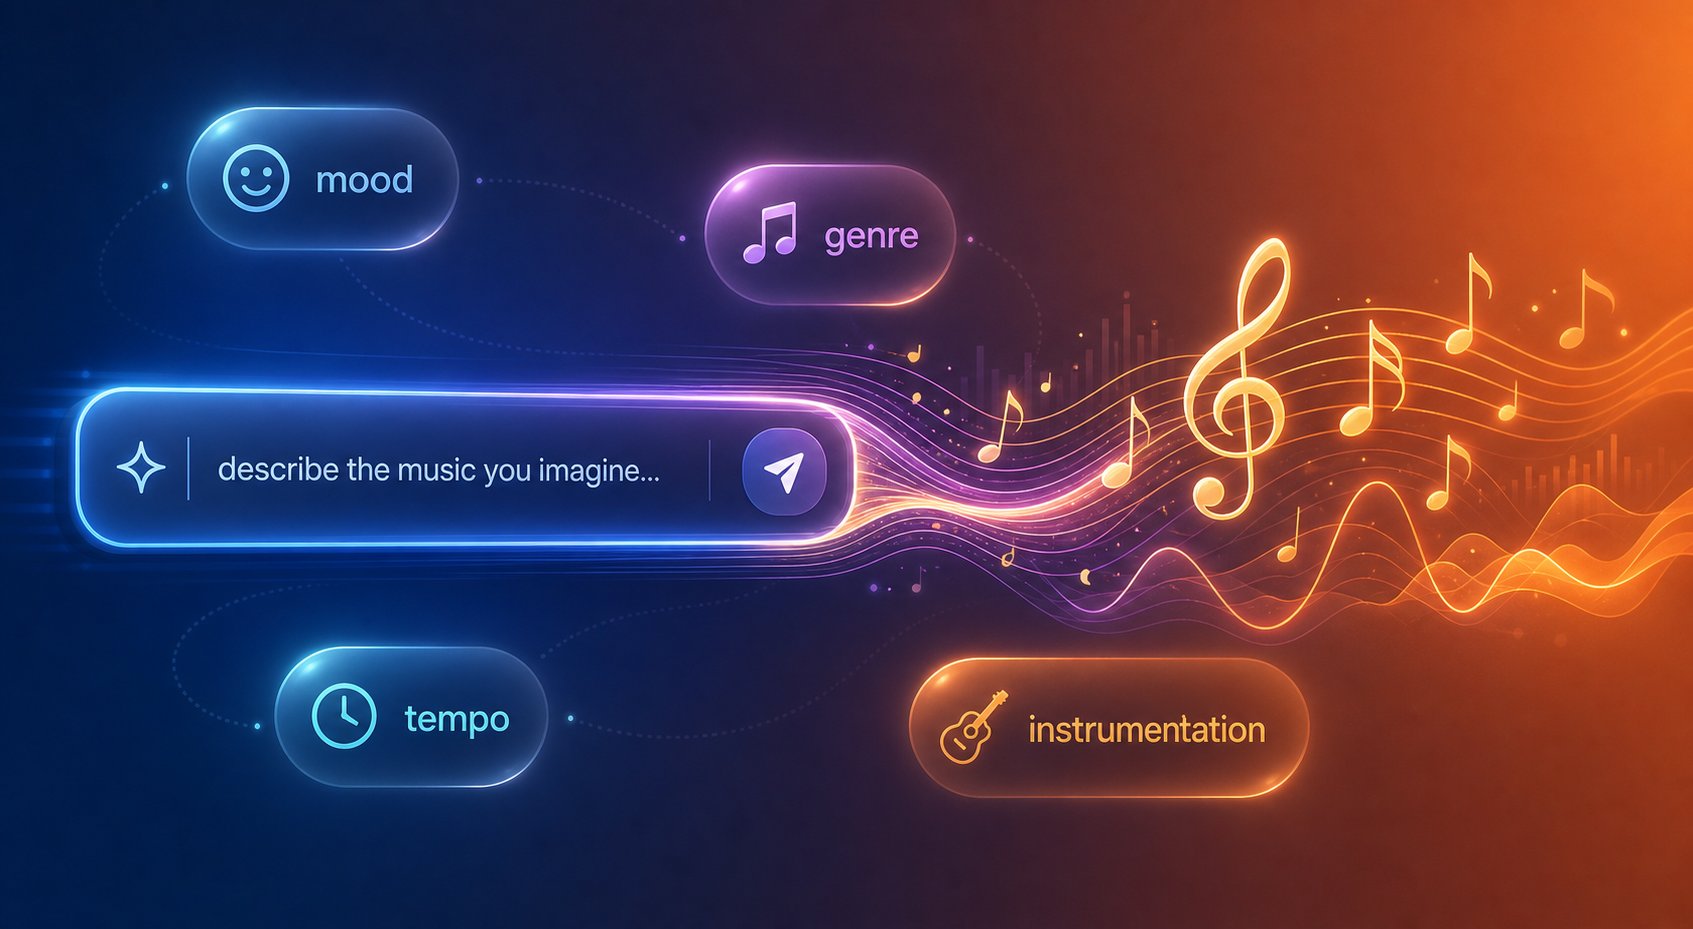
The universal formula that consistently produces reliable results follows this order:
Mood + Genre + Instrumentation + Key/Scale + Tempo/BPM + Arrangement + Production Style
Each component serves a distinct purpose in narrowing the AI's creative space:
- Mood — Sets the harmonic direction and melodic phrasing. Words like "melancholic," "uplifting," "tense," or "nostalgic" tell the model how the music should feel emotionally.
- Genre — Defines the rhythmic structure, instrumentation norms, and overall sonic identity. Place this near the beginning of your prompt since it anchors everything else.
- Instrumentation — Be specific. "Rhodes piano" produces better results than "piano." "Brushed drums" gives you a different output than "drums." The more precise you are, the less the model guesses.
- Key/Scale — Minor keys introduce tension and emotion. Major keys create brightness and resolution. Specifying "D minor" or "G major" stabilizes harmonic movement across the entire track.
- Tempo/BPM — A numerical BPM value anchors the rhythmic grid. Without it, the model estimates speed based on genre probability, which can lead to an unstable groove or unintended pacing.
- Arrangement — Structure like "16-bar verse into 8-bar chorus" or "build to drop at bar 33" tells the model how to organize sections rather than looping indefinitely.
- Production Style — Descriptors like "warm analog saturation," "clean digital mastering," or "wide stereo image" shape the final sonic character.
Here is the difference in practice. A vague prompt versus a structured one targeting the same creative idea:
Vague: "Make a chill lo-fi beat." Result: Generic drum loop, random piano, no cohesive feel.
Specific: "Melancholic lo-fi hip-hop at 78 BPM in A minor, dusty swing drums with vinyl crackle, Rhodes piano chords, warm sub bassline, 16-bar seamless loop, soft analog saturation." Result: Cohesive, genre-accurate loop ready for use.
The specific prompt uses seven distinct musical parameters. Each one eliminates a layer of randomness. The AI does not have to guess at the tempo, the key, the drum character, or the structure. You have defined the creative boundaries, and the model fills in the details within those boundaries.
Genre and Mood Descriptors That Actually Work
Not all descriptive words carry equal weight in AI music generation. Some descriptors are too abstract for the model to interpret musically, while others map directly to trained patterns and produce consistent results. Knowing which words work saves you from wasted generations.
The best prompts for ai music generation use descriptive language grounded in musical characteristics rather than purely subjective feelings. "Energetic" is useful because it maps to faster tempos and driving rhythms. "Cool" is nearly useless because it has no consistent musical interpretation.
Here are descriptor categories that reliably produce better output:
- Tempo words that work — driving, laid-back, bouncy, punchy, hypnotic, relentless. These map to specific rhythmic behaviors the model can act on.
- Mood words that work — melancholic, euphoric, tense, atmospheric, nostalgic, triumphant. Each implies distinct harmonic and melodic directions.
- Mood words to avoid — nice, cool, good, interesting, beautiful. These are subjective judgments, not musical instructions.
- Instrumentation specificity — "supersaw lead" instead of "synth," "fingerpicked acoustic guitar" instead of "guitar," "808 glide bass" instead of "bass." The adjectives before instrument names narrow the sonic palette dramatically.
One critical ai music prompt engineering tip for beginners: avoid contradictory descriptors. Combining "dark, happy, energetic, slow" in a single prompt confuses the model because these terms pull in opposing musical directions. The output becomes incoherent rather than creative. Pick a consistent emotional lane and use descriptors that reinforce each other.
You also do not need to be a music theory expert. If you do not know what key to choose, try "minor key" for emotional or dark sounds and "major key" for bright or uplifting ones. If you are unsure about BPM, use these general ranges: 70 to 90 for relaxed tracks, 90 to 120 for mid-tempo grooves, and 120 to 150 for energetic or dance-oriented music.
How to Iterate and Refine Your Prompts
Even well-structured prompts rarely produce a perfect result on the first generation. The real skill in learning how to use ai to write music is iterative refinement: listening critically, identifying what needs to change, adjusting specific descriptors, and regenerating. This mirrors how professional prompt engineers work across all AI domains, and it applies directly to music generation.
Follow this process each time you generate a track:
- Start broad with your first generation. Use the universal formula with your best guess at mood, genre, BPM, and instrumentation. Do not overthink it. The first output is diagnostic, not final.
- Listen to the output and identify one or two specific problems. Is the tempo too fast? Are the drums too aggressive? Does the melody feel aimless? Is the mood wrong? Pick the most important issue first.
- Adjust only the relevant descriptor. If the drums are too heavy, change "punchy drums" to "brushed drums" or "light percussion." If the tempo feels rushed, drop the BPM by 10 to 15. Changing one variable at a time teaches you what each descriptor actually controls.
- Regenerate and compare. Listen to the new output alongside the previous version. Did the change solve the problem without creating a new one? If yes, move to the next issue. If not, try a different descriptor for that same element.
- Document what works. When you land on a prompt that produces something you like, save it. Build a personal library of prompt templates organized by genre and mood. This library becomes increasingly valuable over time because you stop starting from scratch.
A common beginner mistake is regenerating the exact same prompt hoping for a better result. AI generation includes randomness, so you might occasionally get a better output by chance. But deliberate refinement, changing specific words based on what you heard, produces consistently better results than random rerolls.
Another mistake is changing too many variables at once. If you rewrite your entire prompt after one listen, you cannot identify which changes improved the output and which made it worse. Treat each generation like a controlled experiment: one change, one observation, then decide your next move.
Think of prompt refinement like focusing a camera lens. Each small adjustment brings the image into sharper clarity. You do not swap lenses after every shot — you make precise, incremental turns until the subject is sharp.
The ideal descriptor range for most AI music models is four to seven core elements. Fewer than four gives the model too much freedom, resulting in generic output. More than seven can dilute the signal, causing the model to struggle with conflicting or overly detailed constraints. Find the sweet spot where your prompt is specific enough to produce focused results but flexible enough to allow the AI room for creative generation within your defined boundaries.
With a solid grasp of prompt structure and refinement, the natural next step is putting this knowledge into action on a real track. Theory only takes you so far. The moment you type your first prompt into a live generator and hear what comes back, every concept from this section clicks into place.
Step 4 Create Your First Complete AI-Generated Song
You understand prompt structure. You know which descriptors map to which musical behaviors. But reading about prompts and actually typing one into a live generator are two different experiences. This is where the learning accelerates. In the next few minutes, you will go from a blank screen to a fully produced song you can listen to, evaluate, and refine. Here is exactly how to make your first ai generated song, step by step.
Creating Your First Track From a Text Prompt
For this walkthrough, we will use MakeBestMusic's AI Music Generator as the demonstration platform. Its prompt-and-style workflow mirrors the universal formula you learned in the previous section, making it a natural place to apply those skills immediately. The interface is minimal enough that you will not get lost in menus, but flexible enough to give your prompt real control over the output.
Follow this step by step ai song creation process from account to finished track:
- Create your account. Head to makebestmusic.com/app/create-music-new and sign up. The process takes under a minute. Once logged in, you land directly on the creation interface.
- Enter your prompt. Type a structured description using the formula from Step 3. For your first track, try something like: "Uplifting indie pop in G major at 112 BPM, bright acoustic guitar strumming, warm female vocals, light tambourine and snare groove, nostalgic summer vibe, verse-chorus-verse-chorus structure." This gives the AI seven clear parameters to work with.
- Select your style parameters. Choose a genre or style preset that aligns with your prompt. If the platform offers mood or instrumentation options, use them to reinforce your text description rather than contradict it. Think of these selections as a second layer of direction on top of your written prompt.
- Add lyrics if you have them. If you want vocals with specific words, paste your lyrics into the lyrics field. If you do not have lyrics yet, let the AI generate them based on your mood and theme description. Either approach produces a complete vocal track.
- Generate the track. Click create and wait. Most generations complete in under two minutes. The AI interprets your prompt, builds an arrangement, generates instrumentation and vocals, and delivers a full-length song.
- Listen to the full output without interrupting. Resist the urge to skip ahead or stop playback early. Your first listen should be passive — absorb the overall feel, the energy, the flow between sections. You are forming a gut impression before analyzing details.
- Listen a second time with critical ears. On replay, focus on specifics: Does the vocal sit clearly on top of the instruments? Do the drums maintain consistent timing? Does any section feel out of place or too repetitive? Write down two or three observations.
That is the complete loop. From typing a prompt to hearing a finished song, the entire process takes less than five minutes. The speed is part of the value — you can iterate rapidly rather than spending hours on a single version.
How to Evaluate AI Output Quality With Untrained Ears
Here is a challenge most guides ignore entirely: you are a beginner, which means your ears are not trained to catch problems that a producer would spot instantly. How do you evaluate ai music output quality when you do not yet know what "good" sounds like technically?
The answer is simpler than you think. You do not need professional ears to catch the most common issues in AI-generated music. You just need to know what to listen for. iZotope's ear training research emphasizes that focused listening with specific targets is more effective than passive hearing, even for beginners. Apply that principle here by checking for these four qualities on every generation:
- Clarity — Can you hear each element distinctly? Vocals should not be buried under instruments. Individual parts like guitar, bass, and drums should occupy their own space. If everything blends into a blurry wall of sound, the mix has clarity issues.
- Muddiness — Does the low end sound bloated or boomy? Muddiness happens when too much energy piles up in the 200-500 Hz range. If the track feels "heavy" in a way that is uncomfortable rather than intentional, that is muddiness. Compare it to a professionally released song in the same genre and notice whether the low end feels tighter on the reference.
- Clipping and distortion — Listen for harsh crackling or crunching on louder moments, especially on drum hits and vocal peaks. This is digital distortion caused by audio exceeding its maximum level. It sounds like static layered on top of the sound. If you hear it, the generation had a technical issue and you should regenerate.
- Rhythm consistency — Do the drums maintain a steady groove throughout, or do you notice moments where the timing stumbles or feels unnatural? AI-generated music occasionally produces micro-timing errors that sound like a slightly drunk drummer. Tap your foot along with the beat. If your foot wants to hesitate or stutter at any point, the rhythm has a problem.
A practical trick: play your generated track immediately after a reference song you like in the same genre. The contrast makes problems obvious. Your ears naturally notice differences in fullness, clarity, and energy when two tracks play back to back. You do not need years of training to hear that one sounds professional and the other sounds thin or muddy — you just need the direct comparison.
One more thing to listen for that beginners often overlook: transitions between sections. Does the verse flow naturally into the chorus, or does it feel like two separate pieces stitched together? AI models sometimes struggle with smooth section transitions, creating abrupt energy shifts or awkward silences. If a transition pulls you out of the music, flag it as something to address.
When to Regenerate Versus When to Refine
You have listened critically. You have notes. The track is not perfect. The question is: do you throw it away and start over, or do you keep what works and fix what does not?
This decision point is where beginners waste the most time and credits. Here is a clear framework:
Regenerate from scratch when:
- The genre or overall vibe is fundamentally wrong — you asked for lo-fi hip-hop and got EDM.
- The vocal style does not match your vision at all — wrong gender, wrong energy, wrong language.
- The song structure is incoherent — sections bleed into each other without logic or the arrangement makes no musical sense.
- There are technical artifacts like heavy clipping, extreme distortion, or audio glitches throughout the track.
Refine your prompt and regenerate when:
- The genre and mood are right, but the tempo feels too fast or slow — adjust BPM by 10-15.
- The instrumentation is close but one element is wrong — swap "electric guitar" for "acoustic guitar" in your prompt.
- The energy level is slightly off — add a descriptor like "stripped-back" or "driving" to push it in the right direction.
- Vocals are good but lyrics feel generic — paste your own lyrics instead of relying on AI-generated text.
The general rule: if you like more than 50% of what the AI produced, refine rather than regenerate. Modify one or two elements in your prompt based on your critical listening notes, then generate again. As noted in practical guides to AI music tools, the pattern experienced users settle into is keeping the take they like and surgically fixing the part that is wrong, rather than gambling a fresh generation and losing what worked.
If you like less than 50%, something fundamental about your prompt is misaligned with your intent. Go back to the prompt structure from Step 3, reconsider your genre and mood anchors, and try a meaningfully different description rather than tweaking the same broken one.
Your first publishable track will likely take three to five generations. That is normal. Each generation teaches you something about how the tool interprets your words, and that knowledge compounds with every track you make.
At this point, you have a track you are genuinely satisfied with. It sounds complete, the mix is clear, and the energy matches what you envisioned. But a raw AI export is rarely the final product. The difference between a track that sounds "pretty good" and one that sounds professional often comes down to what happens after generation: editing, mixing, and exporting with the right settings for your intended platform.
Step 5 Edit Mix and Export Your AI Music Properly
A single AI tool can produce a complete track, but professional-sounding results often come from combining outputs across multiple tools and applying basic human editing decisions. Think of AI output as raw material — a strong foundation that benefits from trimming, layering, balancing, and formatting before it reaches listeners. This is where knowing how to mix and edit ai generated music separates casual experiments from tracks you are genuinely proud to publish.
The good news: you do not need years of audio engineering experience to make meaningful improvements. Even simple edits like removing silence at the start, adjusting volume levels, and exporting in the correct format make a noticeable difference. Let us break down the full post-generation workflow.
Combining Multiple AI Tools in One Project
Most beginners stick with one platform for everything, but the real creative leverage comes from understanding how to combine multiple ai music tools in one project. Each category of tool excels at a different job, and routing outputs between them produces results no single tool achieves alone.
Here is a practical multi-tool workflow a beginner can follow:
- Generate your instrumental foundation using a text-to-song generator. Export the result as a WAV file (or use stem separation if the platform offers it) to get individual tracks for drums, bass, melody, and pads.
- Generate vocals separately using a dedicated AI vocal tool if you want more control over the singing style, phrasing, or language than your primary generator offers. Export the vocal as its own WAV file.
- Import all elements into a free DAW or editor like Audacity, GarageBand (macOS), or Cakewalk (Windows). Place each file on its own track so you can control volume, timing, and position independently.
- Trim, arrange, and layer. Cut dead silence from the beginning and end. Align the vocal to the instrumental if timing drifts. Add a fade-in or fade-out to smooth the intro and outro.
- Apply basic polish using EQ and volume adjustments (covered below), then export the final mix in the format your target platform requires.
This modular approach mirrors how professional producers work, just with AI handling the generative steps instead of live recording sessions. With recent ai music tools 2026 updates like Suno's stem extraction and Soundverse's arrangement studio, getting individual elements out of AI generators has become straightforward even on entry-level plans.
A key principle: treat each AI output as one ingredient rather than the finished dish. A beat from one tool, a melody from another, and a vocal from a third can combine into something more cohesive and distinctive than any single generation would produce on its own.
Basic Mixing and Arrangement for AI Tracks
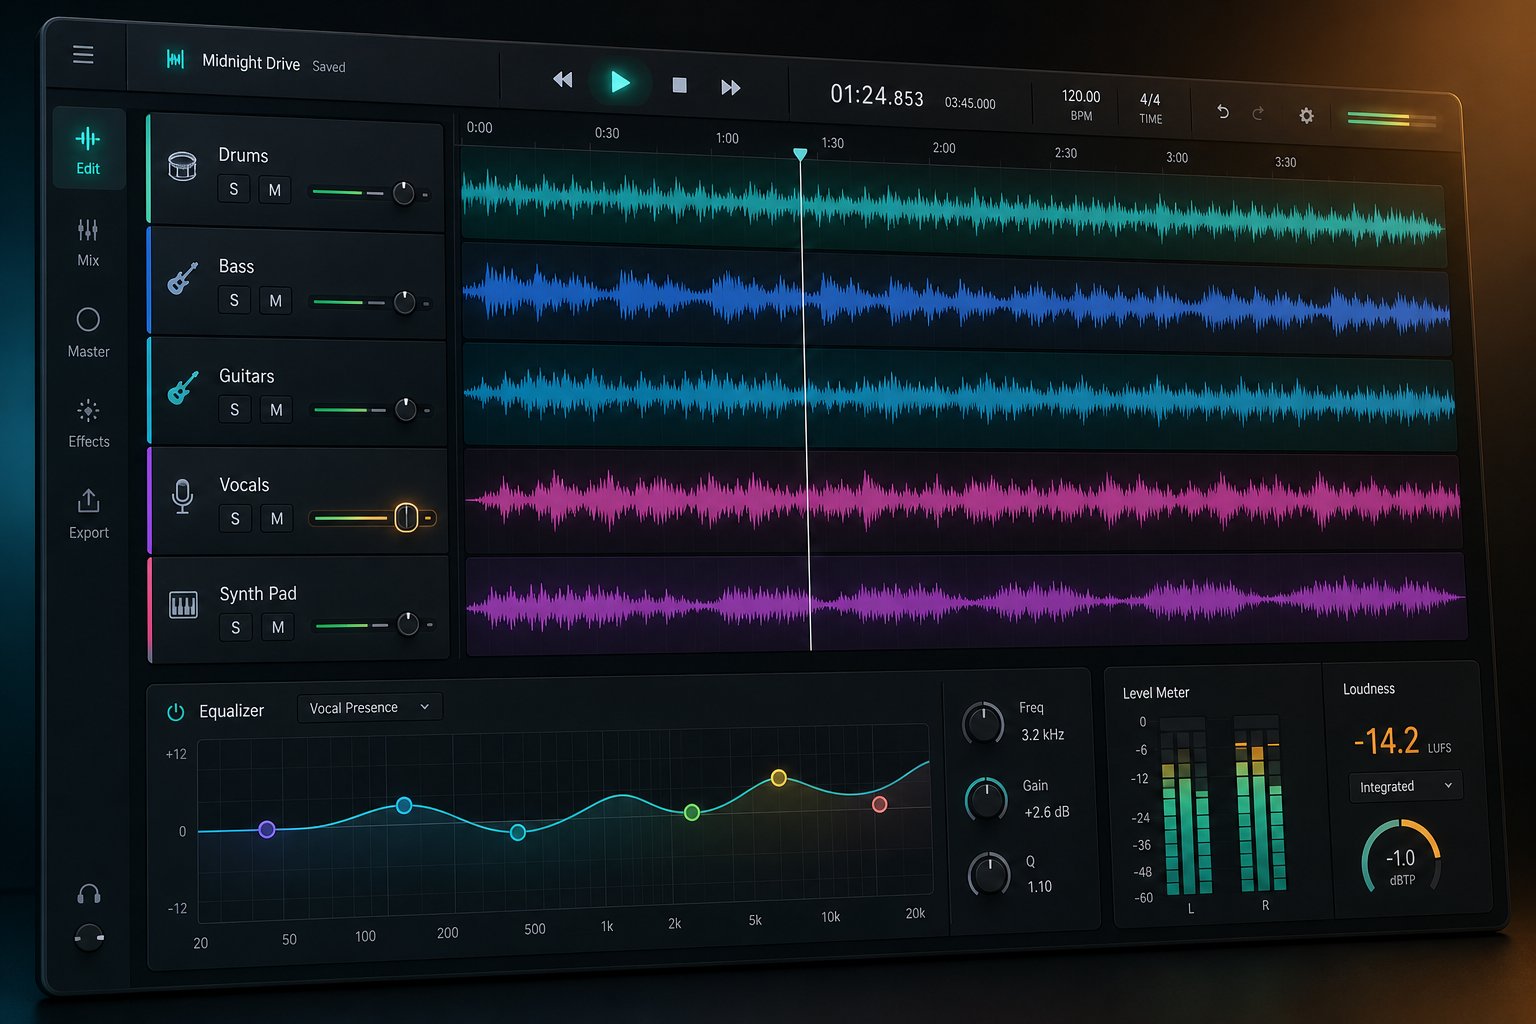
Mixing sounds intimidating, but at the beginner level it comes down to three controls: volume, panning, and EQ. Master these three and your AI tracks will immediately sound more polished and intentional.
- Volume balancing — This is the most impactful adjustment you can make. If the vocal is buried under a loud instrumental, pulling the instrumental down by 3 to 6 dB solves the problem instantly. The goal is for every element to be audible without any single part dominating unnaturally. Start with vocals or the main melody at the loudest level, then bring supporting elements in below them.
- Panning — Panning moves a sound left or right in the stereo field. If all your elements sit dead center, the mix feels narrow and crowded. Try panning rhythm guitars slightly left and right (around 30% each direction), keeping bass and vocals centered, and spreading pads or atmospheric elements wider. This creates space and depth without requiring advanced techniques.
- EQ (equalization) — EQ lets you boost or cut specific frequency ranges. For beginners, the most useful move is a high-pass filter on everything except bass and kick drum. Set it around 80 to 100 Hz and it removes low-end rumble that causes muddiness. If vocals sound muffled, try a gentle boost around 3 to 5 kHz to add presence and clarity. You do not need surgical precision here — broad, simple adjustments make a real difference.
One arrangement decision that dramatically improves AI tracks: do not let every instrument play constantly from start to finish. AI generators tend to produce dense arrangements where everything plays at all times. Muting the drums during a verse intro, dropping the bass out before a chorus hits, or leaving just vocals and piano for four bars creates dynamic contrast that holds a listener's attention. You can do this in any editor by simply cutting or muting sections of individual tracks.
Export Settings for Different Platforms
You have mixed your track, it sounds balanced and clear, and you are ready to share it. This is where knowing the best export settings for ai music streaming platforms prevents your work from being rejected by distributors or sounding worse than it should on playback.
Each platform has specific technical requirements. Upload a file that does not meet them and you will either get an error message or your audio will be automatically re-encoded — often at lower quality than if you had exported correctly in the first place.
| Platform | Format | Sample Rate | Bit Depth | Bitrate (if lossy) | Notes |
|---|---|---|---|---|---|
| Spotify (via distributor) | WAV or FLAC | 44.1 kHz | 16-bit or 24-bit | N/A (lossless upload) | Spotify transcodes to OGG Vorbis internally; upload the highest quality source |
| Apple Music (via distributor) | WAV or AIFF | 44.1 kHz or higher | 24-bit preferred | N/A | Supports Spatial Audio; standard stereo at 24-bit is ideal |
| YouTube | WAV or FLAC | 48 kHz | 16-bit or 24-bit | N/A | 48 kHz matches YouTube's video standard; avoids sample rate conversion |
| Instagram / TikTok | MP3 or AAC | 44.1 kHz | N/A | 256-320 kbps | Platforms compress heavily; 320 kbps MP3 preserves quality through re-encoding |
| SoundCloud | WAV or FLAC | 44.1 kHz | 16-bit or 24-bit | N/A | SoundCloud transcodes to 128 kbps for free listeners; lossless upload gives the best source |
| Podcast hosting | MP3 | 44.1 kHz | N/A | 128-192 kbps | Mono at 128 kbps is standard for spoken word; stereo music intros at 192 kbps |
The universal rule: always export your master file as a lossless format first (WAV at 44.1 kHz, 24-bit). Keep this as your archive copy. Then create platform-specific versions from that master as needed. Converting an MP3 back to WAV does not recover lost quality, so starting lossless protects you from irreversible degradation.
If you are uploading to streaming services through a distributor like DistroKid, TuneCore, or Amuse, they typically require WAV or FLAC at 44.1 kHz minimum. Some accept 48 kHz or higher, but 44.1 kHz at 16-bit is the safe universal standard that every distributor and platform will accept without conversion issues.
For social media posts where file size matters, export a separate MP3 at 320 kbps. The quality difference between 320 kbps MP3 and lossless WAV is nearly inaudible on phone speakers and earbuds, and the file size drops by roughly 80%. Use your lossless master for professional distribution and your MP3 for quick sharing.
One detail worth noting about loudness: streaming platforms normalize volume to a target level (Spotify uses -14 LUFS, YouTube uses -13 to -15 LUFS). If your track is significantly louder or quieter than that target, the platform adjusts playback volume automatically. For beginners, this means you do not need to crush your mix with heavy limiting to compete on loudness. Export at a natural, dynamic level and let the platform handle normalization. Overly loud masters with no dynamic range actually sound worse after normalization, not better.
With a properly mixed and correctly exported track in hand, you have something ready to share with the world. But before you upload anywhere, one critical question needs answering: what are you actually allowed to do with this music? The legal landscape around AI-generated audio is unlike anything most creators have encountered before, and misunderstanding it can mean pulled tracks, lost revenue, or worse.
Step 6 Understand Copyright and Licensing Before You Publish
You have a polished, properly exported track sitting on your hard drive. The instinct is to upload it everywhere immediately. But here is the question that trips up nearly every beginner in AI music: can you sell ai generated music legally? The short answer is yes, but the longer answer involves understanding the difference between copyright ownership and commercial licensing, because in AI music, those two things are not the same.
Traditional music has a straightforward ownership model. You write a song, you own the copyright automatically, you control how it gets used. AI-generated music breaks that model in ways the legal system is still working through. Grasping the basics now protects you from publishing something you cannot monetize, or worse, having tracks pulled from platforms after they have already gained traction.
Who Owns AI-Generated Music and What Rights You Have
The ai music copyright and ownership rules for beginners come down to one foundational principle: most jurisdictions require human authorship for copyright protection. Pure AI output, where you type a prompt and the model generates everything without substantial human creative input, generally does not qualify for copyright registration in the United States, the European Union, or most other major markets.
The US Copyright Office's current position breaks AI music into three categories:
- Pure AI generation — Not copyrightable. No human author can be identified, and the work may effectively enter the public domain.
- AI-assisted creation — May be copyrightable if you can demonstrate substantial human creativity. Writing original lyrics, performing extensive editing, arranging sections, and making deliberate production choices all strengthen your claim.
- Human-AI collaboration — Likely copyrightable when clear human authorship exists and AI functions as a tool rather than the author. Traditional copyright applies.
What does this mean practically? If you generate a track with zero modifications, you probably cannot register a copyright on it. But if you write original lyrics, rearrange the structure, mix it in a DAW, layer in your own recordings, or make significant creative decisions throughout the process, your contributions may be protectable. The more human creativity you add, the stronger your position.
Here is the critical nuance most beginners miss: copyright and commercial rights are separate concepts. You do not need copyright ownership to sell, distribute, or monetize AI music. Your ability to use a track commercially comes from your AI tool's license agreement, not from copyright law. This distinction is fundamental.
Platform Terms of Service You Must Understand
Every AI music tool grants different rights depending on your subscription tier. What you can legally do with your generated tracks depends entirely on which plan you were subscribed to when you created them. Free tiers almost universally restrict commercial use, while paid plans grant commercial licensing rights.
The differences between platforms are significant:
- Suno Free — Personal use only. You cannot distribute, monetize, or sell tracks created on the free tier, even if you later upgrade. Attribution to Suno is required.
- Suno Pro ($10/month) — Full commercial rights granted. No attribution required. You can distribute to streaming platforms, sell directly, and monetize in videos.
- AIVA Free/Standard — AIVA retains copyright ownership. Limited or no monetization rights. Attribution required.
- AIVA Pro (49 euros/month) — Claims to transfer actual copyright ownership to you, making it unique among AI music tools.
One rule applies across all platforms: songs created on a free tier cannot be retroactively commercialized by upgrading later. If you plan to monetize a track, create it while actively subscribed to a paid plan. Songs created during an active paid subscription retain their commercial rights permanently, even if you cancel afterward.
Beyond your AI tool's terms, streaming platforms and distributors add another layer. Distributors like LANDR and DistroKid require you to certify you hold distribution rights for every track you upload. Your paid AI tool subscription serves as that certification. Some distributors also set limits on fully AI-generated releases to prevent spam, and platforms like Spotify and Deezer are beginning to label AI-generated content separately.
Monetization channels like YouTube Content ID, TikTok, and Meta require strict originality standards. Your distributor may restrict AI-generated music from these specific channels even when broader streaming distribution is allowed. Always verify your distributor's AI-specific policies before assuming a track can go everywhere.
Safe Ways to Monetize Your AI Music
Understanding how to monetize ai generated music on streaming platforms starts with knowing which use cases are clearly permitted under current licensing structures. Here are the most common monetization paths and their typical requirements:
- Streaming on Spotify, Apple Music, and YouTube Music — Requires a paid AI tool subscription (commercial rights) and a distribution service. No copyright registration needed. Your license from the AI tool is sufficient.
- YouTube background music — Permitted with commercial rights from your AI tool. Monetize through ads on your own videos. Avoid Content ID registration unless your distributor explicitly supports AI content in their fingerprinting system.
- Podcast intros and background scoring — Straightforward commercial use covered by most paid AI tool plans. No additional licensing needed for your own podcast.
- Selling beats or tracks directly — Permitted with commercial rights. Sell on Bandcamp, Gumroad, or your own site. Disclose AI generation if required by the platform or your market.
- Sync licensing for film, ads, and video — More complex. Most paid AI tool plans include sync rights, but some libraries and production companies require copyright documentation you may not be able to provide for pure AI output. Adding substantial human creativity strengthens your position here.
There are also clear boundaries you should not cross. Do not claim false human authorship. Do not use free-tier output for commercial purposes. Do not replicate recognizable artist voices or styles in ways that constitute impersonation. And do not assume copyright protection exists when you have not added meaningful human creative contribution.
Always read the specific terms of service for any AI tool before commercial use. Terms vary between platforms, change over time, and differ based on your subscription tier. Your rights are defined by contract, not assumption.
Documentation matters more than most beginners realize. Keep records of your subscription dates, which tracks were created on which tier, payment receipts, and any human modifications you made to AI output. If a distributor or platform ever questions your rights, this paper trail is your proof. Save your prompts, iteration history, and editing decisions as evidence of your creative process.
The legal landscape around AI music is actively evolving, with multiple jurisdictions developing new frameworks and court cases establishing precedents. What works today may shift as clearer regulations emerge. The safest long-term strategy is to use AI as a creative tool rather than a fully autonomous creator, add genuine human contributions to every track you plan to monetize, and stay informed as policies update.
With the legal foundation clear, the final piece of the puzzle is getting your music from a finished file on your computer to a live track on streaming platforms where listeners can find it. Distribution is its own process with specific requirements, timelines, and costs that most beginner guides never cover.
Step 7 Distribute Your AI Music and Build a Learning Routine
Your track is mixed, exported correctly, and legally cleared for commercial use. It exists as a WAV file on your hard drive. The gap between that file and a live song on Spotify, Apple Music, or YouTube Music is smaller than most people expect, but it involves specific steps that no amount of creative talent can skip. Knowing how to distribute ai generated music on spotify requires understanding metadata, artwork specs, distribution services, and realistic timelines. Let us walk through the full pipeline.
Getting Your Track From Export to Streaming Platforms
Streaming platforms do not accept direct uploads from independent artists. You cannot drag a WAV file into Spotify and hit publish. Instead, every independent release passes through a digital distribution service that acts as the middleman between you and 150+ streaming platforms worldwide. The distributor handles delivery, metadata formatting, royalty collection, and platform compliance on your behalf.
Before you upload to any distributor, you need three things prepared:
- Audio file — WAV or FLAC at 44.1 kHz, 16-bit minimum (24-bit preferred). This is the lossless master you exported in Step 5. Most distributors reject MP3 uploads.
- Cover artwork — A square image at 3000x3000 pixels in JPG or PNG format. No blurry photos, no text smaller than readable at thumbnail size, and no copyrighted imagery. This is what listeners see on every platform, so it matters more than beginners expect.
- Complete metadata — Song title, artist name, genre tags, release date, songwriter credits, and language. ISRC codes (International Standard Recording Codes) identify each individual track, and UPC codes identify the release as a whole. Many distributors generate these automatically during upload, so you do not need to purchase them separately.
Timeline expectations are important here. The typical window from upload to live release runs 3 to 4 weeks. That breaks down into 1 to 7 days for distributor processing and review, then 2 to 5 additional days for platforms like Spotify and Apple Music to make your track live. The extra lead time exists because playlist pitching, which can dramatically boost your first-week numbers, needs to happen before your release date. Rushing the timeline cuts off that opportunity entirely.
One practical tip: choose a Friday release date. Platform algorithms and editorial teams focus attention on Friday releases, and most major label drops happen that day. Aligning with this rhythm gives your track the best chance of appearing in algorithmic recommendations alongside fresh content.
Distribution Services and What They Cost
The ai music distribution for beginners step by step process starts with picking the right service. Distributors vary in pricing model, royalty splits, delivery speed, and included features. For someone publishing their first AI-generated track, the decision comes down to how often you plan to release and how much you want to spend upfront.
Here are the primary options based on current 2026 pricing:
- DistroKid — From $22.99 per year for unlimited uploads. Keeps 0% of streaming royalties. Delivery to Spotify in roughly 2 to 5 days after review. Best for prolific creators releasing multiple tracks per month. Some features like YouTube Content ID carry a 20% commission.
- TuneCore — $14.99 per year for one artist with unlimited uploads. Keeps 0% on the Standard plan. Delivery to Spotify in 2 to 5 business days after approval. Includes track splits and Spotify Discovery Mode at no extra cost.
- CD Baby — $9.99 per single as a one-time payment (no annual renewal). Takes 9% of streaming revenue. Delivery varies from 2 to 4 weeks. Better for artists who release infrequently and prefer paying per project.
- Amuse — Starts at $23.99 per year for one artist. Keeps 0% of royalties. Delivery times are slower and customer support is more limited, but it works for beginners testing the waters with minimal investment.
For your first release, DistroKid or TuneCore offer the best balance of low cost, fast delivery, and zero commission on streams. If you plan to release only one or two tracks total, CD Baby's one-time fee avoids ongoing costs. All of these services distribute worldwide by default, placing your track on Spotify, Apple Music, Amazon Music, YouTube Music, TikTok, Deezer, and dozens of regional platforms simultaneously.
After upload, claim your Spotify for Artists profile as soon as your track goes live. This unlocks analytics showing listener demographics, save rates, and playlist placements. Verification takes 1 to 3 business days and gives you control over your artist page appearance, bio, and upcoming release promotions.
Revenue expectations should be realistic. Independent artists typically earn around $0.004 per Spotify stream, meaning roughly 250,000 streams generate about $1,000. Your first track will not hit those numbers immediately, and that is fine. The goal of your first release is completing the full pipeline, learning the process, and having a live track you can point people toward.
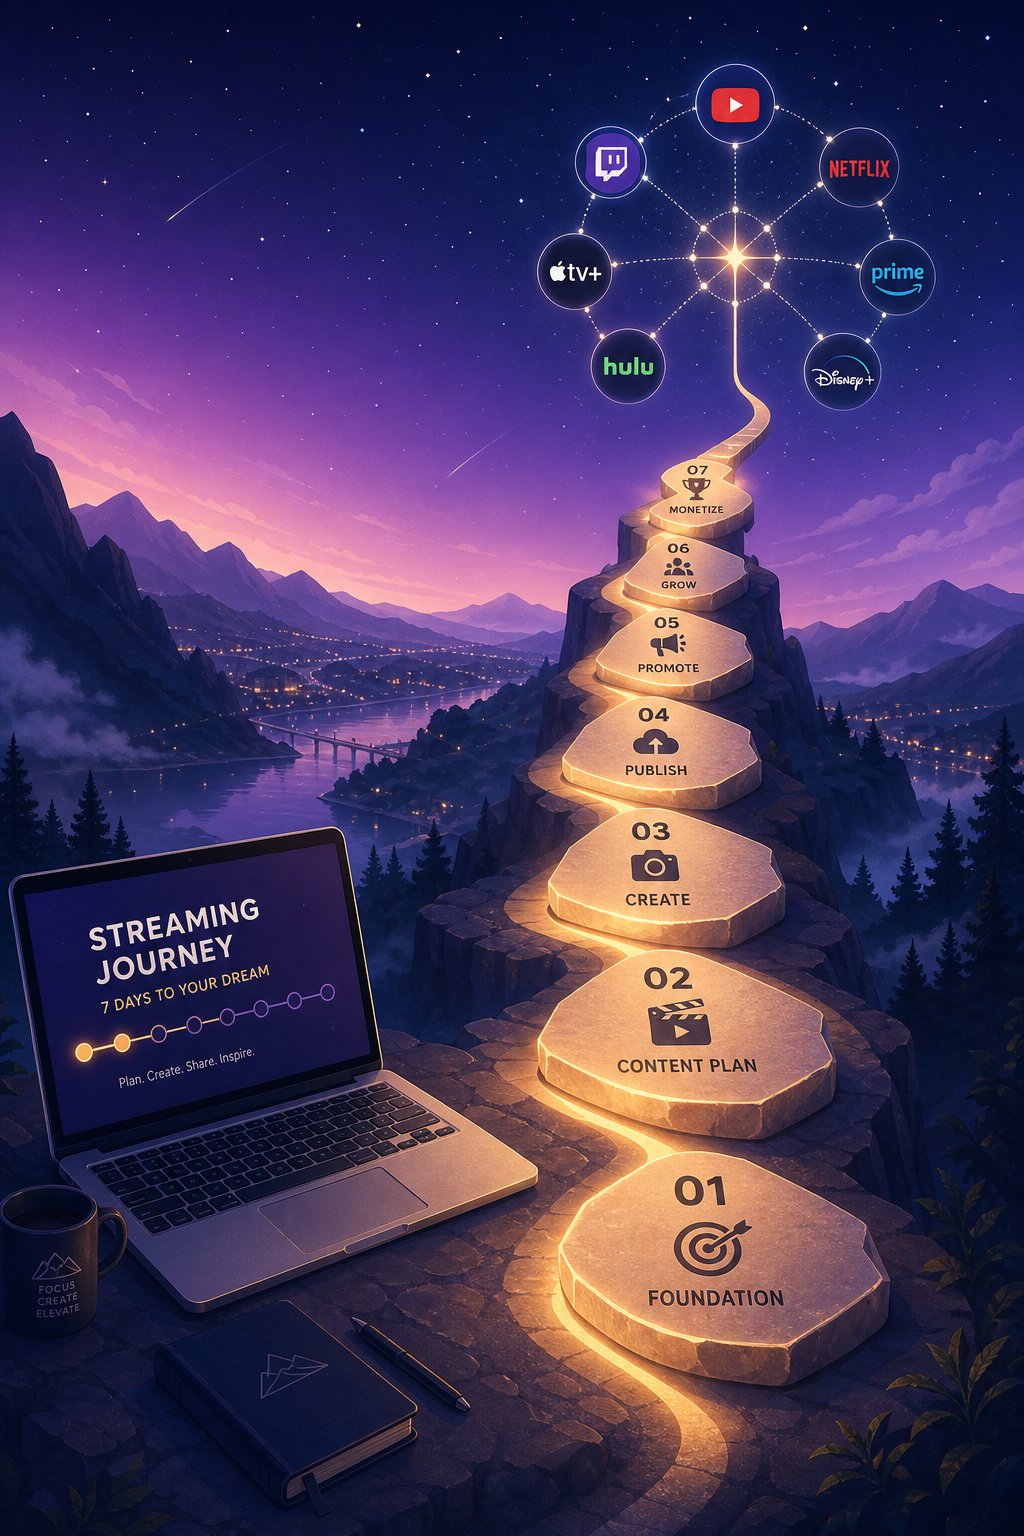
Your 7-Day Beginner Curriculum From Zero to Published
Everything in this guide, from workspace setup to distribution, can feel overwhelming when viewed as a single block. Breaking it into a structured 7 day ai music production learning plan for beginners makes the journey manageable. Each day has a specific objective and a clear deliverable so you never wonder what to do next.
- Day 1: Set up your workspace. Install Audacity and a modern browser. Test your internet speed. Bookmark two or three AI music tools you want to try. Create free accounts on each one. Deliverable: a ready-to-use workspace with all accounts created.
- Day 2: Learn prompt fundamentals. Read through the prompt engineering principles from Step 3. Write five different prompts using the Mood + Genre + Instrumentation + Tempo formula. Generate one track from each prompt using a free tier. Do not judge quality yet — just observe how different prompts produce different outputs. Deliverable: five generated tracks and notes on what each prompt produced.
- Day 3: Refine and iterate. Pick the best generation from Day 2. Listen critically using the four-point evaluation framework (clarity, muddiness, clipping, rhythm). Rewrite your prompt based on what you want to change. Generate three refined versions. Compare them. Deliverable: one track you are satisfied with musically.
- Day 4: Edit and mix. Import your best track into Audacity. Trim silence from the beginning and end. Normalize volume. Apply a fade-out to the last four seconds. If you have stems, practice basic volume balancing between elements. Export as WAV at 44.1 kHz, 24-bit. Deliverable: a polished, properly exported audio file.
- Day 5: Prepare release assets. Create or commission your 3000x3000 pixel cover art (Canva works for simple designs). Write your song title, artist name, and genre tags. Decide on a release date at least three weeks out. Research which distributor fits your budget. Deliverable: all metadata and artwork ready for upload.
- Day 6: Upload and schedule. Sign up for your chosen distributor. Upload your WAV file, attach your artwork, enter all metadata fields, and set your release date. Select worldwide distribution. Review everything for typos in your artist name and song title — these are difficult to correct after delivery. Deliverable: a scheduled release confirmed by your distributor.
- Day 7: Plan your promotion and next steps. Create a short TikTok or Instagram clip using a 15-second hook from your track. Draft a post announcing your upcoming release. Set a calendar reminder to claim your Spotify for Artists profile once the track goes live. Start writing prompts for your second track. Deliverable: promotional content ready to post on release day, and a prompt draft for track number two.
By the end of this seven-day arc, you will have gone from zero knowledge to a track scheduled for release on streaming platforms worldwide. That is the complete Day 1 to Done journey. Every step after this is iteration: better prompts, more refined mixing, smarter promotion, and a growing catalog of published work.
The producers who build real momentum treat this first track not as a finished achievement but as proof of concept. You now know the full pipeline. The second track takes half the time because you are not learning the tools anymore — you are using them. The third takes even less. Within a month of consistent practice, generating, editing, and distributing a track becomes a repeatable process rather than an overwhelming project.
Start today. Open your AI tool, type your first prompt, and let the curriculum carry you forward one day at a time.
