


Why AI Changes Everything for Indie Game Creators
You have a game idea burning in your head, but your team is just you, maybe one or two friends, and a shoestring budget. Hiring a concept artist, a sprite animator, and a composer? That could eat through months of savings before you ship a single build. This is the exact situation where artificial intelligence in gaming becomes a genuine force multiplier rather than a buzzword.
The numbers back this up. The 2026 State of the Game Industry report found that 36 percent of game industry professionals now use generative AI tools as part of their work. Meanwhile, the 2025 Unity Gaming Report paints an even broader picture: 96 percent of surveyed studios use AI tools in select workflows, and 45 percent see efficiency tools as a primary strategy for success. Small teams in particular are staying lean, doing more with less, and leaning on new technology to close the gap between ambition and resources.
This guide covers a complete pipeline for using AI to produce both visual art and music for your game, integrated into one unified workflow. You will not find separate tutorials stitched together here. Instead, every step connects, from generating your first piece of concept art to exporting a loopable soundtrack and importing both into your engine of choice.
Who This Guide Is For
If any of these describe you, you are in the right place:
- Solo developers building a game nights and weekends
- Small indie teams (2-5 people) without a dedicated artist or composer
- Hobbyists and game jam participants who want polished assets fast
- Students learning game development who need production-quality art and audio on a zero budget
You do not need to be an artist or musician. You do need a clear game concept, a basic understanding of at least one game engine (Unity, Godot, Unreal), and a willingness to iterate. Artificial intelligence in games works best when you guide it with intent rather than hoping for magic on the first try.
What You Will Build by the End
By the final step of this guide, you will have produced and integrated these deliverables:
- Concept art that defines your game's visual identity
- Game-ready sprites, textures, or tilesets formatted for your target engine
- A loopable soundtrack with multiple tracks suited to different game states
- All assets imported, configured, and running inside your game engine
Before you start, make sure you have these prerequisites ready:
- A defined game concept (genre, art style direction, mood)
- A game engine installed (Unity, Godot, or Unreal Engine)
- A budget range from free to moderate ($0-$50/month covers most AI tool subscriptions)
- An image editor for touch-ups (Aseprite, Krita, or Photoshop)
- An audio editor for trimming loops (Audacity works fine)
The real question is not whether artificial intelligence in gaming can produce usable assets. It can. The real question is which tools fit your project, how to prompt them effectively, and how to refine raw outputs into something that feels cohesive and intentional. That starts with choosing the right toolkit for your specific game.
Step 1: Choose the Best AI Toolkit for Game Art and Music
Picking tools before you understand the tradeoffs is how you end up fighting your software instead of making a game. Every AI generator has a personality: some excel at painterly concept art, others spit out pixel-perfect sprites, and a few handle music loops better than full compositions. Your job is to match the tool to your game's genre, your budget, and the specific asset types you need most.
AI Art Tool Comparison for Game Developers
When searching for the best AI for game development on the visual side, you will encounter five major options. Each one fills a different niche. Here is how they stack up for common game art tasks:
| Tool Name | Best For | Output Types | Pricing Tier | Commercial License |
|---|---|---|---|---|
| Midjourney | Concept art, mood boards, art direction | PNG images (up to 2048px) | $10-$120/month | Yes (paid plans only) |
| Stable Diffusion | Pixel art, custom styles via LoRA, pipeline control | PNG/JPEG, any resolution | Free locally; cloud APIs from ~$0.002/image | Varies by model (CreativeML Open RAIL) |
| DALL-E 3 | Quick references, UI mockups, accurate layouts | PNG images | $20/month (ChatGPT Plus) | Yes (paid plan) |
| Leonardo AI | Game-specific assets, rapid iteration, textures | PNG images, texture maps | Free tier (150 daily tokens); Pro from $12/month | Yes (paid plans) |
| Adobe Firefly | IP-safe commercial production, texture extension | PNG/PSD via Photoshop integration | $10-$55/month | Yes with IP indemnification |
Genre matters here. Building a pixel art indie game? Stable Diffusion with community-trained LoRA models gives you maximum customization and style control that no closed platform can match. Working on a 3D game that needs seamless textures? Leonardo AI's game-focused models and Real-Time Canvas let you iterate fast without technical setup. Shipping a mobile casual title where speed trumps fidelity? Leonardo's generous free tier and quick turnaround fit that pace. And if you are a studio worried about legal exposure in your adobe gaming workflow, Firefly's IP indemnification is the only option that offers genuine legal protection for commercial releases.
A practical note on free tiers: Midjourney has no free option. Stable Diffusion is completely free if you run it locally, but that requires a GPU with at least 12GB VRAM. Leonardo's free tokens run out fast during heavy asset sprints. Plan accordingly.
AI Music Tool Comparison for Game Audio
The best game development AI for audio depends on whether you need full compositions, loopable background tracks, or layered stems for adaptive gameplay. Here is what each music tool brings to the table:
| Tool Name | Best For | Output Formats | Pricing | Commercial Rights |
|---|---|---|---|---|
| Suno | Full songs with vocals, thematic tracks | MP3, WAV | $10/month (Pro) | Yes (paid tiers only) |
| AIVA | Orchestral scores, classical compositions | MP3, WAV, MIDI | Free (non-commercial); Pro for full rights | Yes (Pro tier, full copyright ownership) |
| Soundraw | Customizable loops, background music | MP3, WAV | $19.99/month | Yes (royalty-free, paid plan) |
| Mubert | Ambient textures, generative soundscapes | MP3, WAV | Varies by plan | Yes (paid tiers) |
Suno is the current frontrunner if you want complete tracks with AI vocals, useful for title screens or narrative moments. AIVA shines for orchestral and cinematic scores, though it demands some music theory knowledge to guide effectively. Soundraw takes a parameter-driven approach instead of text prompts, letting you adjust BPM, mood, and instrumentation directly, which makes it ideal for background loops where precision matters more than creativity. Mubert generates continuous ambient audio that works well for exploration and menu screens.
One critical warning: free tiers on nearly every music platform restrict commercial use. Suno's Basic plan does not grant commercial rights, AIVA's free outputs are owned by AIVA, and Mubert's free tier is personal-use only. If you plan to ship your game commercially, budget for at least one paid music subscription from the start.
Most developers working as an ai gamemaker will not rely on a single tool. The practical stack looks something like Midjourney or Leonardo for visual exploration, Stable Diffusion for controlled batch generation, and Suno or AIVA for audio. Pick one art tool and one music tool to start, learn them well, then expand as your project demands it.
Choosing the toolkit is the easy part. The harder skill, and the one that separates generic AI output from assets that actually feel like your game, is knowing how to talk to these tools effectively.
Step 2: Master Prompt Engineering for Game Assets
Most AI art generators produce impressive images out of the box, but impressive and game-ready are two very different things. A beautiful landscape painting is not a tileable texture. A cool character portrait is not a sprite sheet. The difference between generic output and something you can actually drop into your engine comes down to how you structure your prompts. Artificial intelligence game design depends less on which tool you pick and more on what you tell it to make.
Think of prompt engineering as writing a creative brief for the world's fastest artist. The more specific your technical requirements, the less cleanup you will do later. Here is a repeatable formula you can apply to any AI image tool:
- Define the art style (pixel art, cel-shaded, hand-painted, photorealistic)
- Describe the subject clearly (character, tileset, environment, prop)
- Specify pose, action, or composition (front-facing, T-pose, side-view running cycle, top-down)
- Add technical specs (resolution, transparent background, sprite sheet layout, seamless tiling)
- Include negative prompts to exclude unwanted elements (blurry, text, watermark, extra limbs)
Each asset category needs its own approach. A prompt that works for concept art will fail for sprites, and texture prompts require parameters that character prompts never touch.
Prompts for Sprites and Character Sheets
Sprites demand precision that concept art does not. You need consistent proportions across every frame, a transparent background for engine import, and specific dimensions that align with your game's pixel grid. When generating an ai game image for character sprites, your prompt should lock down these variables explicitly.
The template structure looks like this: [art style] + [subject with details] + [pose/action] + [technical specs] + [negative prompts]. For character sheets with multiple poses, specify the layout format directly. Scenario's sprite generation workflow demonstrates that models like GPT Image 2 and Gemini understand sprite sheet layouts natively when you prompt them with frame counts and grid arrangements.
Here is a complete example prompt for a pixel art character sprite sheet:
Pixel art sprite sheet, 32x32 resolution, fantasy rogue character with dark cloak and daggers, 8 frames in a single horizontal row showing a walk cycle, side view, consistent proportions across all frames, transparent background, NES-era color palette limited to 16 colors, clean pixel edges. Negative prompt: blurry, anti-aliased, 3D render, text, watermark, extra limbs, inconsistent sizing between frames.
Notice how every technical constraint is spelled out. The resolution, frame count, layout direction, perspective, and color limitations are all explicit. Leaving any of these to chance means more manual cleanup afterward.
Prompts for Tilesets and Textures
Tileable textures have one non-negotiable requirement: the edges must wrap seamlessly. If you do not specify this in your prompt, the AI will generate a beautiful image with obvious borders that break immersion the moment you repeat it across a floor or wall.
For texture generation in Stable Diffusion, enabling the tiling parameter is critical. As one developer's PBR texture workflow demonstrates, the tiling checkbox fundamentally changes how the model generates edge pixels, ensuring left-right and top-bottom continuity. A strong texture prompt looks something like: "top-down image of rough solid flat dark slate rock, interspersed with bright flecks of glinting metallic spots, seamless tileable texture, high quality photograph, detailed, realistic." The negative prompt is equally important here: "blurry, cracks, distinct shadows, round objects, non-tileable edges."
Maintaining stylistic consistency across a full tileset requires generating variations rather than entirely new images. Find a texture you like, lock the seed, and use a small variation strength (0.1 to 0.3) to produce siblings that share the same visual DNA but differ in detail. This gives you a grass tile, a dirt tile, and a stone tile that all feel like they belong in the same world.
Prompts for Concept Art and Environments
Concept art prompts shift focus from technical specs to mood, composition, and narrative. Here you are building the visual identity of your game world, so ai concept art for games benefits from cinematic language: describe lighting direction, time of day, atmospheric conditions, and emotional tone.
Imagine you are building a post-apocalyptic platformer. Instead of prompting "ruined city," try: "Wide establishing shot of an overgrown abandoned subway station, morning light filtering through cracked ceiling tiles, volumetric god rays, moss covering turnstiles, concept art style, muted greens and warm amber highlights, environmental storytelling." The composition keywords (wide shot, establishing) tell the model how to frame the scene. The lighting direction (morning, from above) creates consistent shadows you can reference across multiple environment pieces.
Chaining prompts is how you build a cohesive world. Generate your first environment, lock the seed, then modify only the subject while keeping style descriptors identical. Swap "subway station" for "rooftop garden" or "flooded parking garage" and you will get locations that share the same palette and mood. This seed-locking technique, where the same numerical seed plus the same prompt produces nearly identical results every time, is the single most underused feature in AI art workflows for games. It transforms random generation into controlled iteration where each output builds on what already works.
The gap between a raw AI output and a production-ready game asset is rarely zero, though. Even the best prompts produce results that need refinement, which is where iterative generation techniques like img2img and inpainting come in.
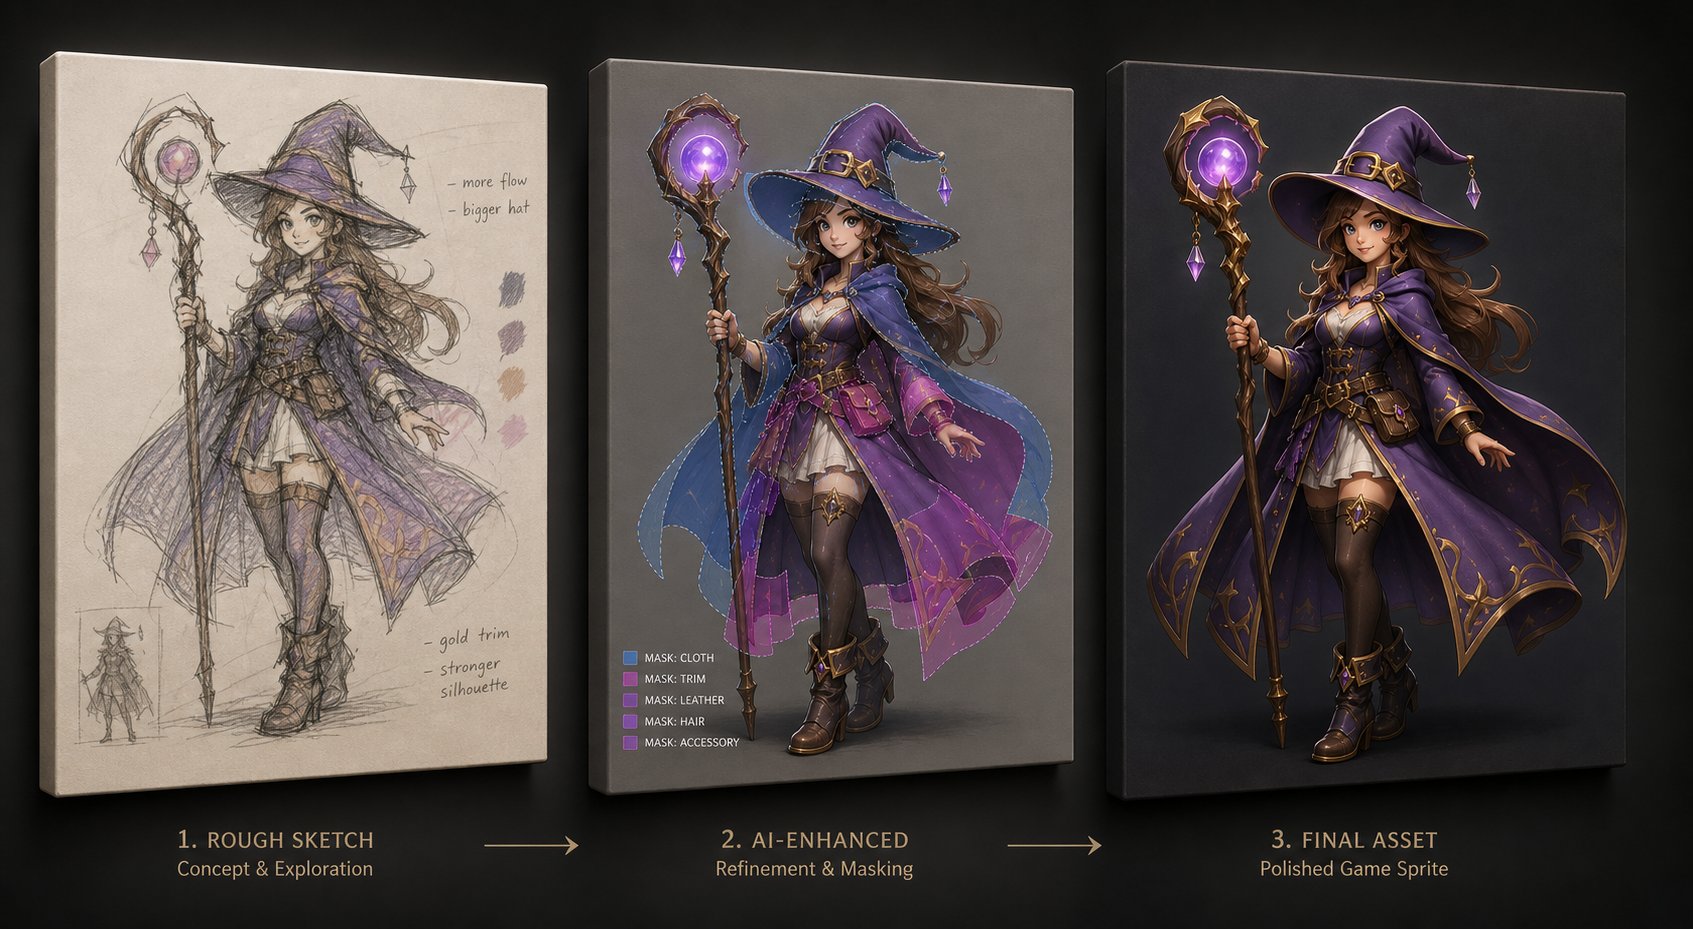
Step 3: Generate and Iterate Until Your AI Game Art Is Right
A single generation rarely produces a finished asset. Even with a perfect prompt, you will get results that are 70 to 90 percent there: the pose is right but the hand has six fingers, the tileset is gorgeous but one edge refuses to wrap cleanly, or the color palette drifts between batch outputs. This is normal. The real workflow for ai generated game art is not generate-and-done. It is generate, evaluate, refine, repeat.
Three techniques turn raw AI output into polished game assets: img2img for style refinement, inpainting for surgical fixes, and knowing when to open an editor and finish by hand.
Use Img2Img to Refine Rough Sketches
Img2img lets you feed an existing image back into the AI as a structural guide. Instead of starting from a text prompt alone, you provide a rough sketch, a programmer-art placeholder, or even a screenshot from a prototype, and let the model apply style, detail, and polish while preserving the underlying composition.
This is powerful for ai art for video games because it gives you control over layout without needing drawing skill. Sketch a character silhouette in MS Paint, set the denoising strength between 0.4 and 0.6, and the AI will interpret your shapes while adding the art style you described in your prompt. Lower denoising stays closer to your original structure. Higher denoising gives the model more creative freedom but risks losing your intended proportions.
For game assets specifically, img2img shines when you need consistency across a set. Generate one sprite you love, then use it as the input image with slight prompt modifications to produce variants: same body structure but different armor, same enemy silhouette but a palette swap for a harder version. The structural bones stay intact while surface details change.
Fix Problem Areas with Inpainting and Outpainting
Inpainting is how you fix localized problems without regenerating the entire image. You paint a mask over the broken area, write a prompt describing what should replace it, and the AI regenerates only that region while blending seamlessly with surrounding pixels.
Common scenarios where inpainting saves hours: a character sprite with a mangled hand, a tileset with one visible seam, a face that looks unnatural at your game's zoom level, or a background with an anachronistic detail that breaks the world. According to Stable Diffusion Art's inpainting guide, setting masked content to "original" and adjusting denoising strength works for about 90 percent of cases. Keep denoising around 0.75 as a starting point: enough change to fix the defect, not so much that the repaired area looks like it belongs to a different image.
Two practical tips from that workflow: inpaint one small area at a time rather than masking half the image, and generate multiple candidates per fix (set batch size to 4-8) so you can pick the best blend. Inpainting is iterative. Two or three passes on different problem spots is faster and more controlled than trying to fix everything in a single mask.
Outpainting extends your canvas beyond the original boundaries. This is useful for vfx game ai work where you need a wider environment from a cropped concept, or when a generated background needs more breathing room on one side to fit your game's aspect ratio. The technique uses the same mask-and-regenerate logic, just applied to empty space rather than existing content.
When AI Output Needs Human Touch
Here is the honest truth: AI works best as an accelerator, not a replacement for all manual work. Some assets come out of the generator ready to drop into your engine. Many do not. Knowing when to stop iterating in AI and switch to a pixel editor like Aseprite, Krita, or Photoshop is a skill that saves time.
The hybrid workflow pattern that most shipped indie games actually use treats AI generation as the 80 percent solution. Bulk assets like enemies, items, and environmental props can ship with light edits. Hero characters and signature visual moments deserve hand-crafted attention in a dedicated editor.
Watch for these common issues that require human refinement:
- Inconsistent lighting direction across assets in the same set
- Broken anatomy: extra fingers, fused limbs, impossible joints
- Color palette drift between batch generations that makes assets look like they belong to different games
- Tile seam artifacts that only appear when assets repeat in a grid
- Transparency edge halos or fringing around sprite borders
- Scale inconsistencies where props, characters, and environments imply different world sizes
A useful rule: if you have spent three regeneration attempts fixing the same area and it still looks wrong, open the image in your editor and paint the fix manually. Five minutes of hand-editing often beats twenty minutes of prompt wrestling.
Visual assets are only half the equation, though. Your game also needs a soundtrack that loops cleanly, adapts to gameplay, and reinforces the mood your art establishes. Producing that audio with AI follows its own distinct workflow.
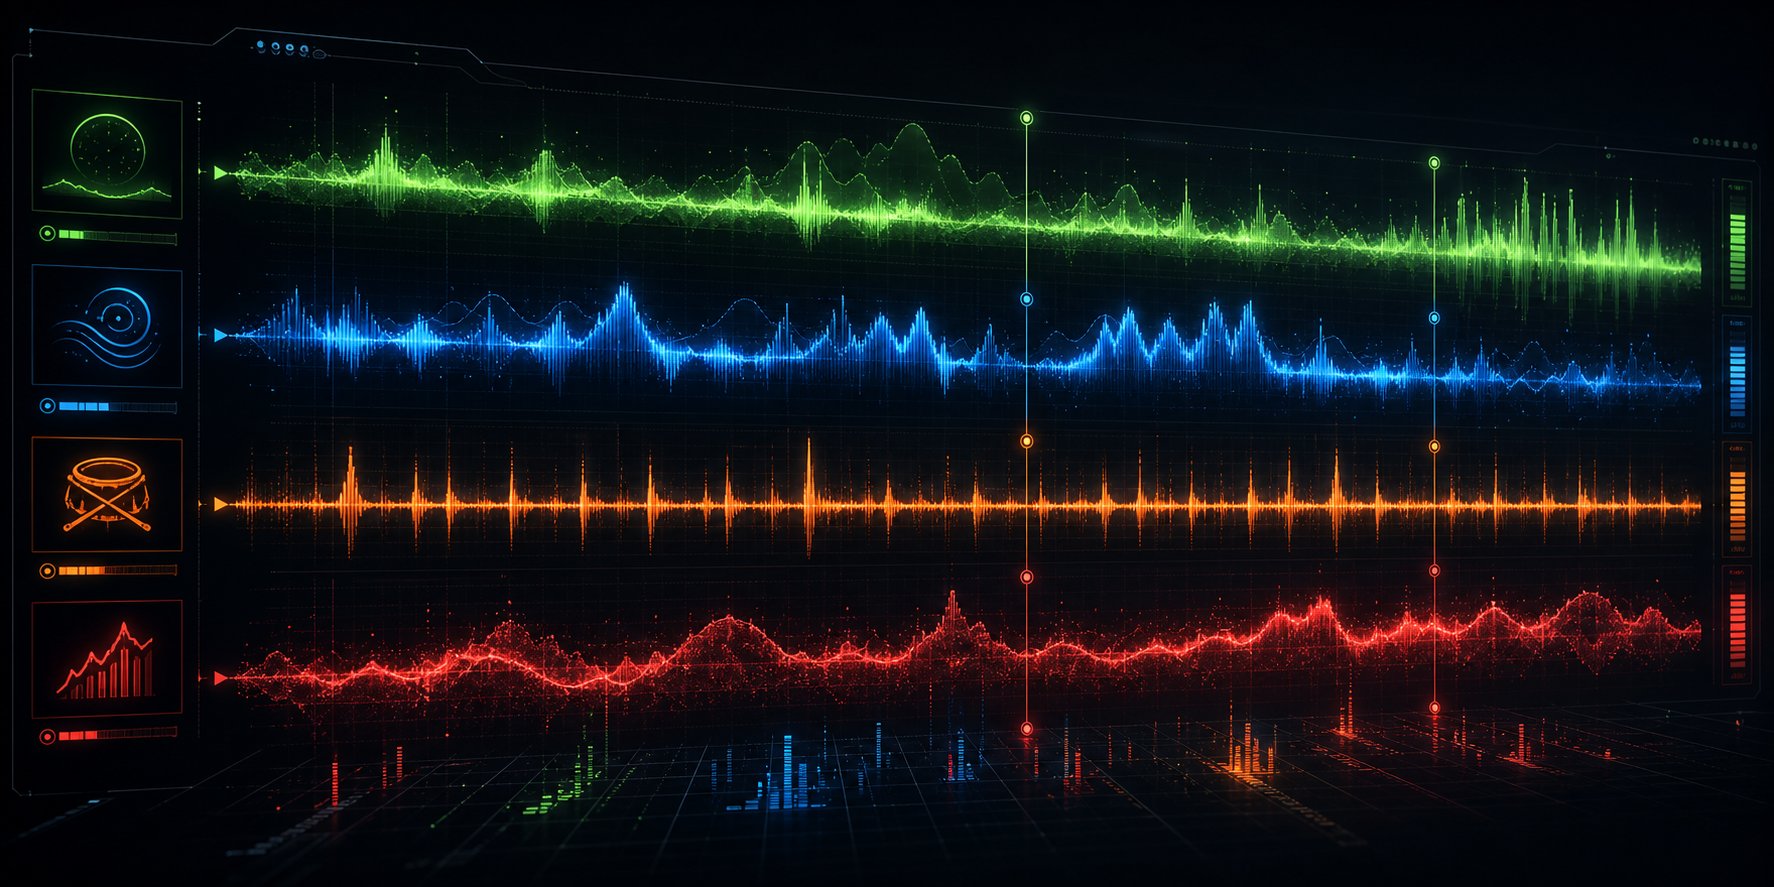
Step 4: Produce Game Music and Soundtracks with AI
A polished sprite set without a soundtrack feels like watching a movie on mute. Music sets emotional context, signals danger, rewards progress, and transforms a collection of assets into a living world. The challenge for solo devs and small teams making a game with AI is that composing game audio requires a different mental model than generating art. You are not producing single static files. You need loopable tracks, layered stems, and audio that responds to what the player is doing.
Here is a step-by-step workflow for producing ai generated game music that actually works inside a game engine, not just as a standalone listening experience:
- Define your audio needs per game state (menu, exploration, combat, boss, victory)
- Set musical parameters for each state: BPM, key signature, mood, and instrumentation
- Generate initial tracks using your chosen AI music tool
- Trim and loop-point each track so it repeats without audible seams
- Generate separate stems for adaptive layering
- Normalize volume levels across all tracks for consistent playback
- Export in game-ready formats and test inside your engine
Each step builds on the previous one. Skipping the parameter definition phase leads to tracks that sound fine in isolation but clash when played sequentially during gameplay.
Generate Loopable Background Music for Game Levels
The single biggest difference between a soundtrack and game music is looping. A three-minute track that fades out is useless for a level that takes fifteen minutes to complete. Your ai soundtrack for games needs seamless repetition where the listener cannot detect the restart point.
Start by defining the musical DNA for each level or game state. For a pixel art dungeon crawler, that might look like: 120 BPM, D minor, dark ambient with lo-fi synth pads and minimal percussion. For a space shooter's combat phase: 140 BPM, E minor, driving electronic with aggressive bass and fast hi-hats. These parameters are your prompt ingredients.
In tools like Soundraw, you adjust BPM, mood, and instrumentation directly through sliders and menus rather than text prompts. In Suno or AIVA, you describe these attributes in natural language. Either way, specificity matters. "Scary music" gives you something generic. "Dark ambient drone in D minor, 80 BPM, sparse reverb-heavy piano notes over a low synth pad, no percussion, loopable" gives you something you can use.
Once you have a generated track, the critical step is trimming it to a clean loop point. Most AI tools produce tracks with intros and outros that break repetition. Open the output in Audacity or a similar editor, find a musically natural loop point (typically at the end of a 4-bar or 8-bar phrase), and trim precisely there. AI music generators with native loop mode, like Soundverse's dedicated loop output option, can reduce this manual trimming by producing audio already designed for seamless repetition. Test every loop by playing it on repeat for at least two minutes, listening specifically for clicks, volume jumps, or rhythmic hiccups at the transition point.
Create Adaptive Audio Layers for Dynamic Gameplay
Static loops work for menus and simple levels, but modern players expect music that responds to gameplay. When combat starts, the drums kick in. When you enter a safe zone, the melody softens. This is adaptive audio, and gen ai game development makes it accessible without hiring an audio director.
The concept is straightforward: instead of generating one complete track per game state, you generate separate musical layers (stems) that share the same key, BPM, and bar length. Then your game engine mixes them dynamically based on what is happening in the scene.
A practical stem set for a platformer level might include:
- Ambient layer: atmospheric pad or drone that plays continuously
- Melodic layer: the main theme, faded in during exploration
- Percussion layer: drums and rhythmic elements, triggered during combat or time pressure
- Intensity layer: additional instrumentation that stacks on top during boss encounters or critical moments
Generate each stem using identical BPM and key settings but different instrumentation prompts. For example, generate your ambient layer with "80 BPM, C minor, atmospheric synth pad, no percussion, no melody, loopable, 16 bars." Then generate the percussion layer with "80 BPM, C minor, drum pattern only, electronic kit, loopable, 16 bars." The shared tempo and key ensure they sound cohesive when stacked.
Research on adaptive game soundtrack generation confirms that this collaborative approach between AI-generated stems and in-engine mixing logic increases player immersion while significantly reducing production costs for game developers. The key insight: you do not need AI to handle the adaptivity logic. You just need it to produce the raw musical layers. Your game engine's audio system handles when and how to blend them.
Make sure all stems are exactly the same length in bars and samples. Even a few milliseconds of drift between layers will produce audible phasing after several loops. Trim every stem to the exact same sample count before importing.
Turn Your Game Soundtrack Into Visual Promotional Content
You have spent hours crafting an ai soundtrack for games that sets the perfect mood. That audio is not just a game asset. It is marketing material waiting to be activated. Indie developers who post gameplay trailers with their original AI-generated music on YouTube and social media see significantly more wishlist conversions than those who post silent screenshots.
The problem? Most solo devs are not video editors. Creating a polished promotional trailer from scratch takes time you would rather spend on the game itself. This is where AI music video generators bridge the gap. Tools like MakeBestMusic's AI Music Video Generator let you upload your game's soundtrack and automatically generate visual content synced to the music, useful for creating teaser trailers, social media clips, or YouTube devlog intros without touching a video editor.
A practical promotional workflow for indie developers looks like this: export a 60-second highlight from your best game track, feed it into an AI music video generator to produce a visually engaging clip, then overlay your game's logo and a Steam or itch.io link. You get a shareable trailer that shows off both your game's audio identity and visual mood in under thirty minutes of total effort.
Combine this with your AI-generated concept art as static frames or background imagery, and you have a complete promotional package built entirely from assets you already produced during development. No separate video production budget required.
Raw AI audio files are not game-ready out of the box, though. File formats, bitrates, loop point metadata, and volume normalization all need attention before these tracks will play correctly inside Unity or Unreal. That post-processing pipeline is the next critical step.
Step 5: Post-Process AI Assets to Production Quality
Here is where most AI-assisted game projects stall. You have a folder full of beautiful generated images and solid audio tracks, but none of them are actually ready for your game engine. A 1024x1000 pixel sprite sheet will not import cleanly. A WAV file at 96kHz stereo is overkill for a retro platformer and will bloat your build size. The ai game asset pipeline between "generated" and "shipped" is a technical production step that demands the same attention as the creative work.
This section covers the exact specifications, formats, and automation workflows that turn raw AI output into optimized, engine-ready assets. Skip this and you will spend hours troubleshooting import errors, wondering why your textures look blurry, or discovering your music clips pop audibly at loop boundaries.
Prepare Art Assets for Engine Import
Game engines expect specific file dimensions, formats, and compression settings. Feed them anything else and you get visual artifacts, wasted memory, or outright import failures. Three rules govern how to prepare AI-generated art for production use:
Use power-of-two dimensions. GPUs are optimized for textures whose width and height are powers of two: 64, 128, 256, 512, 1024, 2048. A 300x300 sprite will get padded or rescaled internally by the engine, wasting VRAM and potentially introducing blurriness. When generating AI art, either prompt for power-of-two sizes directly or plan to crop and resize outputs afterward. For sprite sheets, a common layout is a 512x512 or 1024x1024 atlas containing multiple frames arranged in a grid.
Choose the right file format for the asset type. PNG is the standard for 2D sprites and UI elements because it supports transparency via an alpha channel and uses lossless compression. For 3D textures like normal maps, roughness maps, and albedo maps, TGA or EXR files preserve the color depth and linear color space your shading pipeline expects. Never use JPEG for sprites. Its lossy compression creates artifacts around edges and destroys alpha channels entirely.
Match resolution to your target platform. A mobile game running on mid-range phones does not need 4096x4096 texture atlases. A desktop title with detailed environments might. Define your maximum texture budget per platform early, then downscale AI outputs to fit rather than generating at arbitrary resolutions. Common targets:
- Mobile: 512x512 to 1024x1024 max per atlas
- Desktop/Console: 1024x1024 to 4096x4096 depending on asset importance
- Pixel art games: native resolution sprite sheets (often 256x256 or 512x512) with nearest-neighbor filtering, never bilinear
Prepare Audio Assets for Game Integration
Audio format choices affect both quality and build size more dramatically than most developers expect. A single uncompressed WAV soundtrack can add hundreds of megabytes to your game. The use of ai in game development for music generation typically outputs WAV or MP3 files, but neither is ideal for final game integration without conversion.
The format decision comes down to a simple split. As a detailed comparison of audio formats for games explains, Ogg Vorbis provides better audio quality and smaller file size than MP3, making it the preferred compressed format for background music and longer audio tracks. WAV remains the right choice for short sound effects where instant playback without decoding overhead matters. Ogg Opus is a newer alternative that improves on Vorbis with even better compression, though engine support varies.
Setting proper loop points is the step most developers skip, then regret. AI-generated music tracks rarely end at a mathematically precise loop boundary. In Audacity, zoom into the waveform at sample level and find the zero-crossing point closest to your intended loop end. Trim there. Audio formats like WAV and OGG do not natively store loop point metadata, so you will need to either handle looping in your game engine's audio system or note the loop sample positions in a metadata file your code can reference. As the format comparison notes, tracker music formats (MOD, XM, IT) natively support loop points and restart positions, which makes them worth considering if your game uses retro-style audio.
Normalize volume levels across all tracks before importing. If your menu music peaks at -3 dB and your combat music peaks at -12 dB, players will constantly adjust their volume slider. Batch normalize all tracks to the same peak level (typically -1 dB for headroom) or, better, to a consistent LUFS loudness target (around -16 LUFS for games). Audacity handles basic peak normalization; for LUFS-based loudness matching, tools like FFmpeg's loudnorm filter or dedicated mastering plugins work well.
Batch Processing and Automation Tips
When your ai tools for game production generate dozens or hundreds of individual assets, manual conversion becomes impractical. A few automation tools handle the repetitive work so you can focus on creative decisions:
- ImageMagick - command-line image processor that handles batch resizing, format conversion, cropping to power-of-two dimensions, and trimming transparent padding. A single command like
mogrify -resize 512x512 -background none -gravity center -extent 512x512 *.pngpads all images in a folder to 512x512 with transparent fill. - TexturePacker - packs individual sprite frames into optimized sprite atlases with proper padding between frames, generates atlas metadata for Unity and other engines, and supports trimming transparent borders to reduce sheet size.
- FFmpeg - converts audio between any format, normalizes loudness, trims to precise timestamps, and batch-processes entire folders. To convert all WAV files to OGG Vorbis at quality 6:
for f in *.wav; do ffmpeg -i "$f" -c:a libvorbis -q:a 6 "${f%.wav}.ogg"; done
Build a simple shell script or batch file that runs your full conversion pipeline in one step. When you regenerate assets after iteration, running a single command should reproduce your entire production-ready output folder. This repeatability is what separates a professional ai game asset pipeline from a manual, error-prone process.
Here is a quick reference for format requirements across asset types:
| Asset Type | Recommended Format | Resolution / Bitrate | Notes |
|---|---|---|---|
| 2D Sprites | PNG (32-bit RGBA) | Power-of-two atlas (512-2048px) | Lossless, supports transparency, use nearest-neighbor for pixel art |
| 3D Textures (Albedo) | PNG or TGA | 1024-4096px per map | sRGB color space, mip-maps enabled |
| 3D Textures (Normal/Roughness) | TGA or EXR | Match albedo resolution | Linear color space, no sRGB conversion |
| UI Elements | PNG (32-bit RGBA) | Native resolution for target display | Avoid compression artifacts on text and sharp edges |
| Background Music | OGG Vorbis (quality 5-7) | 44.1kHz, stereo | Good compression, better quality than MP3, wide engine support |
| Sound Effects | WAV (16-bit PCM) | 44.1kHz or 22.05kHz, mono | No decoding latency, mono saves memory for spatial audio |
| Ambient Loops | OGG Vorbis (quality 4-6) | 44.1kHz, stereo | Lower quality acceptable for background layers |
One final consideration: keep your original uncompressed AI outputs in a separate archive folder. Once you compress to OGG or resize textures, you cannot recover the original quality. If you need to re-export at different settings for a new platform later, you will want those source files intact.
With your assets properly formatted and optimized, they are finally ready for the step that makes them real: importing into your game engine with the correct settings so they render and play exactly as intended.
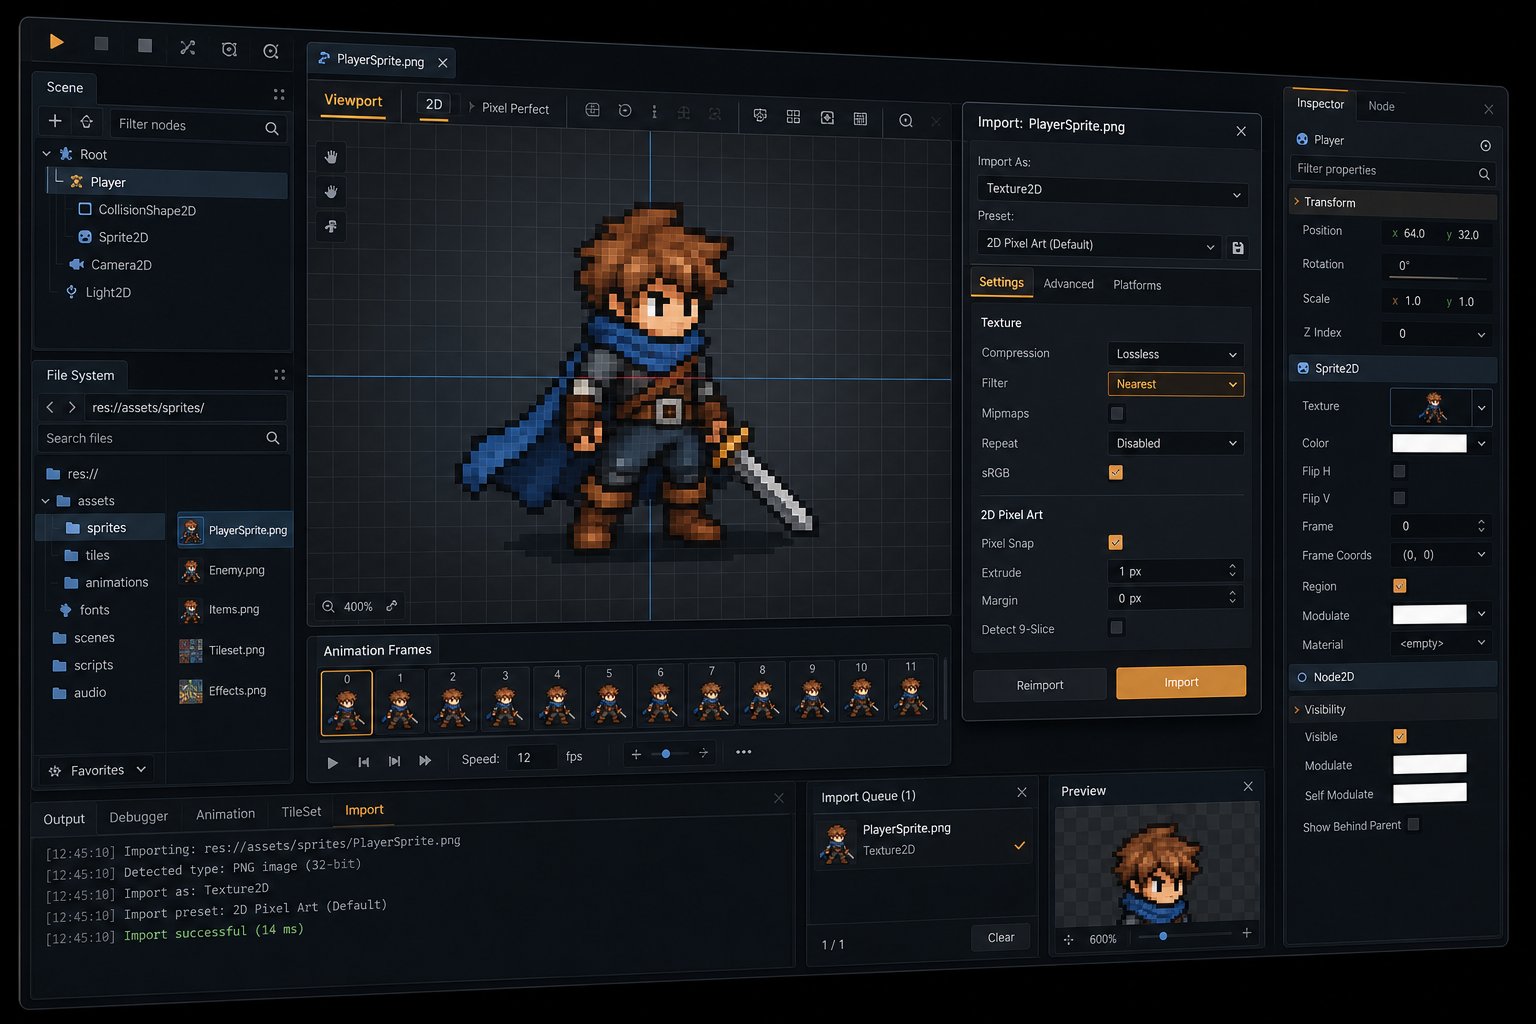
Step 6: Integrate AI Generated Assets Into Your Game Engine
You have production-ready PNGs and OGG files sitting in a folder. They look great in your file browser. But dragging them into Unity or Unreal without configuring import settings is how pixel art gets blurry, normal maps render flat, and music clips pop at every loop restart. The gap between "file on disk" and "working in-game" is where most ai in game dev tutorials go silent. This section fills that gap with exact settings for both major engines.
Import AI Art Into Unity
When you drop a PNG into Unity's Assets folder, the engine assigns default import settings that are almost never correct for AI-generated game art. You need to configure three things immediately: texture type, filter mode, and compression.
For 2D sprites, select your imported texture and set Texture Type to "Sprite (2D and UI)" in the Inspector. The Pixels Per Unit value determines how large the sprite appears in your scene. If your AI-generated sprites are 32x32 pixel art characters, set Pixels Per Unit to 32 so one sprite occupies one world unit. For 64x64 sprites, use 64. Getting this wrong means your characters render at the wrong scale relative to your tilemap.
Filter Mode is critical for pixel art. Set it to "Point (no filter)" to preserve crisp pixel edges. The default Bilinear filter smears pixels together, destroying the clean look your AI tool produced. For painterly or high-resolution ai assets in Unity, Bilinear is fine, but pixel art demands Point filtering every time.
Compression settings depend on your target platform. For desktop builds, RGBA 32-bit gives perfect quality at the cost of VRAM. For mobile, ASTC 4x4 or ETC2 compression saves memory with minimal visual loss on non-pixel-art textures. Never compress pixel art with lossy formats because the block artifacts are immediately visible at low resolutions.
For 3D textures like AI-generated albedo maps, set Texture Type to "Default" and enable sRGB (Color Texture). Normal maps need Texture Type set to "Normal map" explicitly so Unity applies the correct linear-space interpretation. If you skip this, your lighting will look flat and wrong because the engine is treating linear height data as color data.
Once individual sprites are imported, organize them into Sprite Atlases to reduce draw calls. Unity's Sprite Atlas workflow lets you group related sprites into a single texture that the renderer can batch efficiently. Create a new Sprite Atlas asset via Assets > Create > 2D > Sprite Atlas, then drag your AI-generated sprite folders into its Objects for Packing list. This is especially valuable when your AI pipeline produces dozens of individual sprite files rather than pre-packed sheets.
Import AI Art Into Unreal Engine
Unreal handles texture imports differently. Drag your PNG or TGA files into the Content Browser and Unreal creates Texture2D assets automatically. The engine attempts to detect texture usage, but you will often need to override its guesses for ai generated assets game engine integration to work correctly.
For albedo/diffuse textures, open the texture asset and confirm Compression Settings is set to "Default (DXT1/5, BC1/3 on DX11)." This gives you standard GPU-compressed color data. For normal maps, change Compression Settings to "Normalmap (DXT5, BC5 on DX11)" and set the Texture Group to "WorldNormalMap." Unreal's FBX import pipeline will automatically import textures assigned as diffuse or normal maps from 3D packages, but standalone AI-generated textures need manual assignment.
To use your AI textures on a 3D mesh, create a Material asset and connect your textures to the appropriate input pins: Base Color for albedo, Normal for normal maps, and a combined channel texture for Roughness/Metallic. Unreal's Material Editor expects textures in specific channel formats. A common approach for AI-generated PBR sets is packing roughness into the green channel and metallic into the blue channel of a single texture to save memory and texture samples.
Compression in Unreal is platform-aware. The engine automatically selects the best compressed format per platform at cook time (ASTC for mobile, BC for desktop). You control quality through the LOD Bias and Maximum Texture Size settings per texture. For AI-generated textures that will be viewed up close, like character skins, keep Maximum Texture Size at 2048 or higher. For distant environment textures, 1024 is often sufficient.
Set Up AI Audio in Game Engines
Audio import settings matter just as much as visual ones. In Unity, imported audio clips default to "Decompress on Load" for short files and "Streaming" for long ones. For your AI-generated music loops, set Load Type to "Compressed In Memory" with the Vorbis compression format. This keeps memory usage reasonable while avoiding the disk seek latency that Streaming can introduce on slower storage. For short sound effects, "Decompress on Load" with PCM or ADPCM compression ensures zero-latency playback.
Configuring loop points in Unity requires setting the Audio Clip's Loop property on the AudioSource component. Unity loops from the beginning of the clip to the end, so your pre-trimmed loop points from the post-processing step become critical. If your loop has any silence or intro before the repeating section, trim it in Audacity first. Unity does not support custom loop start/end markers within a clip natively.
In Unreal, imported Sound Waves expose a Looping property directly in the asset details. For adaptive music with multiple stems, both engines support playing multiple audio sources simultaneously and adjusting their volumes independently based on game state. Unity uses AudioSource components with script-driven volume crossfading. Unreal uses Sound Cues or MetaSounds for more complex layering logic.
For projects where your adaptive audio needs outgrow built-in engine capabilities, audio middleware like FMOD or Wwise provides professional-grade solutions. FMOD Studio offers a timeline-based interface where you design adaptive music behaviors visually, then trigger them from game code with simple event calls. Wwise uses state-based switching with Real-Time Parameter Controls (RTPCs) that dynamically adjust audio based on game variables like player health or combat intensity. Both integrate with Unity and Unreal through official plugins and are free for indie projects under revenue thresholds.
Before you consider middleware, though, ask whether you actually need it. A game with three or four music stems that crossfade based on combat state works fine with native AudioSource scripting. Middleware becomes worthwhile when you have dozens of interactive audio states, need advanced DSP effects, or want non-programmers on your team to design audio behaviors independently.
Common Import Mistakes and How to Avoid Them
After importing hundreds of AI-generated assets across projects, these are the mistakes that cost the most debugging time:
- Wrong filter mode on pixel art: Bilinear filtering on low-resolution sprites makes everything look smeared. Always use Point (no filter) for pixel art in Unity, or set the texture's Filter to Nearest in Unreal.
- Missing alpha channels: If your sprite backgrounds appear black instead of transparent, your PNG was exported without an alpha channel or your import settings stripped it. In Unity, ensure Texture Type is set to Sprite or that Alpha Source is set to "Input Texture Alpha." In Unreal, check that Compression Settings support alpha (DXT5 rather than DXT1).
- Incorrect color space for normal maps: Importing a normal map as sRGB makes it too bright and produces wrong lighting. Always mark normal maps as Linear in Unity (uncheck sRGB) or set the correct Compression Settings in Unreal.
- Audio clipping on import: AI music tools sometimes output audio that peaks above 0 dB. Clipped audio produces harsh crackling during playback. Normalize all tracks to -1 dB peak before importing. If you hear distortion in-engine but the source file sounds clean, check that your AudioSource volume is not stacking above 1.0 with other gain stages.
- Lossy compression on already-compressed audio: Importing an MP3, then having the engine re-compress it to Vorbis, applies lossy compression twice. Always import from WAV source files and let the engine handle the single compression pass.
- Non-power-of-two texture dimensions: Both engines handle NPOT textures, but they waste memory through internal padding and may disable certain compression formats. Resize to power-of-two before importing.
A quick sanity check after every batch import: play the game, walk through the area where the new assets appear, and listen to the audio on loop for at least 60 seconds. Visual errors are obvious immediately. Audio problems like loop pops, volume mismatches, and compression artifacts reveal themselves only over time and repetition.
With assets rendering correctly and audio playing cleanly in your engine, the project is functionally complete. The remaining question is not technical but legal and practical: can you actually ship a commercial game built on AI-generated content, and how do you promote it once it is ready?
Step 7: Handle AI Game Licensing, Ethics, and Ship Your Indie Game
Your game runs. The sprites animate, the music loops, the assets look cohesive inside your engine. But can you actually sell it? The answer depends entirely on which AI tools generated your assets and under what terms. Ai game licensing commercial use is not a universal yes or no. It varies per tool, per pricing tier, and sometimes per specific model version. Get this wrong, and you risk pulling your game from storefronts after launch or facing legal claims you cannot afford to fight.
This is not a hypothetical concern. As ongoing legal challenges like Andersen v. Stability AI demonstrate, the legal landscape around AI-generated content is actively evolving, and courts in multiple jurisdictions are still defining what constitutes fair use in AI training contexts. As an indie developer shipping indie game with ai assets, your best defense is knowing exactly what each tool's license permits and documenting your workflow thoroughly.
Understand Commercial Licensing for Each AI Tool
Licensing terms differ dramatically between platforms. Some grant full commercial rights on every paid tier. Others restrict commercial use to specific plans or impose revenue thresholds. A few open-source options give you complete freedom with no strings attached. Here is how the major tools break down:
| Tool | Commercial Use Allowed | Conditions | Risk Level |
|---|---|---|---|
| Midjourney V8 | Yes | Paid plan required. Revenue over $1M/year requires Pro plan ($60/month) | Low (clear terms) |
| Stable Diffusion 3.5 | Yes | Community license with some restrictions for very large companies. Varies by checkpoint model. | Medium (license varies per model) |
| Flux 2 Klein | Yes | Apache 2.0 license. Use for anything, no restrictions. | Very Low |
| ChatGPT Images 2.0 (GPT Image 2) | Yes | Paid plan. Subject to OpenAI content policy. | Low |
| Adobe Firefly | Yes | Paid plan. Trained on licensed/public domain content. Includes IP indemnification. | Very Low (best legal protection) |
| Leonardo AI | Yes | Paid plans only. Free tier outputs are non-commercial. | Low (clear terms) |
| AIVA | Yes (Pro tier) | Free tier: AIVA owns copyright. Pro tier: full copyright transfers to you. | Low on Pro, High on Free |
| Suno | Yes (paid tiers) | Free/Basic tier does not grant commercial rights. Pro and Premier do. | Low on paid, High on Free |
| Soundraw | Yes | Paid subscription required. Royalty-free on paid plan. | Low |
A few critical details from this table: if you used Stable Diffusion, the license depends on which specific model checkpoint you loaded, not just "Stable Diffusion" as a platform. A community-trained LoRA model from Civitai might carry its own license terms separate from the base model. Flux 2 Klein's Apache 2.0 license offers the cleanest commercial freedom for any open-weight image model currently available. For music, AIVA's free tier is a trap for indie devs. Everything you generate on the free plan is owned by AIVA, not you, which means you cannot legally ship it in a commercial game.
When in doubt, screenshot the license page for each tool you used on the day you generated your assets. Terms of service change. Having a timestamped record protects you if a platform later restricts permissions retroactively.
Ethical Best Practices Built Into Your Workflow
Licensing tells you what is legal. Ethics tells you what is responsible. Both matter if you want to ship a game you can stand behind. The growing conversation around AI art ethics highlights real concerns from human artists: unconsented use of their work in training data, style mimicry that dilutes their identity, and lack of credit or compensation. You cannot solve systemic industry problems as a solo developer, but you can build respectful practices into your personal workflow.
Here is what responsible AI-assisted game development looks like in practice:
- Credit AI tools in your game credits. A simple line like "Visual assets generated with assistance from Stable Diffusion and refined by [Your Name]" is transparent without being apologetic. Players and peers increasingly respect honesty here.
- Avoid prompting specific living artists' names as style references. Requesting output "in the style of [specific artist]" raises ethical red flags even where it is technically legal. Describe visual qualities instead: "cel-shaded with thick outlines and saturated colors" rather than naming someone whose livelihood depends on that style being distinctly theirs.
- Keep generation records. For every asset in your final build, save the prompt, the model version, the seed, and the tool used. This metadata costs nothing to maintain and protects you in disputes. It also helps you regenerate or modify assets later if needed.
- Use tools trained on licensed or consented data where possible. Adobe Firefly's training dataset consists of licensed Adobe Stock images, public domain content, and openly licensed materials. This does not guarantee zero legal risk, but it significantly reduces the ethical burden compared to models trained on scraped internet art without consent.
- Apply human creative judgment to every shipped asset. The more you transform, curate, and refine AI outputs, the more your game reflects genuine creative direction rather than raw algorithmic output. This is not just ethical. It is what makes your game feel distinct.
Think of these practices as your quality bar, not a checklist to satisfy critics. Any ai game development company building tools for creators benefits when the ecosystem maintains trust between artists, developers, and players. Your small choices contribute to that ecosystem health.
Promote and Ship Your AI-Assisted Game
Your assets are licensed, your credits are honest, and your build is stable. Time to get it in front of players. The marketing challenge for indie developers is the same whether you used AI tools or hand-crafted every pixel: you need attention in a crowded market, and you need it without a marketing budget.
Your AI-generated assets are already marketing material. The concept art, character designs, and soundtrack you produced during development translate directly into promotional content with minimal extra effort:
- Steam page capsule art: Use your best concept art as the foundation for store page banners. AI-generated environment shots often work perfectly as key art with minor text overlay.
- Social media content: Post before-and-after comparisons showing your AI generation process. Devlog content about your workflow attracts both players curious about your game and developers curious about your pipeline.
- Soundtrack-driven trailers: Your game's music is one of your strongest marketing assets. A 30-to-60-second clip set to your best track captures mood faster than any screenshot gallery.
For soundtrack-driven promotional videos, solo devs without video editing experience can turn to AI-powered tools that handle the visual side automatically. MakeBestMusic's AI Music Video Generator takes your audio track and produces synced visual content suitable for YouTube trailers and social media posts, which is practical when you need promotional material but would rather spend your editing hours on the game itself. Pair that with direct gameplay capture for a trailer that shows the actual player experience alongside the musical identity you built.
Other promotional strategies worth your time: submit your game soundtrack to indie game music playlists on Spotify and YouTube, post animated GIFs of your sprite work on platforms where game developers congregate, and write a short devlog about your AI-assisted workflow. Transparency about your process often generates more engagement than silence. Players respect developers who are honest about their tools and focused on delivering a good experience.
Shipping indie game with ai assets is no longer experimental. It is a legitimate production path used by thousands of developers. The tools handle the heavy lifting. Your job is creative direction, quality control, ethical responsibility, and the persistence to actually finish the project. That last part, as every game developer knows, is still the hardest step no AI can do for you.
