


What Is an AI Music Visualizer Generator and Why It Matters
Imagine dropping your latest track onto Instagram or TikTok with nothing but a static album cover. The scroll keeps moving. No one stops. That gap between raw audio and scroll-stopping video content is exactly where an AI music visualizer generator fits in, and it is reshaping how independent artists, YouTubers, and short-form creators turn sound into something people actually watch.
An AI music visualizer generator is a software tool that uses artificial intelligence to analyze audio input and automatically generate synchronized visual content, ranging from abstract particle effects and audio spectrum displays to fully cinematic AI-generated scenes, without requiring manual motion-graphics work.
If you have ever wondered what's a visualizer in music, the simplest answer is a video layer that reacts to your audio in real time. But the AI-powered version goes much further than the bouncing bars you remember from old media players. It listens to your track, interprets its mood, tempo, and energy, and builds visuals that feel like they belong to that specific song, not a generic preset.
What Exactly Is an AI Music Visualizer Generator
At its core, an AI music visualizer takes your audio file, runs it through machine-learning models that detect beats, frequency ranges, and structural shifts, and then produces frame-by-frame video output that moves with the music. The result can be anything from a pulsing neon waveform to a dreamlike cinematic landscape that evolves as your chorus hits. So what is a visualizer for a song in practical terms? It is the visual identity of your track, a piece of content ready for YouTube, Reels, Shorts, or Spotify Canvas the moment it renders.
The reason these tools have become essential comes down to a simple reality: modern platforms prioritize video. An audio-only upload on YouTube gets minimal engagement compared to even a basic visualizer for music. Independent musicians, podcast creators, and content producers who lack motion-graphics budgets or After Effects skills now have a way to produce professional-looking visual content from nothing more than an MP3 or WAV file.
How AI Visualizers Differ from Template-Based Tools
Traditional audio visualizer platforms like Specterr or older versions of Vizzy work by applying pre-designed templates to your audio waveform. You pick a visual preset, upload your track, and the template reacts to volume and frequency data. The output looks polished, but it is fundamentally the same visual framework every creator using that template will get. Two completely different songs can produce nearly identical videos.
AI-powered generators operate on a different level entirely. Instead of cycling through preset animations, they use generative AI models, think diffusion-based architectures and video generation networks, to create entirely new imagery frame by frame. Each render is unique because the AI is building visuals from scratch based on your specific audio signal and, in many cases, a text prompt you provide. Tools like TwoShot reference underlying models such as Seedance 2.0, Veo 3.1, and Kling 3.0, illustrating just how deeply generative AI has entered this space. Neural Frames uses Stable Diffusion-level rendering to produce what many consider the highest-fidelity AI art synchronized to music.
The practical difference? A template-based audio visualiser gives you speed and consistency. An AI-native generator gives you creative uniqueness that no preset can replicate, visuals that belong to your track and your track alone. For creators competing for attention across saturated platforms, that distinction increasingly separates forgettable content from something worth a second look.
The real question, then, is not whether these tools produce impressive visuals. It is how they actually translate raw audio data into synchronized motion, and that process is more fascinating than most creators realize.
How AI Turns Audio Signals into Synchronized Visuals
When you upload a track to an AI music visualizer generator, something remarkable happens in the seconds before any visuals appear. The software tears your audio apart, not destructively, but analytically, converting sound into a dense stream of numerical data. Every bass hit, every vocal swell, every hi-hat shimmer becomes a set of values that the AI can read, interpret, and translate into motion, color, and light. Understanding this process helps you make better creative decisions, so let's break it down without the engineering jargon.
Beat Detection and Frequency Mapping Explained
Every sound visualizer, whether it is a simple bouncing bar or a sprawling cinematic AI render, relies on the same three pillars of audio analysis. These are the building blocks that transform an audio file into a language that visual engines can understand.
- Beat detection — The system listens for sudden spikes in energy, particularly in the low-frequency range where kick drums and bass hits live, and tracks how regularly those spikes occur to estimate tempo in beats per minute (BPM). This is what allows visuals to flash, pulse, or switch scenes precisely on the beat rather than at random intervals.
- Frequency mapping — Using a process called Fast Fourier Transform (FFT), the tool decomposes your audio waveform into a spectrum showing how much energy exists at each frequency at any given instant. The result splits your track into distinct channels: lows (bass and kick), mids (vocals, synths, guitars), and highs (hi-hats, cymbals, airy textures). Each channel can then drive a different visual parameter.
- Amplitude tracking — Beyond individual frequencies, the system measures overall loudness over time using smoothed metrics like RMS (root mean square). This gives the visuals a sense of the track's dynamics, how loud the music feels moment to moment, rather than reacting to every tiny spike in the waveform.
Think of it this way: beat detection provides the rhythm, frequency mapping provides the texture, and amplitude tracking provides the breathing. Together, they turn your audio file into a rich data stream that an audio spectrum visualizer or a full AI rendering engine can interpret frame by frame.
The creative magic happens in what engineers call mapping, deciding which audio value controls which visual property. Bass energy might drive camera shake or scale pulsing. Treble might control particle density or shimmer effects. Amplitude might govern overall brightness. A well-designed audio waveform visualizer makes these mappings feel invisible to the viewer: you do not see data being translated, you simply feel visuals that are alive and locked to the music. Poor mapping, on the other hand, produces visuals that flicker aimlessly, a visual sound equalizer with no soul behind it.
How AI Models Translate Sound into Visuals
Here is where traditional sound wave visualizer tools and AI-powered generators diverge dramatically. A classic audio wave visualizer takes the numerical data from beat detection and frequency mapping and feeds it into preset visual templates. Bars go up when the bass hits. Particles scatter when the treble spikes. The relationship between audio and visuals is direct but shallow: the system reacts to the surface of the sound without understanding its deeper structure.
AI-native tools push the audio to visual conversion much further. Instead of simply reacting to raw waveform data, advanced generators analyze the structure of your song, identifying sections like intro, verse, pre-chorus, chorus, bridge, and outro. This concept, sometimes called "music-aware" visualization, means the AI does not just respond to volume spikes. It understands that a quiet intro should feel visually distinct from an explosive chorus, and that a bridge section might call for a dramatic shift in color palette or camera perspective.
SunoMV's methodology illustrates this structural approach clearly: their system automatically detects section boundaries and suggests visual intents for each part of the song, locking scene transitions to downbeats so that every cut feels musically intentional rather than arbitrary. The result is a narrative visual arc, a beginning, a build, a climax, and a resolution, that mirrors the emotional journey of the track itself.
Powering this deeper interpretation are two families of AI models. Diffusion models, the same architecture behind tools like Stable Diffusion, generate individual frames or image sequences by progressively refining visual noise into coherent imagery guided by text prompts and audio data. Video generation models extend this concept across time, producing fluid motion that maintains visual consistency from one frame to the next. The quality differences you notice between competing tools often trace directly back to which underlying model they use, and how effectively that model has been fine-tuned to respond to audio signals rather than just text prompts.
Researchers at MIT have demonstrated that AI systems can learn fine-grained correspondences between audio and visual data without human labels, associating a specific video frame with the exact audio occurring during that moment. This kind of research is what makes music-aware AI visualization possible: models that do not just hear a beat, but understand the relationship between a sound and the visual scene it belongs to.
The practical takeaway? When an AI music visualizer generator works well, it is not randomly generating pretty images on top of your track. It is reading your song's emotional DNA, mapping sections to visual moods, and rendering frame-by-frame imagery that feels like it was storyboarded by a human director. That level of intentionality is what separates a forgettable background animation from a visual that makes your audience feel the music, and it opens up a surprisingly wide range of visual styles to choose from.
A Complete Taxonomy of Music Visualization Styles
Every song has an energy fingerprint, and the visualization style you choose determines whether your audience sees that energy as a pulsing neon bar, an exploding galaxy of particles, or a cinematic landscape that shifts with every chord change. The problem? Most creators pick a style based on whatever the first tool they open happens to default to, rather than making a deliberate creative choice. This taxonomy breaks every major music visualization style into two clear categories, audio-reactive and AI-generated, so you can match the right visual language to your track before you hit render.
Audio-Reactive Styles from Waveforms to Particle Systems
Audio-reactive styles are the foundation of every song visualizer. They take the numerical data described earlier, beat detection, frequency mapping, amplitude tracking, and convert it into motion that the viewer perceives as "alive." Some are minimal and clean. Others are dense and chaotic. The right fit depends on your genre, your platform, and how much visual complexity you want competing with the music itself.
| Style Name | Visual Description | Best Use Case | Complexity Level |
|---|---|---|---|
| Waveform Bars | A continuous line or set of vertical bars that rise and fall with audio amplitude over time, showing volume as a moving wave | Podcast audiograms, SoundCloud embeds, quick social posts where simplicity reads fast | Low |
| Audio Spectrum Display | Frequency bands rendered as vertical bars spanning bass on the left to treble on the right, the classic equalizer look | YouTube music uploads, audio-focused channels, any genre where a clean beat visualizer aesthetic fits | Low |
| Circular Equalizer | A radial version of the spectrum display where frequency bars extend outward from a central point, often surrounding album art or a logo | Branded content, album art presentations, artists wanting a polished yet recognizable look | Medium |
| Particle Systems | Thousands of dots, sparks, or shapes that scatter, swirl, and reform in response to beat hits and frequency spikes | Electronic, EDM, and synthwave tracks where high-energy, abstract visuals match the sonic intensity | Medium |
| 3D Geometric Visualization | Polygons, fractals, and morphing shapes that rotate and transform in a three-dimensional space, reacting to audio energy | Immersive YouTube content, VJ loops for live performances, modern and futuristic branding | High |
A waveform visualizer is the fastest to produce and the easiest for viewers to parse, but it offers the least visual distinction between tracks. An audio spectrum music visualizer adds more informational depth by showing which frequencies are active, not just how loud the track is. Particle systems and 3D geometrics push into territory where the visuals become an experience of their own, though they demand more rendering power and careful parameter tuning to avoid looking cluttered.
The key takeaway: every style in this category reacts to the surface of the audio. Bass hits make bars jump. Treble spikes scatter particles. The visuals mirror the sound's energy in real time, but they do not interpret the song's meaning. That distinction matters because it defines exactly where AI-generated styles pick up the creative thread.
AI-Generated Cinematic and Artistic Styles
Where audio-reactive styles visualize how a track sounds, AI-generated styles attempt to visualize what a track means. These are the newer categories made possible by generative AI models, and they represent the frontier of what a creative visualizer can achieve. Instead of mapping frequency data to bar heights, these tools interpret mood, lyrics, and song structure to produce imagery that feels narratively connected to the music.
- AI-Generated Cinematic Scenes — Live-action-style visuals with settings, lighting, and camera movement that shift based on song structure. Verse sections might feature calm, wide-angle establishing shots while choruses trigger faster cuts and warmer palettes. This is the closest a soundwave visualizer gets to a traditional music video without hiring a director.
- Abstract Art Styles — Flowing gradients, liquid morphs, smoke-like trails, and organic color blends generated by diffusion models. Less geometric than particle systems and more painterly, these work beautifully for ambient, lo-fi, and downtempo tracks where atmospheric visuals complement a softer energy profile.
- Lyric-Driven Narrative Visuals — AI reads the lyrics line by line and generates illustrations or scenes that match the words. When the vocal says "city lights," you see a skyline. Platforms like SunoMV lean into this approach with their lyric illustration playbook, and tools like LyricEdits focus specifically on word-synced visual storytelling. SunoMV offers 7 distinct art styles for this category alone, giving creators meaningful aesthetic control over how each lyric segment looks.
- Album-Art Animation — Takes a static cover image and brings it to life with subtle motion, parallax depth, or AI-generated transitions that evolve over the track's duration. Ideal for Spotify Canvas loops and social teasers where brand recognition matters more than visual complexity.
The genre and energy of your track play a decisive role in which AI style fits. Freebeat's style guide notes that cinematic scene-based visuals suit pop, indie, and hip-hop releases, while liquid and organic abstract motion pairs best with ambient and chillwave productions. Vocal-forward tracks gain the most from lyric-driven approaches, especially on short-form platforms where muted autoplay makes on-screen text essential for stopping the scroll.
What makes the current generation of tools especially powerful is that many no longer force you to choose just one lane. Modern AI music visualizer generators increasingly blend these categories, overlaying reactive spectrum elements on top of AI-generated cinematic backgrounds, or combining lyric typography with abstract particle effects behind the text. The result is a hybrid visual language where a beat visualizer pulses inside a dreamlike AI landscape, giving your track both rhythmic energy and narrative depth in a single render. That flexibility is exactly what turns a basic visualizer into a piece of content worth sharing, and it is the reason choosing the right style upfront matters more than most creators expect when they sit down to build one.
How to Make a Music Visualizer with AI Tools
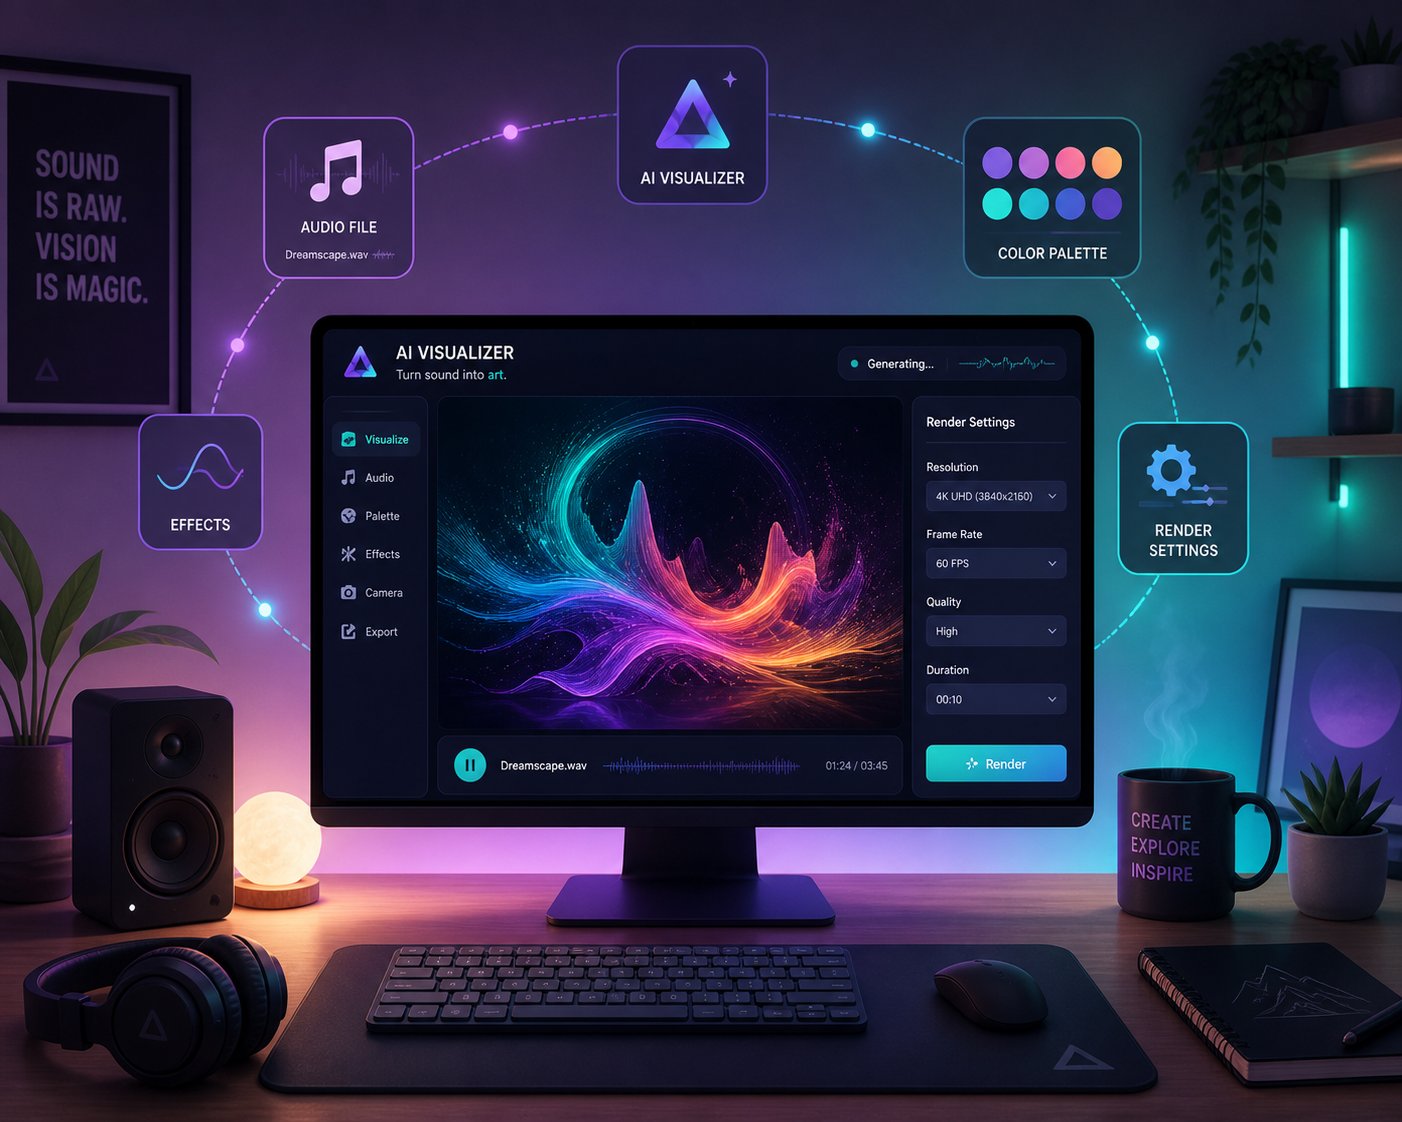
Knowing which visualization style fits your track is one thing. Actually building it is another. The good news is that every major AI visualizer generator follows a surprisingly similar workflow, and once you understand the pattern, you can move between tools without a steep relearning curve. This section walks through the entire process from raw audio file to finished export, with practical tips at each stage that apply whether you are using a one-click music visualizer maker or a prompt-driven generative platform.
Preparing Your Audio File for Visualization
Your visuals are only as good as the audio data feeding them. A compressed, low-bitrate file strips away the frequency detail that AI models and beat-detection algorithms rely on, resulting in mushy sync and visuals that feel disconnected from the music. Before you open any tool, get your audio file right.
- Format matters — WAV is the gold standard because it preserves the full dynamic range of your mix. If file size is a concern, a high-bitrate MP3 (320kbps) or FLAC offers a solid compromise. Avoid anything below 256kbps; the frequency data that drives tight visual sync gets noticeably degraded at lower bitrates.
- Trim dead air — Most visualizer platforms start rendering from the first millisecond of your file. Silence at the beginning or end wastes render time and produces a video that opens with a blank screen. Trim your track in any DAW or free editor like Audacity before uploading.
- Pick your section strategically — If you are learning how to make a visualizer animation for the first time, start with a 30- to 60-second highlight rather than the full track. Choose a section with clear dynamic contrast, a quiet verse that builds into an explosive chorus, because that range gives the AI the most interesting data to work with.
A clean, high-resolution source file is the single most impactful step you can take. Every downstream decision, from beat detection accuracy to the quality of AI-generated imagery, inherits the strengths or weaknesses of your input audio.
Step-by-Step Workflow for AI Visualizer Creation
Regardless of the specific platform, the general workflow for creating a music visualizer follows a predictable sequence. Here is the process that applies across most audio visualizer generator tools available right now:
- Upload your audio track — Drag your WAV, MP3, or FLAC file into the platform. Most tools accept files up to 10-15 minutes in length, though some impose tighter limits on free tiers.
- Select a visualization style or enter a visual prompt — Template-based tools present a gallery of presets. AI-native platforms ask you to describe the visuals you want in a text prompt, choose an art style, or both. This is where how to make music visualizer decisions become creative decisions, not just technical ones.
- Configure resolution, aspect ratio, and duration settings — Set your output dimensions based on your target platform: 1920x1080 for YouTube, 1080x1920 for TikTok and Reels, or 720x720 for Spotify Canvas. Lock these before generating to avoid cropping headaches later.
- Preview or generate a short test clip — Most tools let you render a low-resolution preview or a brief segment before committing credits or processing time to the full track. Use this to evaluate color accuracy, sync tightness, and overall mood before proceeding.
- Render the full visualization — Once you are satisfied with the preview, trigger the full render. AI-generated visualizations can take significantly longer than template-based ones because the system is creating new imagery frame by frame rather than applying a preset.
- Download and export — Save your finished file as MP4 (H.264 encoding) for the broadest platform compatibility. Some tools offer direct publishing to YouTube or social platforms from within the interface.
What varies between platforms is how much control you get at each step. Some music visualizer generator tools offer a spectrum of experience levels within a single platform. Neural Frames, for example, structures its interface around three distinct tiers: Autopilot for fully automated, one-click generation where the AI handles every decision; Render for creators who want to guide the visual style through prompts and parameter adjustments; and Control for advanced users who want keyframe-level precision over how visuals evolve across the timeline. This three-tier model is worth understanding even if you use a different tool because it maps perfectly to the question most creators face: how much creative control do I actually want versus how much do I want the AI to handle?
Beginners benefit from starting at the automated end. Upload, click, wait, download. As you develop a sense for what works visually with your music, you naturally migrate toward more hands-on modes where prompt input, style selection, and timing adjustments give you a visualizer music maker experience that feels genuinely custom.
Prompt Engineering Tips for Better AI Visuals
If your chosen tool accepts text prompts, the words you type have an outsized influence on the quality of your output. Vague prompts produce generic results. Specific, well-structured prompts produce visuals that feel intentionally designed. Here is how to write prompts that work:
- Name specific color palettes — Instead of writing "colorful," try "deep indigo and burnt orange with gold highlights." AI models respond far more precisely to named colors and color relationships than to abstract descriptors.
- Reference art movements or visual styles — Phrases like "art deco geometric patterns," "watercolor impressionist blending," or "cyberpunk neon cityscape" give the model a concrete aesthetic framework. These references anchor the output in a recognizable visual tradition rather than leaving the AI to guess what you consider beautiful.
- Describe mood and energy level explicitly — A prompt for a melancholic piano ballad should read differently from one for a high-BPM drum-and-bass track. Words like "ethereal," "tranquil," "slow drifting motion" versus "explosive," "intense," "rapid flashing transitions" steer the AI's choices about pacing, brightness, and visual density.
- Specify what you do not want — Many AI platforms support negative prompts, terms that tell the model what to avoid. Adding "no text, no faces, no photorealism" can prevent unwanted artifacts that break the immersive quality of abstract visuals.
- Iterate on short clips before full renders — Render a 10-second test, evaluate, refine your prompt wording, and render again. Two or three quick iterations at low resolution will teach you more about effective prompting than any guide, and they cost a fraction of the time and credits a full-length render demands.
The learning curve is real but short. Most creators find their prompt rhythm after three or four experiments, and the improvement between a first attempt and a fifth attempt is often dramatic. Think of prompt engineering as the creative direction layer: the AI is your rendering engine, but you are still the director deciding what the final product looks and feels like.
The best music visualizer generator workflow is not the one with the most features. It is the one where your creative intent survives every step from audio upload to final export.
With your file prepared, your workflow locked in, and your prompts sharpened, the next critical decision is making sure your finished visualizer actually fits the platform where your audience lives, and that means understanding the specific output formats and resolution requirements each platform demands.
Output Formats and Platform Publishing Requirements
A stunning visualizer that renders at the wrong resolution or aspect ratio is a stunning visualizer nobody sees. Social platforms are ruthless about formatting: upload a landscape video to TikTok and it gets pillarboxed into a tiny rectangle. Push a 9:16 vertical clip to YouTube's main player and black bars swallow half the screen. Whether you are using a music visualizer online or a desktop rendering tool, locking your output specs to your target platform before you generate saves hours of re-rendering and avoids the quality loss that comes with post-render cropping.
Resolution and Aspect Ratio Guide by Platform
Every platform has its own preferred canvas. The table below covers the five destinations most creators target with AI-generated visualizer content, along with the exact specs that ensure your video displays natively without compression penalties or awkward framing.
| Platform | Recommended Resolution | Aspect Ratio | Max Duration | File Format |
|---|---|---|---|---|
| YouTube (Standard) | 1920x1080 (HD) or 3840x2160 (4K) | 16:9 landscape | 12 hours (effectively unlimited) | MP4 (H.264) |
| YouTube Shorts | 1080x1920 | 9:16 vertical | 60 seconds | MP4 (H.264) |
| Instagram Reels | 1080x1920 | 9:16 vertical | 90 seconds | MP4 (H.264) |
| TikTok | 1080x1920 | 9:16 vertical | 10 minutes (15-30s performs best) | MP4 (H.264) |
| Spotify Canvas | 720x720 (square loop) | 1:1 square | 3-8 seconds (seamless loop) | MP4 (H.264) |
| Live Performance Backdrops | 1920x1080 or higher | 16:9 landscape | Variable (seamless loop preferred) | MP4 or MOV (high bitrate) |
A few details worth highlighting. Shootlab's 2026 social media video specs guide confirms that Instagram Reels and TikTok both favor 1080x1920 vertical video at 9:16, and uploading the wrong format to the wrong surface is one of the most common, and most avoidable, performance killers. Spotify Canvas is uniquely restrictive: it demands a short, seamless square loop, which means your online audio visualizer output needs to be specifically crafted for that format rather than trimmed from a longer render. Many free audio visualizer online tools do not support Spotify Canvas dimensions natively, so verify before you start.
Optimizing Render Settings for Quality and Speed
Resolution is only half the equation. Frame rate, codec choice, and bitrate all influence how your finished visualizer looks after a platform compresses it, and they dramatically affect how long your render takes to complete.
Frame rate: 30fps is the standard for social content and keeps file sizes manageable. 60fps produces noticeably smoother motion, especially for fast-moving particle systems and geometric visualizations, but it doubles your frame count and rendering time. For AI-generated frame-by-frame content, that difference can mean hours of additional processing. Reserve 60fps for YouTube showcases or live performance backdrops where fluidity matters most. For TikTok and Reels, 30fps is perfectly native and avoids unnecessary render overhead.
Codec: MP4 with H.264 encoding remains the safest choice for web delivery. It is supported by virtually every device and platform, and social networks are optimized for H.264 playback. H.265 (HEVC) offers up to 50% better compression efficiency, meaning the same visual quality at roughly half the file size, but compatibility with older devices and some browsers remains inconsistent. If you are archiving high-resolution masters or working with 4K content where storage matters, H.265 is worth considering. For direct social uploads, stick with H.264 to avoid playback issues.
Resolution trade-offs: A 4K render looks stunning on a large monitor, but most social platforms compress uploads aggressively regardless of input resolution. Rendering at 1080p for social content hits the sweet spot between visual quality and practical render times, especially when using an online music visualizer that processes frames through cloud-based AI models. Save 4K for YouTube long-form content or archival purposes where the extra detail actually survives platform compression.
One critical planning decision deserves emphasis: choose your aspect ratio before you generate, not after. Cropping a 16:9 landscape render into 9:16 vertical does not just remove pixels. It destroys your visual composition. Key elements get sliced off. Centered focal points shift awkwardly. The framing that looked intentional in landscape becomes chaotic in portrait. Vertical content for TikTok and Reels requires a fundamentally different visual layout than landscape YouTube videos, with important elements stacked vertically in the center-safe zone rather than spread across a wide horizontal canvas. Most audio visualizer online tools let you set aspect ratio at the start of the workflow. Use that setting deliberately, and if you need content for both vertical and landscape platforms, plan two separate renders rather than forcing one to serve both.
Design your visualizer for the screen where your audience actually watches. A free online music visualizer that outputs at the right resolution and aspect ratio will outperform a premium render that gets cropped and compressed into irrelevance.
Getting the technical specs right ensures your visuals survive the journey from render to feed. The next challenge is a creative one: choosing the right tool for the job, because the landscape of AI visualizer platforms ranges from fully automated one-click generators to deeply customizable prompt-driven engines, and picking the wrong one for your skill level wastes both time and money.
Top AI Music Visualizer Tools Compared
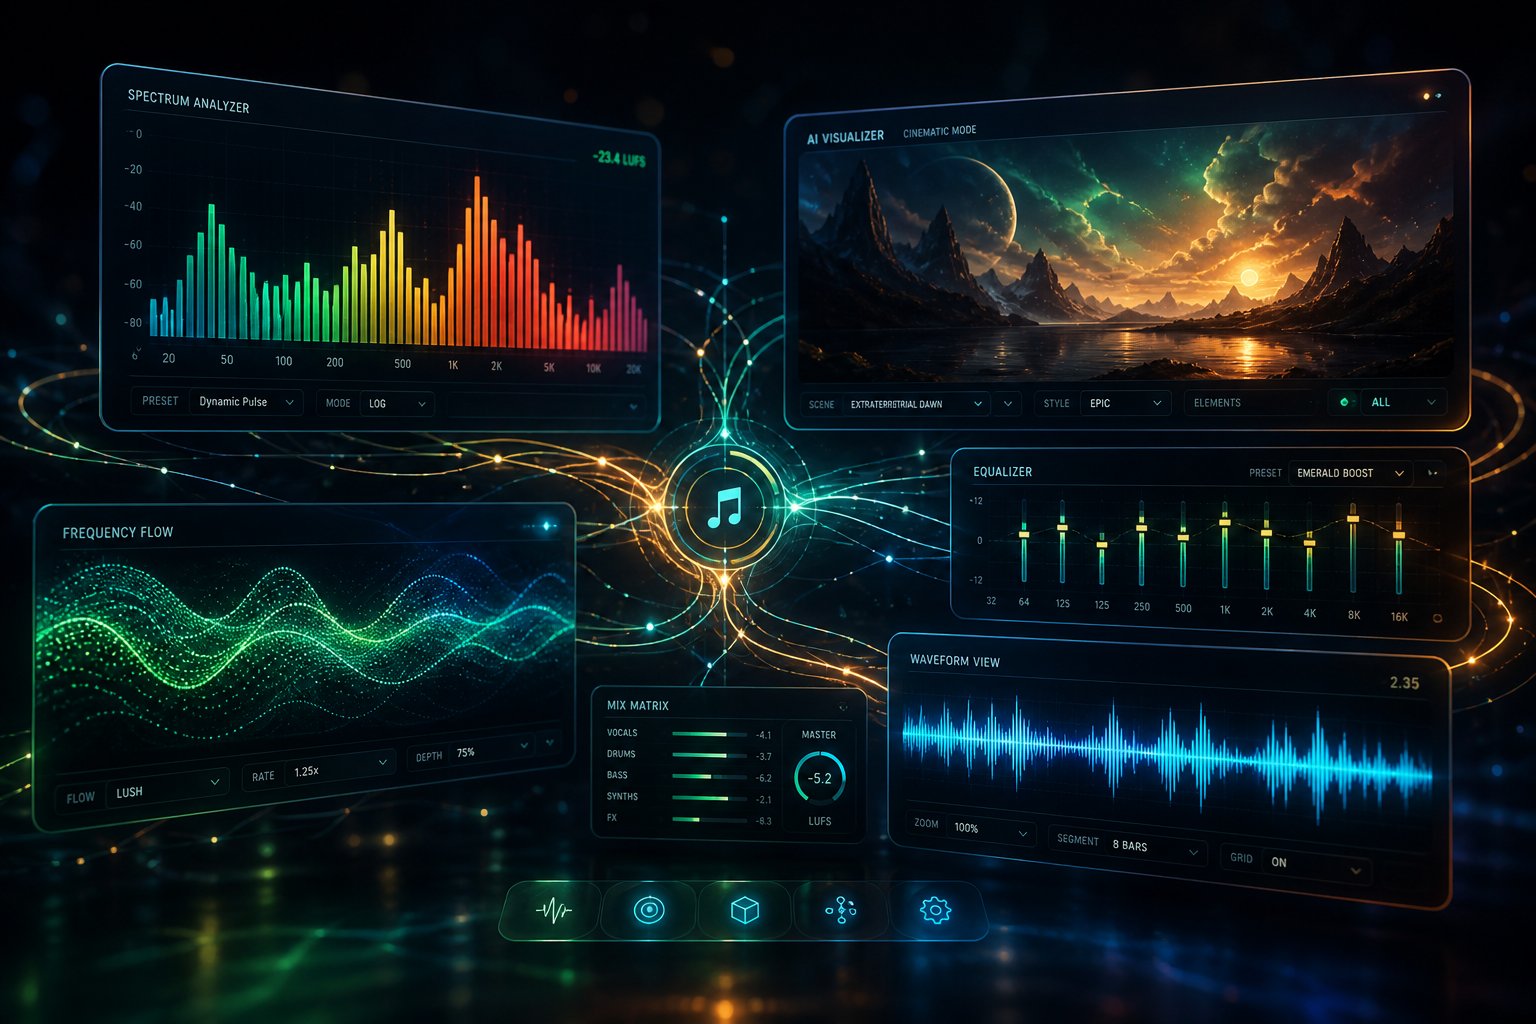
The difference between a frustrating afternoon and a finished visualizer often comes down to one decision: which tool you open first. The market for music visualizer software has split into two distinct camps, and understanding that divide before you commit saves real time and money. Below is a detailed comparison of the major platforms available right now, organized by their core technology, strengths, and ideal user profile.
| Tool Name | AI-Powered | Key Strength | Free Tier Available | Best For |
|---|---|---|---|---|
| MakeBestMusic AI Music Video Generator | Yes | Turns songs into full music videos, lyric videos, and visualizer content from a single platform | Yes | Musicians, YouTubers, and TikTok creators who need versatile visual output beyond just visualizers |
| Neural Frames | Yes | Highest visual fidelity with diffusion-model rendering and keyframe-level control | Limited trial | Electronic producers and visual artists chasing maximum image quality |
| SunoMV | Yes | Word-level lyric sync with 7 art styles and native Suno link support | Free create and preview (paid export) | Suno creators needing fast lyric videos with automatic synchronization |
| TwoShot | Yes | Multiple generative AI models (Seedance 2.0, Veo 3.1, Kling 3.0) for diverse visual outputs | Limited | Creators who want to experiment across different AI model architectures |
| LyricEdits | Yes | Lyric-driven visual storytelling with word-synced scene generation | Limited | Vocal-heavy tracks where on-screen lyrics are the primary visual element |
| Kaiber | Yes | Prompt-driven creative control with reference-image style anchoring | Limited trial | Experienced AI users making pure-visual, non-lyric content |
| Specterr | No | Professional spectrum and waveform animation templates with fast rendering | Limited | Producers needing clean, branded audio spectrum content quickly |
| Vizzy | No | Hundreds of pre-built templates with native social media sizing | Yes (watermarked) | High-frequency social posting where speed and consistency beat uniqueness |
| Rotor Videos | No | Stock footage library with AI auto-editing to the beat | No | Independent musicians who need quick promotional clips and lyric videos |
AI-Native Generators vs Traditional Visualizer Platforms
The most important distinction in this table is not which tool has the longest feature list. It is whether the platform generates novel visuals or applies pre-existing ones. AI-native generators like MakeBestMusic, Neural Frames, SunoMV, TwoShot, and Kaiber use generative models to create entirely new imagery frame by frame. Every render produces something unique because the AI is building visuals from scratch based on your specific audio and creative input. The practical upside is creative distinction: your visualizer will not look identical to another creator's output from the same platform.
Template-driven platforms take the opposite approach. The Specterr audio visualizer applies professional spectrum animations over background images, and the Specterr music visualizer workflow is fast precisely because it is not generating new imagery. Similarly, the Vizzy music visualizer offers hundreds of pre-built templates with native aspect ratio presets for Stories, TikTok, and Shorts, making it one of the fastest paths from audio file to published post. Rotor Videos sits in a middle lane, pulling from a stock footage library rather than templates or AI generation, then auto-editing clips to your beat.
The trade-off is straightforward. AI-native visualizer software produces more distinctive results but typically requires longer render times, sometimes 10 to 60 minutes depending on resolution and length. Template-based tools render almost instantly but offer less visual uniqueness, meaning your content may look similar to other creators using the same preset pack. For musicians building a recognizable visual identity, AI-native tools earn their extra processing time. For creators posting daily social clips where speed outranks originality, template platforms are the pragmatic choice.
Matching Tools to Your Specific Needs
Your ideal visualizer maker depends less on which tool is "best" in the abstract and more on where you sit as a creator. The neural frames AI music video generator, for instance, offers stunning output, but its prompt-plus-keyframe workflow demands real skill. A beginner uploading their first track would find that learning curve discouraging. Conversely, an advanced visual artist would feel creatively boxed in by a fully automated one-click tool.
Neural Frames structures this reality into three explicit tiers: Autopilot for fully automated generation, Render for prompt-guided creation, and Control for keyframe-level precision. That framework maps cleanly to how every creator should think about tool selection, regardless of which platform they choose:
- Beginners wanting one-click results — Prioritize tools with automated workflows and minimal configuration. MakeBestMusic's AI Music Video Generator is especially strong here because it handles visualizers, lyric videos, and full music videos from one interface, eliminating the need to learn multiple platforms. Vizzy and SunoMV also excel at fast, low-friction output for creators who want results without a prompt-writing learning curve.
- Intermediate creators who want style control — Look for platforms that accept text prompts, offer multiple art styles, or allow reference image uploads. Kaiber and SunoMV (with its 7 art style presets and custom prompt option) give you meaningful creative input without requiring technical expertise. This is the sweet spot for music player software with visualizers that feel custom but do not demand hours of tweaking.
- Advanced users who want prompt-level or keyframe-level control — Neural Frames and Kaiber provide the deepest creative toolkits, including per-scene prompt adjustments, keyframe animation curves, and audio-reactive parameter mapping. These are the right choice when you want a signature visual language that no preset can deliver, and you are willing to invest the time to learn the interface.
For creators who need versatility across content types, not just standalone visualizers, MakeBestMusic's AI Music Video Generator stands out as a particularly efficient option. Rather than using one tool for visualizers, another for lyric videos, and a third for promotional clips, it consolidates those workflows into a single platform. Musicians managing content across YouTube, TikTok, and Instagram benefit from that consolidation because it reduces the tool-switching overhead that eats into creative time. When the goal is turning a finished track into multiple visual assets for different platforms, having one hub that handles music videos, lyric content, and visualizer output streamlines the entire production pipeline.
The best AI music visualizer tool is not the one with the most features. It is the one that matches your skill level, your publishing cadence, and your creative ambition without forcing you to become a motion-graphics expert first.
Picking the right tool is only half the equation. The other half is knowing exactly where and how to use the content it produces, because AI-generated visualizers unlock far more practical value than most creators realize when they think beyond a single YouTube upload.
Practical Use Cases for Musicians and Content Creators
A visualizer sitting in your downloads folder is worth exactly nothing. Its value is realized only when it lands on a platform, in a context, where it changes how someone interacts with your music. The range of scenarios where AI-generated visuals create measurable impact is broader than most creators assume, stretching well beyond the obvious YouTube upload into workflows that touch every stage of a release cycle, a live set, and even a professional portfolio.
Social Media Music Promotion and Single Releases
Picture this: you finish mastering a new single. You have a Spotify release date locked in, a Linktree ready, and exactly zero video content to promote it with. Hiring a videographer for a proper shoot runs $1,000 to $5,000 or more, and even a freelance motion-graphics artist charging $300 for a simple lyric animation needs a week of turnaround. Meanwhile, the algorithmic window for a new release is measured in hours, not days.
This is where independent artists are finding the sharpest practical edge with AI visualizer tools. A single track can generate three to five distinct visual assets in an afternoon: a 15-second teaser for TikTok, a 30-second clip for Instagram Reels, a 60-second YouTube Short, and a full-length companion for the main YouTube upload. Versely's 2026 musician playbook reports that a track launched with three solid vertical visualizer cuts pulls 8 to 14 times the streams of a track dropped with nothing but a static cover image and a Spotify canvas. That multiplier is not about visual polish. It is about having video content at all, because platforms like TikTok and Instagram simply will not distribute audio-only posts.
The time-and-cost math works overwhelmingly in favor of AI generation for this use case. Where custom motion graphics require a creative brief, revision rounds, and a production timeline, an AI music visualizer generator delivers a finished asset from upload to export in under an hour. For artists releasing singles monthly or managing content across multiple platforms simultaneously, that efficiency difference compounds into weeks of reclaimed time over the course of a year.
YouTube Lyric Videos and Full Album Visualizers
YouTube remains the single largest music discovery platform globally, yet it is built for video. An audio-only upload with a static thumbnail struggles against the algorithm, which prioritizes watch time and visual engagement. Lyric videos solve this problem elegantly: they give viewers a reason to stay on the page while simultaneously reinforcing your song's words, which is especially powerful for vocal-driven genres like hip-hop, pop, and indie folk.
AI-powered tools have collapsed the cost and timeline of lyric video production dramatically. What once required a freelancer comfortable with After Effects and kinetic typography can now be generated by platforms that sync lyrics to your audio at the word level, layering text over AI-generated backgrounds that shift in style and mood to match each section of the song. For a full album release, this means you can give every track a distinct visual identity without commissioning ten separate video projects. Each song gets its own color palette, its own atmospheric backdrop, its own visual personality, all generated from the same workflow.
Full-length album visualizers serve a slightly different purpose. They create a lean-back listening experience on YouTube, essentially a visual album where each track flows into the next with unique generative imagery. For artists building a YouTube channel as a long-term discovery asset, this kind of content accumulates watch hours that feed the algorithm steadily, turning your catalog into a passive promotion engine months or even years after release.
Live Performance Backdrops and VJ Content
Beyond the screen-based world of social feeds and streaming platforms, AI-generated visualizations have carved out a growing role in physical performance spaces. DJs, electronic producers, and live performers use these tools to create stage backdrops that react to their music or run as pre-rendered loops behind their sets. The DJing.ai performance guide notes that a 2025 Eventbrite survey found a 20% increase in audience satisfaction when dynamic, responsive visuals were present compared to static or repetitive visual loops. For performers working smaller venues without a dedicated VJ, pre-rendered AI visualizations offer a cost-effective way to elevate the visual experience without hiring additional crew.
A live audio visualizer setup can range from straightforward to highly technical. At the simpler end, a performer pre-renders a set-length visual mix from their tracklist and plays it back on a projector or LED wall, synced manually to their performance. More advanced setups feed real-time audio into a live music visualizer website or desktop application that generates reactive visuals on the fly, though this demands robust hardware to maintain smooth frame rates. Both approaches benefit from the same AI generation technology discussed throughout this article; the difference is whether the visuals are created before the show or during it.
For DJs building a visual identity across residencies and festival appearances, a music visualizer for Spotify Canvas loops also deserves attention. Spotify Canvas displays a 3- to 8-second looping video on the now-playing screen, and artists who upload canvas content see measurably higher save rates and playlist adds. A short, seamless AI-generated loop, perhaps a slow-motion abstract gradient or a pulsing geometric pattern matched to the track's energy, transforms the passive listening screen into a branded visual touchpoint.
To put the full range of scenarios into a scannable format, here are the primary use cases where AI-generated visualizers deliver the clearest return on creative investment:
- Social media promotion — Vertical teaser clips and short-form visualizers for TikTok, Instagram Reels, and YouTube Shorts that turn audio releases into shareable video content
- YouTube channel content — Full-length visualizers and lyric videos that accumulate watch time, drive subscriber growth, and keep your catalog visually discoverable
- Spotify Canvas loops — Short, seamless visual loops for the Spotify music visualizer now-playing screen, boosting engagement metrics like saves and shares
- Live performance visuals — Pre-rendered or real-time stage backdrops for DJs, electronic artists, and bands performing in venues with projection or LED capabilities
- Podcast video enhancement — Converting audio-only podcast episodes into visual content for YouTube and social distribution, using waveform or spectrum overlays to give listeners something to watch
- Music portfolio presentation — Embedding visualizer clips in EPKs (electronic press kits), artist websites, and pitch decks to give A&R contacts, booking agents, and playlist curators a richer first impression
Each scenario demands slightly different output specs, visual styles, and platform considerations, which is exactly why understanding the full use-case landscape matters before committing to a tool or workflow. The real power of an AI music visualizer generator is not that it makes one great video. It is that it turns a single audio file into a content ecosystem spanning every platform where your audience might discover you.
Of course, no tool delivers all of this without trade-offs. Render times add up. Costs scale with volume. And AI-generated visuals are not yet immune to inconsistencies that can undermine the professional polish you are aiming for. Those limitations deserve an honest look before you build your next campaign around them.

Limitations and Honest Downsides You Should Know
Every tool has a ceiling, and AI visualizers are no exception. The previous sections covered what these platforms can do at their best. This section covers where they fall short, because understanding these constraints before you commit to a workflow saves you from wasted credits, missed deadlines, and visual output that undermines the professionalism you are trying to project. No one else in this space talks openly about these trade-offs. That silence does not make the problems disappear.
Rendering Time and Cost Considerations
Speed is the first expectation that collides with reality. Template-based tools render a finished visualizer in seconds or minutes because they are applying pre-built animations to your audio waveform. AI-native generators operate on an entirely different timeline. When a platform creates new imagery frame by frame using diffusion models or video generation networks, a three-minute track at 30fps requires generating 5,400 individual frames, each one a fresh AI inference pass. Depending on the tool, resolution, and underlying model, a full render can take anywhere from 15 minutes to well over an hour. If you are working with a free audio visualizer tier, expect even longer queue times as your job waits behind paying users.
Cost scales in ways that surprise creators who start with a single track and then try to visualize an entire album or maintain a weekly posting cadence. Most AI visualizers use credit-based or subscription pricing. A single high-quality render might cost $3 to $15 in credits. Multiply that across a 12-track album, and you are looking at $36 to $180 just for visualizer content, before factoring in test renders, re-generations for unsatisfactory output, or separate vertical and landscape versions for different platforms. Subscription plans cap your monthly generation minutes, and exceeding those caps means purchasing additional credits at premium rates.
No competitor in this space publishes transparent, side-by-side pricing comparisons, and rates change frequently. The only reliable approach is checking each tool's current pricing page directly before committing. What looks affordable for a single project can become a significant ongoing expense when you are producing content at scale.
Quality Consistency and Creative Control Trade-Offs
Even the most capable AI visualizers produce inconsistent results. You will encounter this firsthand: a render that looks breathtaking for the first 45 seconds suddenly develops flickering artifacts during the bridge, or the color palette drifts noticeably between the verse and chorus in ways your prompt never intended. These issues stem from how generative models work. Each frame is produced with some degree of randomness, and maintaining perfect visual coherence across thousands of consecutive frames remains a genuine technical challenge.
AI Fruit's quality guide identifies the most common artifacts: flickering caused by frames generated semi-independently without temporal locking, face or shape morphing where features warp between frames, and physics violations where objects or particles behave in ways that feel visually wrong. Their testing found that even leading models like Kling 3.0 and Seedance 2.0 still score poorly on style consistency and physics simulation in standardized benchmarks. These are not bugs in any specific tool. They are current limitations of the underlying AI technology.
The prompt engineering learning curve compounds this problem. Writing a prompt that produces one beautiful frame is relatively straightforward. Writing a prompt that produces 5,400 beautiful and visually consistent frames is a skill that takes real practice. Beginners often experience a frustrating gap between what they envision and what the AI delivers, especially when using abstract or cinematic styles where small prompt changes produce wildly different outputs. The fix is iterative: render short test clips, refine your language, and run multiple variations before committing to a full-length generation. But that iteration cycle itself costs time and credits, which brings you back to the cost-at-scale concern.
If you want to grab a quick audio visualizer download from a free visualizer platform and call it done, template-based tools still deliver more predictable, artifact-free results. The trade-off is creative uniqueness for visual reliability, and for certain use cases like podcast audiograms or simple social posts, that trade-off makes perfect sense. A visualizer free of distracting glitches will always outperform a visually ambitious render that flickers or morphs at the wrong moment.
Copyright and Ownership Considerations
This is the limitation most creators overlook entirely, and it is arguably the most consequential. When an AI model generates your visualizer imagery, who actually owns it? Can you monetize it freely on YouTube without risking a content claim? Could the AI produce imagery that unintentionally resembles copyrighted works from its training data?
The legal landscape remains genuinely unsettled. Stock Legal's 2026 analysis of AI-generated works and ownership confirms that U.S. copyright law requires human authorship, and works created solely by AI without meaningful human input are not eligible for copyright protection. The practical question is where your contribution, selecting prompts, choosing styles, curating output, falls on the spectrum between "operating a tool" and "creative authorship." Recent U.S. Copyright Office guidance suggests that prompts alone are unlikely to qualify as authorship unless paired with significant human selection, arrangement, or modification of the output.
For musicians, this ambiguity creates a real business risk. If your AI-generated visualizer content lacks copyright protection, competitors could theoretically reuse your visuals freely. And on the input side, AI models trained on large datasets of existing visual works raise the question of whether generated outputs could be considered derivative of copyrighted training data. Courts have begun addressing these issues, but there is no universally accepted framework yet.
The practical safeguard, as Stock Legal recommends, is contractual: review each platform's terms of service to understand what rights you receive over generated content, look for indemnification clauses that protect you against infringement claims, and document your human creative involvement in the generation process to strengthen any ownership argument.
To put all of these constraints in one place, here are the key limitations every creator should weigh before building a content strategy around AI visualizers:
- Rendering time — AI-generated frame-by-frame content takes significantly longer to produce than template-based alternatives, with full-track renders ranging from 15 minutes to over an hour
- Cost at scale — Credit-based and subscription pricing models add up quickly when producing content for full albums, multiple platforms, or weekly posting schedules
- Visual consistency — Flickering, color drift, morphing artifacts, and physics violations remain common across all current AI video models
- Prompt learning curve — Achieving reliable, high-quality output requires iterative prompt refinement that itself consumes time and credits
- Copyright ambiguity — Ownership of AI-generated visual content is legally unsettled, with implications for monetization, exclusivity, and infringement risk
- Platform-specific format constraints — Different platforms demand different resolutions, aspect ratios, and durations, often requiring multiple separate renders from the same source track
None of these limitations are dealbreakers. They are trade-offs, and every creative tool involves trade-offs. The difference between a frustrated creator and a productive one is knowing these constraints upfront and planning around them rather than discovering them mid-project. With a realistic picture of both the capabilities and the boundaries of these tools, the final question becomes the most personal one: which approach actually fits your goals, your skill level, and your budget?
How to Pick the Right AI Visualizer for Your Goals
Trade-offs only paralyze you when you lack a framework for evaluating them. The capabilities, limitations, and use cases covered throughout this guide all converge on a single practical question: which tool and workflow match your situation right now? Not someone else's genre, budget, or skill set. Yours. The table below maps the three most common creator profiles to the features, approaches, and spending ranges that deliver the best return at each level.
Choosing by Skill Level and Budget
| User Level | Priority Feature | Recommended Approach | Budget Range |
|---|---|---|---|
| Beginner | One-click automation, zero prompt writing, fast output | Start with fully automated AI tools that handle style selection, sync, and rendering without manual input. Explore free tiers before upgrading. Focus on getting content published rather than perfecting every frame. | Free to $10/month |
| Intermediate | Style customization, text prompts, art direction control | Use platforms that accept visual prompts, offer multiple art style presets, or support reference image uploads. Test 2-3 tools on the same track to compare output quality before committing to a subscription. | $10 to $30/month |
| Advanced | Keyframe control, per-scene prompt adjustments, API access | Invest in tools with timeline-based editing, frame-level creative control, and granular parameter mapping. Budget for longer render times and higher credit consumption. Consider combining a specialist ai visualizer maker for hero content with a faster template tool for daily social posts. | $30 to $100+/month |
Beginners often make the mistake of gravitating toward the most powerful tool because it has the most impressive demo reel. A music visualizer free tier on a simpler platform will teach you more about what works visually with your music than an advanced tool you abandon after two frustrating sessions. The goal at every level is the same: get a finished piece of content onto a platform where your audience can find it. The sophistication of your workflow should scale with your experience, not the other way around.
If you already know your skill level but are unsure which tier of control you need, think about it through the lens of time. How many hours per week can you realistically dedicate to visual content? Beginners with limited time benefit most from automation. Intermediate creators with a few hours to spare can invest in prompt refinement and style exploration. Advanced users who treat visuals as a core part of their artistic identity will find the deeper tools worth the steeper learning curve.
Getting Started with Your First AI Visualizer
Decision paralysis is the enemy of progress. You do not need to evaluate every platform exhaustively before creating your first piece of visual content. Here is a concise action plan that works regardless of which tool you choose:
- Pick one tool and commit to it for your first project. Switching between three platforms mid-workflow teaches you nothing and wastes your energy. Choose based on the skill-level table above and start there.
- Start with a 30-second clip, not a full track. Select the most dynamic 30 seconds of your song, ideally a section with a clear build from quiet to loud, and use that as your test bed. A short clip renders faster, costs fewer credits, and gives you a tighter feedback loop for learning what works.
- Experiment with at least three different styles on the same audio. Whether you are choosing from preset templates or writing text prompts, seeing how the same 30 seconds look across different visual treatments sharpens your creative instincts faster than reading about styles in the abstract.
- Iterate before committing to a full render. Use low-resolution previews or short test generations to refine your approach. Two or three quick iterations at preview quality will save you from burning credits on a full-length music visualizer ai render that misses the mark.
- Export and publish. Do not let perfectionism hold your first visualizer hostage. A published visualizer that is 80% of your vision outperforms an unpublished masterpiece every single time. You will learn more from audience response than from another round of tweaking.
Free tiers exist for a reason. Nearly every ai visualizer generator offers some form of unpaid access, whether it is watermarked output, limited monthly generations, or lower-resolution exports. Use these free music visualizer options aggressively during your learning phase. You should understand a platform's interface, rendering speed, and output quality before your credit card enters the equation. An ai visualizer generator free tier that fits your workflow will always outperform a paid subscription to a tool that frustrates you.
For creators who need more than standalone visualizers, versatility becomes the deciding factor. MakeBestMusic's AI Music Video Generator is a strong starting point precisely because it consolidates multiple content types into a single workflow. Instead of juggling one tool for visualizers, another for lyric videos, and a third for full AI music videos, you can generate all three from the same platform. That consolidation matters most for musicians and marketers managing content across YouTube, TikTok, and Instagram simultaneously, where every release needs a landscape version, a vertical cut, a lyric clip, and a short teaser. Handling all of those from one hub eliminates the tool-switching overhead that quietly eats hours out of every release cycle. When your visualizer ai workflow and your music video workflow live under the same roof, you spend less time learning interfaces and more time making content that reaches people.
The right AI music visualizer is not the one with the most impressive technology demo. It is the one that fits your creative vision, matches your publishing workflow, and gets your music in front of eyes that would have scrolled right past the audio alone.
Every tool reviewed in this guide, from one-click automated platforms to keyframe-level ai audio visualizer engines, exists to solve the same fundamental problem: music deserves to be seen, not just heard. The platforms will evolve, the underlying models will improve, and render times will shrink. What will not change is the core advantage these tools provide. They turn a finished song into a content ecosystem, giving independent creators the visual firepower that used to require a production budget, a motion-graphics team, and weeks of lead time. Start with one tool, one track, and one 30-second clip. The scroll stops when people have something to watch.
