

Yes You Can Use AI to Make Video to Your Music
Short answer: yes, you can absolutely use AI to make video to your music. The technology has moved well beyond novelty. In 2025 and into 2026, artificial intelligence music video tools have matured to the point where independent artists, bedroom producers, and content creators are publishing AI-generated visuals that genuinely hold attention on YouTube, TikTok, and Spotify Canvas. No film crew. No five-figure budget. Often no video editing experience at all.
But here's the honest picture. AI music video generators range from tools that produce release-ready content in minutes to others that hand you disjointed clips you'll spend hours stitching together in Premiere. Quality depends heavily on which type of tool you choose, how well you prepare your audio, and how specific your creative direction is. Expect to invest anywhere from $0 (free tiers with watermarks) to around $30-50 per month for professional output. Time commitment varies from a single click to a full afternoon of prompt refinement and editing.
What AI Music Videos Actually Look Like Today
When people ask how do you make a music video with AI, they often picture one thing. In reality, there are four distinct categories of AI-generated music video, each suited to different goals:
- Audio-reactive visualizers — Visuals that pulse, morph, and shift in direct response to your track's frequencies, BPM, and energy. Perfect for electronic, ambient, and lo-fi genres where abstract imagery complements the sound.
- Prompt-based narrative videos — You write text descriptions of scenes, the AI generates video clips, and you align them to your song structure. More creative control, more effort, but capable of storytelling.
- AI lyric videos — Tools that animate your lyrics over stylized backgrounds, syncing text appearance to vocal timing. A practical option for official lyric video releases on any budget.
- AI storytelling videos synced to music — Platforms that analyze your full arrangement, detect verses and choruses, and generate scene-by-scene narrative content with consistent characters. The newest and most ambitious category.
The gap between these categories is significant. An audio-reactive visualizer can produce a polished Spotify Canvas loop in under five minutes. A full narrative ai music video with consistent characters and beat-synced transitions still requires iteration and careful prompting. Knowing which type fits your release saves you from choosing the wrong tool and getting frustrated with the results.
Who Benefits Most From AI Music Video Tools
So how can you make a music video if you have zero production budget and a track that deserves visuals? That's exactly the scenario where AI tools shine. The people getting the most value from these platforms fall into three groups:
Independent musicians without video budgets. A basic human-directed music video runs $500 to $2,000 from a local videographer. A polished production easily hits $5,000 to $20,000. AI lets you create music video with ai for a fraction of that cost, making it realistic to produce visual content for every single or EP track rather than just your lead release.
YouTubers building a music channel. Consistency matters more than perfection on YouTube. An app to make a video with music that generates visuals quickly means you can publish visual versions of every track, keeping your channel active and algorithm-friendly.
Social creators repurposing songs for TikTok, Reels, and Shorts. Short-form video platforms reward volume and visual hooks. If you're wondering how can I make a video with music that stops the scroll in under three seconds, AI generators optimized for vertical formats are built for exactly that workflow.
This guide walks through the full pipeline — from preparing your raw audio file to publishing a finished video across platforms. Each step covers practical decisions you'll face, the best ai platform to make music videos for social media depending on your genre, and the honest trade-offs between speed, quality, and cost. The tools are ready. The question isn't whether AI can do this. It's which approach matches your music and your goals.
Step 1 - Understand the Four Types of AI Music Video Generation
Picking a tool before understanding the categories is like buying a guitar amp before knowing what genre you play. Each type of AI music video generation works differently, accepts different inputs, and produces a fundamentally different visual output. You'll save hours of frustration by matching the right category to your track's needs first.
Think of the landscape as four lanes, each serving a distinct creative purpose. Some tools act like a modern mtv music generator, automatically producing polished visual content from your audio. Others hand you a canvas and expect you to direct every frame. Here's how they break down.
Audio-Reactive Visualizers That Respond to Your Beat
These tools analyze your audio waveform in real time, extracting amplitude, frequency spectrum, and beat onsets. The result? Visuals that pulse, morph, and shift in direct response to your track's energy. When the bass hits, shapes expand. When the high-end sparkles, particles scatter. Every visual element ties back to something happening in the audio.
An ai beat visualizer works best for genres where abstract imagery complements the sound: electronic, ambient, lo-fi, synthwave, downtempo. The visual output is mesmerizing but non-narrative. You won't get characters or storylines. You'll get color fields that breathe with your mix, geometric shapes that fracture on snare hits, and flowing textures that follow your melody's contour.
Tools in this category include Neural Frames (which layers energy-curve analysis over multiple generation models), projectM (open-source and free), and Plazmapunk (browser-based with a rendered output mode). These are also a natural fit for creators making anime music videos with reactive abstract styles that respond to the beat rather than depicting narrative scenes.
The strength here is automation. Upload a track, choose a style, and the visualizer maker handles the rest. The limitation is creative range. You're locked into abstract territory, which is stunning for the right genre and underwhelming for a hip-hop track that wants storytelling.
Prompt-Based AI Video Generators With Manual Sync
Imagine describing each scene of your music video in words, then watching AI generate those scenes as video clips. That's the prompt-based approach. You write text prompts, something like "a lone figure walking through neon-lit rain, cinematic lighting, slow motion," and the AI produces a 5-to-10-second clip matching that description. You then manually align these clips to your song's structure.
This category offers the highest creative control of any AI method. You decide what each section looks like. You choose the visual style, whether photorealistic, illustrated, or painterly. You can create ai image to video with audio and emotions by carefully crafting prompts that match the emotional arc of your track. The trade-off is time and skill. Assembling a full 3-minute video from individually generated clips requires editing software and a clear creative vision.
Runway Gen-4 and Kling AI sit squarely in this lane. Both produce cinematically impressive footage but have zero audio integration. You generate clips, then sync them to your track in post-production. For creators with editing chops, this approach delivers results that rival professional production. For creators who want something fast, it's the wrong lane.
Link-Based Tools That Auto-Generate Full Videos
Lowest effort, highest convenience. These platforms accept a YouTube link, a SoundCloud URL, or a direct audio upload and automatically produce a complete music video. The AI handles everything: beat detection, scene generation, transitions, and final render. You provide the song. You get back a finished video.
Freebeat is the clearest example. Paste a link (YouTube, SoundCloud, Suno, or Udio), and the platform extracts your audio, analyzes its BPM and structure, and generates a beat-synced video with character consistency and scene variety. The workflow takes minutes, not hours. For independent musicians releasing frequently, this speed makes visual content sustainable for every track rather than just flagship singles.
The limitation is creative control. You're trusting the AI's interpretation of your song. Results vary depending on the track's complexity and how well the platform's style presets match your genre. But for artists who need something polished and platform-ready without a post-production workflow, link-based tools fill a gap nothing else covers.
AI Lyric Video Generators
A free ai lyric video generator takes your lyrics text file and animates the words over stylized backgrounds, syncing each line's appearance to your vocal timing. The output is a dedicated lyrical video maker workflow: words appear, highlight, fade, and move in rhythm with your delivery.
This category serves a specific purpose. Lyric videos remain one of the most-watched formats on YouTube for music content. They're cheaper and faster to produce than narrative videos, yet they give listeners something visual to engage with while following along. AI tools in this space handle the tedious timing work that used to require hours of manual keyframing in After Effects.
Freebeat includes a built-in lyrics video module with customizable fonts, highlight animations, and timing controls. Other tools like Rotor Videos also offer lyric-focused workflows. The visual sophistication ranges from simple karaoke-style text to fully animated typographic sequences with reactive backgrounds. For official releases where you want a visual presence on YouTube without committing to a full narrative video, this category delivers practical results quickly.
| Category | Input Method | Creative Control | Time Required | Best For (Genre/Use Case) | Typical Cost |
|---|---|---|---|---|---|
| Audio-Reactive Visualizers | Direct audio upload | Low to Medium (style presets, color choices) | 5-30 minutes | Electronic, ambient, lo-fi, synthwave; Spotify Canvas, livestream backgrounds | Free to $15/month |
| Prompt-Based Generators | Text prompts + separate audio file | High (scene-by-scene direction) | 2-6 hours (generation + editing) | Hip-hop, pop, cinematic storytelling; YouTube full-length videos | $10-35/month |
| Link-Based Auto-Generators | YouTube/SoundCloud/upload link | Low to Medium (style selection, character options) | 5-15 minutes | All genres; fast social content, consistent release schedules | $5-40/month |
| AI Lyric Video Generators | Audio file + lyrics text | Medium (font, animation style, timing) | 15-45 minutes | Any vocal track; official lyric releases, YouTube SEO | Free to $10/month |
Each category serves a real need. The question isn't which is "best" in the abstract. It's which one matches what you're actually trying to create. An electronic producer building a visualizer maker workflow for Spotify Canvas has completely different requirements than a rapper who wants a narrative video with consistent characters. Genre, budget, timeline, and creative ambition all factor into the decision, and the next step is making sure your audio file is ready to give any of these tools the best possible input to work with.
Step 2 - Prepare Your Music File for the Best AI Output
Your audio file is the raw material every AI video tool analyzes before generating a single frame. Feed it a clean, well-structured track and the algorithm detects beat onsets, vocal regions, and energy shifts with precision. Feed it a low-quality MP3 ripped from a streaming link, and you'll wonder why transitions land in awkward places and the beat sync feels half a second off. A few minutes of preparation makes the difference between a polished result and a frustrating one.
Audio Format and Quality Requirements
Most AI music video platforms accept common audio formats: MP3, WAV, AAC, M4A, FLAC, and AIFF. But "accepted" and "optimal" are different things. WAV or FLAC preserves every detail of your mix, giving the AI's waveform analysis the cleanest signal to work with. VibeMV's technical guide recommends WAV for master exports, with MP3 at 320kbps as a practical fallback when file size matters. Anything below 320kbps introduces compression artifacts that muddy transients and confuse beat detection algorithms.
Here's a common mistake: converting a 128kbps MP3 to WAV hoping it'll improve results. It won't. Upconverting a lossy file doesn't restore the frequency data that was already discarded during compression. Always export directly from your DAW at the highest quality available. In Ableton, FL Studio, or Logic Pro, choose WAV 44.1kHz/16-bit as your minimum standard. If you're working with a 24-bit session, export at 24-bit — some platforms handle it natively.
Some tools skip the file upload entirely and accept platform links instead. Paste a YouTube or SoundCloud URL, and the system extracts audio automatically. This approach works well for quick tests or when your track is already published and you want to generate visuals without hunting for the original project file. It's also useful if you're exploring an mp3 youtube upload workflow where you've already published audio and want matching video content. The trade-off is that link-extracted audio may carry platform compression, so for your final release video, always upload the source file directly.
Structuring Your Track for Better AI Results
AI video generators don't just listen to your audio — they analyze its structure. The algorithm identifies where energy rises, where vocals enter, where the drop hits, and where transitions belong. A track with clearly defined sections gives the AI obvious anchor points to work with. A song that drifts between sections without distinct changes produces videos that feel visually flat and randomly paced.
Consider these structural elements before uploading:
Clear beat markers and consistent tempo. Tracks with a steady BPM give beat-detection algorithms an easy job. Complex time signatures or frequent tempo shifts can confuse simpler tools, leading to visual transitions that land between beats rather than on them.
Distinct sections. A verse that sounds clearly different from the chorus, a bridge that drops energy, an intro that builds — these contrasts tell the AI where to trigger scene changes. If your song structure is ambiguous, the generated video tends to feel monotonous.
Dynamic shifts over silence. Some producers include long silent intros or abrupt silence between sections. Most AI tools treat silence as dead space, generating empty or glitchy visuals during those gaps. If you're testing a tool for the first time, trim extended silent sections and upload just the strongest 60-90 seconds to evaluate results without wasting credits or generation time.
One practical consideration many creators overlook: knowing your BPM before uploading. Some platforms auto-detect tempo, but if yours misreads a half-time groove as double-time, your visuals will pulse at twice the intended speed. Check your DAW's BPM readout or tap it manually using a free online tool. If you're working from a Spotify link to mp4 conversion or pulling audio from a streaming platform, the BPM isn't always embedded in the metadata, so you'll want to verify it independently. Similarly, if you've been researching how to import mp3 into Spotify for distribution purposes, that same source file is exactly what you should upload to your AI video tool — it's already mastered and formatted correctly.
- Confirm file format: WAV or FLAC for best results; MP3 at 320kbps minimum if file size is a concern
- Check bitrate: Verify your export isn't below 320kbps for MP3; avoid upconverted lossy files
- Note your BPM: Record the exact tempo from your DAW — don't rely on auto-detection alone
- Identify section timestamps: Mark where your intro, verse, chorus, bridge, and outro start (in seconds or mm:ss format)
- Trim if testing: Cut to your strongest 60-90 second segment for initial generations before committing a full track
- Prepare a lyrics text file: If you're creating a lyric video, have your lyrics in a plain text document with line breaks matching your vocal phrasing
- Decide on aspect ratio early: 16:9 for YouTube, 9:16 for TikTok/Reels/Shorts — this choice affects generation and can't easily be changed after rendering
Solid preparation at this stage means fewer wasted generations, better beat sync, and cleaner transitions once you upload your song and the AI will make a visual draft. With your file ready and your structure mapped, the next decision is which specific tool deserves that clean audio file — and that choice depends heavily on your genre, your visual ambitions, and how much hands-on involvement you want in the creative process.
Step 3 - Pick the Right AI Tool for Your Genre and Goals
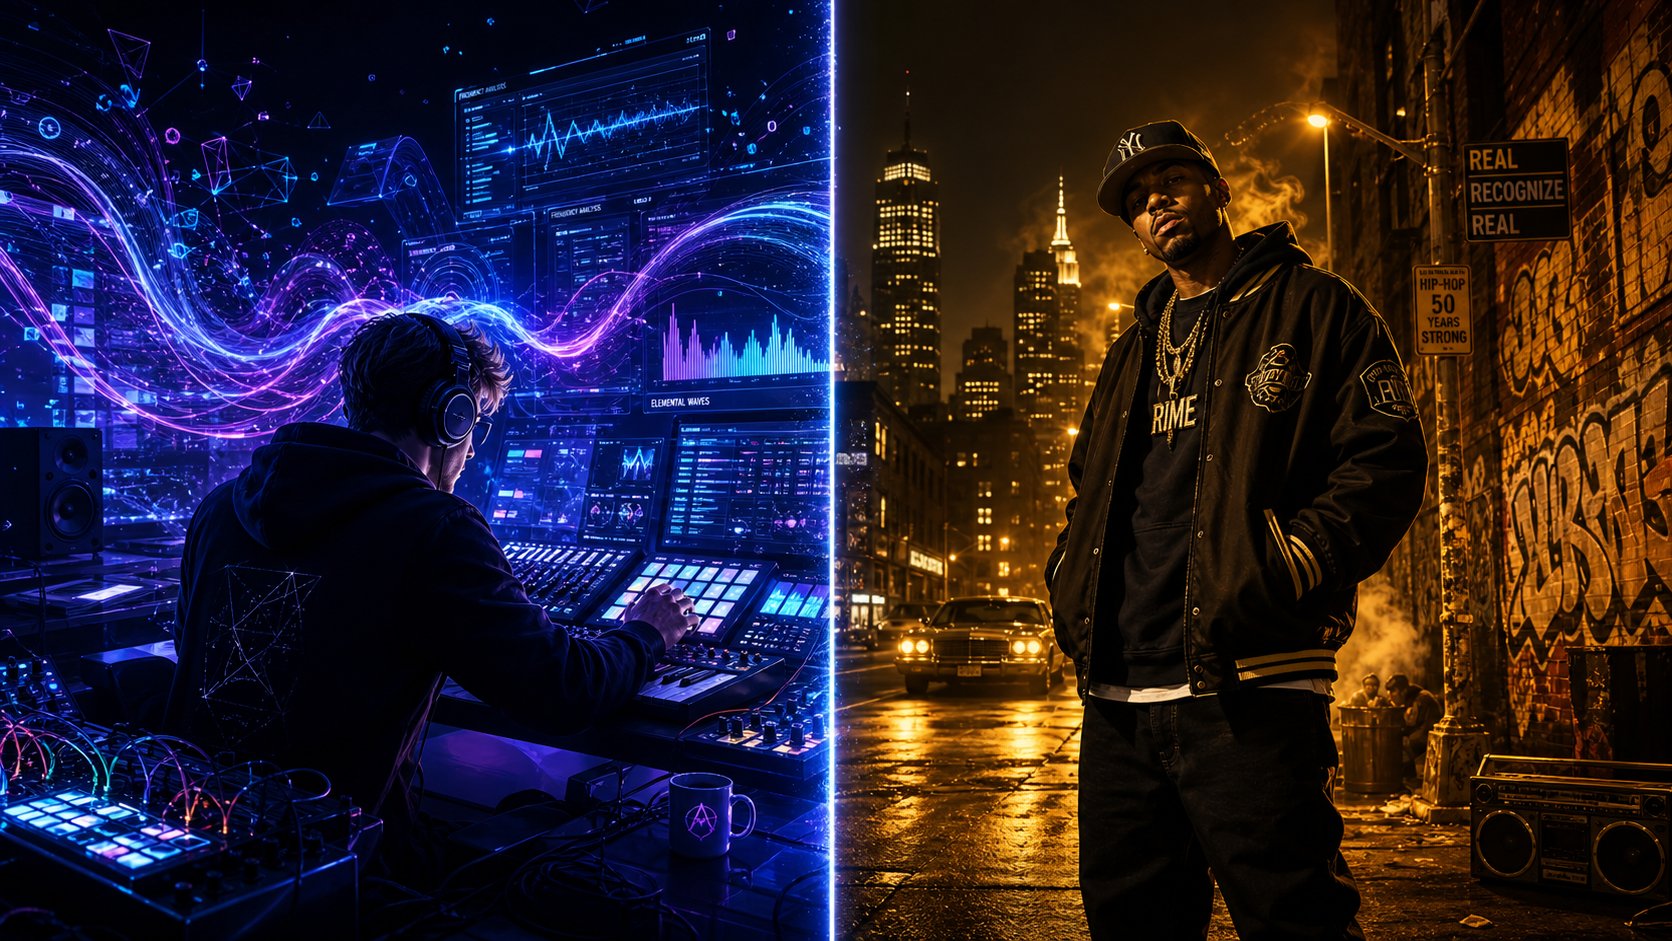
Genre shapes everything about a music video — the color palette, the pacing, the visual language your audience already expects. An ambient track wrapped in cinematic narrative footage feels disjointed. A hard-hitting trap beat paired with soft watercolor animations misses the mark entirely. The best ai music generators aren't universally "best." They're best for a specific combination of genre, visual style, and workflow preference. Here's how to match them.
Matching Tools to Your Music Genre and Visual Style
Think about what your listeners already see in their heads when your track plays. That mental image is your starting point for choosing a tool category and platform.
Electronic, ambient, lo-fi, and synthwave — These genres thrive on atmosphere and texture rather than storytelling. Audio-reactive visualizers are the natural fit. Tools that analyze frequency data and translate amplitude into visual motion create hypnotic content that feels inseparable from the sound. The neural frames ai music video generator excels here, with its 8-stem audio reactivity producing visuals that dance precisely to each element of your mix.
Hip-hop, pop, and R&B — Audiences in these genres expect narrative, character presence, or at minimum a strong visual concept. Prompt-based generators and link-based auto-generators handle this better than abstract visualizers. You want scene variety, human figures (even stylized ones), and beat-synced transitions that hit on the kick and snare.
Acoustic, folk, and singer-songwriter — Lyric videos and stylized imagery work well here. The focus is the words and the emotional arc. Heavily animated or flashy visuals can overwhelm quieter, more intimate music. A clean lyric video generator or a platform that produces gentle, illustrative scenes often serves these genres better than a high-energy visualizer.
Rock, metal, and punk — Fast cuts, aggressive color contrast, and gritty textures. Prompt-based tools let you dial in the specific visual intensity these genres demand, while some link-based tools offer presets that lean into darker, more energetic aesthetics.
Comparing Top AI Music Video Platforms
With dozens of music video apps and platforms competing for attention, a side-by-side comparison cuts through the noise. Here's how the leading options stack up across the factors that actually matter when you're choosing where to upload your track:
| Platform | Input Method | Free Tier Available | Best Genre Fit | Output Quality | Ease of Use |
|---|---|---|---|---|---|
| MakeBestMusic AI Music Video Generator | Direct song upload | Yes (limited) | All genres — strong all-rounder | High (1080p, social-optimized) | Very easy — upload and generate |
| Neural Frames | Audio upload + prompts | Trial credits | Electronic, ambient, experimental | Up to 4K | Moderate — learning curve for advanced features |
| LTX Studio | Text prompts + audio | Free trial | Pop, hip-hop, narrative-driven | 1080p | Moderate — multi-scene setup required |
| Freebeat | YouTube/SoundCloud link or upload | Free starting credits | All genres — fast social content | Up to 4K | Very easy — link-and-go workflow |
| VidMuse | MP3 upload + reference images | Free trial | Narrative-heavy, indie releases | 1080p | Moderate — storyboard-driven workflow |
MakeBestMusic's AI Music Video Generator sits at the top as a recommended starting point for a reason: it accepts direct song uploads and produces social-ready video without requiring complex prompt engineering or manual scene assembly. For musicians, YouTubers, and social creators who want to turn a finished track into a visual asset without learning a new creative tool, the upload-and-generate workflow removes the biggest friction point. You focus on your music. The platform handles the visual interpretation.
Neural Frames is the specialist pick for producers who want deep audio-reactive control and don't mind investing time in the frame-by-frame editor. LTX Studio suits creators with a clear narrative vision who want multi-scene storytelling. Freebeat delivers speed and convenience for anyone who wants a finished video from a link in minutes. Each platform occupies its own lane — the right choice depends on whether you prioritize ease, control, speed, or visual style.
Free vs Paid Options and What You Actually Get
Nearly every ai music video generator free tier comes with strings attached. Understanding those strings before you invest time in a project prevents the frustration of building something you can't actually export cleanly.
Here's what free tiers typically include:
- Watermarks — Platform branding burned into your export. Fine for testing, unprofessional for a public release.
- Resolution caps — Many free plans limit output to 720p or lower. On a modern phone or YouTube, that looks noticeably soft.
- Duration limits — Free generations often cap at 15-30 seconds. Enough for a TikTok teaser, not enough for a full music video.
- Credit systems — A fixed number of generations on signup, with no monthly reset. Once they're gone, you pay or wait.
- Older AI models — Paid plans typically route generation through newer, higher-fidelity models while free tiers use faster but lower-quality alternatives.
If you're searching for other free sites like musicvid or exploring every free ai music video creator available, the pattern holds across the board. Tools like Plazmapunk offer no-signup test generations, and platforms like the vidnoz ai music video generator provide limited free credits. These free options are genuinely useful for one purpose: evaluating whether a platform's visual style and workflow match your needs before committing money. Use free tiers as auditions, not as your production pipeline.
For public releases, even entry-level paid plans ($5-19 per month) unlock the features that matter most: watermark-free exports, 1080p resolution, and enough generation credits to iterate on results. The cost of one month's subscription is a fraction of what a single afternoon of professional video production would run — and you can produce visual content for multiple tracks within that same billing period.
The platform you choose sets the ceiling for what's possible. But even the best tool produces mediocre results with vague creative direction. The real craft lives in what you type into that prompt field — how precisely you can translate your song's mood, energy, and story into words the AI can interpret visually.
Step 4 - Generate Your First AI Music Video From a Song
You've chosen your platform. Your audio file is prepped and exported cleanly. The prompt field blinks at you, waiting. This is where most people stall — staring at an empty text box with no idea how to describe what they want visually. The difference between a stunning result and a generic mess often comes down to how well you translate your song's mood into words the AI can interpret. Here's exactly how to make a music video with ai using prompt-based generation, the most flexible and widely available approach.
Writing Effective Prompts That Match Your Song's Mood
Think of your prompt as a creative brief you'd hand a cinematographer. You wouldn't say "make it look cool." You'd describe the mood, the color palette, the camera movement, and the emotional tone. AI video generators respond to the same level of specificity.
Every strong prompt includes four elements: visual style, mood keywords, color palette, and scene description tied to the song section it accompanies. The top prompts for music videos aren't necessarily long — they're precise. Compare these two approaches for the same lo-fi hip-hop track:
Lo-fi hip-hop prompt: "A girl studying at a rain-streaked window at night, warm lamp light casting amber tones across scattered notebooks, anime illustration style, soft lofi anime aesthetic, gentle camera drift, muted purples and warm oranges, cozy and melancholic."
Energetic EDM prompt: "Neon wireframe city shattering into particles on impact, deep space background, electric blue and hot pink, camera pushing forward through debris at high speed, glitch artifacts, strobe lighting on beat drops, photorealistic 3D render."
Notice how each prompt specifies a visual style (anime illustration vs. photorealistic 3D), an emotional register (cozy and melancholic vs. high-energy destruction), specific colors, and camera behavior. The AI uses all of these cues to shape the output. Vague prompts like "cool abstract video" give the model nothing to anchor on, producing generic results that could belong to any track.
Here are prompt patterns matched to common genres:
- Ambient/downtempo: Focus on slow camera movements, natural textures (water, clouds, fog), muted earth tones, and words like "ethereal," "drifting," "meditative"
- Hip-hop/trap: Emphasize urban environments, dramatic lighting contrast, cinematic angles, confident character presence, and specific cultural settings
- Pop: Bright saturated colors, dynamic movement, fashion-forward styling, quick visual variety, and words like "vibrant," "glossy," "editorial"
- Metal/rock: Dark environments, fire and smoke elements, aggressive camera motion, high contrast, desaturated with selective color accents
For creators looking to convert song to video ai with an anime aesthetic — whether you're exploring an ai video generator anime opening style or wondering how to make an amv easy without frame-by-frame editing — prompt specificity matters even more. Terms like "anime key visual," "cel-shaded," "Studio Ghibli color palette," or "shonen action sequence" push the AI toward distinct anime substyles rather than a generic cartoon look. Creators building ai opening parody video generator content for YouTube often chain multiple short anime-style clips together, each prompted to match a specific section of their track's energy curve.
Uploading Your Track and Configuring Generation Settings
The typical workflow across most platforms follows a consistent pattern, even though interfaces differ:
- Upload your audio file — Drag in your WAV or high-bitrate MP3. Some platforms also accept links from YouTube, SoundCloud, Suno, or Udio.
- Set video duration — Match it to your full track length, or select a specific segment (chorus only, first 60 seconds, etc.) if you're generating content for social clips.
- Choose aspect ratio — This decision locks your output format, so decide based on where you'll publish:
- Select style presets — Many platforms offer starting points: cinematic, anime, abstract, photorealistic, psychedelic. These act as a baseline that your text prompts refine further.
- Input prompts per section — Advanced tools let you assign different prompts to different timestamps. Map your verse prompt, chorus prompt, and bridge prompt to the sections you identified during audio preparation.
- Hit generate — The platform queues your request. Generation time depends on video length, resolution, and current server load.
Aspect ratio deserves extra attention because it's essentially irreversible without quality loss. AI tools that use platforms like those described in JAI Portal's reframing guide can reformat video after the fact, but you'll get better native results by generating in your target ratio from the start. If you're planning to publish the same video across YouTube and TikTok, generate twice — once in each ratio — rather than cropping a horizontal video into vertical.
What to Expect From Your First Generation
Here's the honest truth: your first result probably won't be your final video. And that's completely normal.
AI music video generation involves inherent variability. The same prompt run twice produces two different outputs. Some clips will nail the mood perfectly. Others will miss — maybe the color palette drifts, a character's face distorts, or the energy doesn't match the section it's paired with. Plan for two to three iterations minimum before landing on something release-worthy.
Generation time varies significantly by platform and settings. A 60-second clip at 1080p might take 2-5 minutes on a fast platform. A full 3-minute video at higher resolution can take 15-30 minutes. AI Magicx reports that native 4K generation runs approximately 3 to 8 minutes per clip depending on complexity, with longer sequences requiring proportionally more time.
What to do while waiting:
- Draft alternate prompts for sections you're uncertain about
- Watch your first result at full playback speed before judging — single frames can look rough while motion smooths things out
- Note specific timestamps where visuals feel disconnected from the music's energy
- Don't delete "failed" generations immediately — sometimes a clip works perfectly for a different section than originally intended
The iterative nature of AI generation is actually an advantage if you use ai to make music videos strategically. Each generation teaches you what language the model responds to best. You'll notice that adding "cinematic depth of field" dramatically changes the output mood. Or that specifying "slow lateral camera pan" prevents the jittery movement that generic prompts sometimes produce. Your second and third attempts will be sharper because you're learning the model's visual vocabulary in real time.
Once you have a full set of generated clips that roughly match your song's arc, the raw output becomes your starting material — not your finished product. The next phase is where you refine transitions, tighten the beat sync, and push your video from "AI-generated" to "visually intentional."
Step 5 - Fine-Tune Your Visuals and Sync to the Beat
Raw AI output is a rough cut, not a finished product. The difference between something that looks like a tech demo and something that feels like a deliberate creative choice comes down to refinement. This step is where you shape the generated material into a video that moves with your music rather than alongside it.
Adjusting Visual Transitions to Match Song Sections
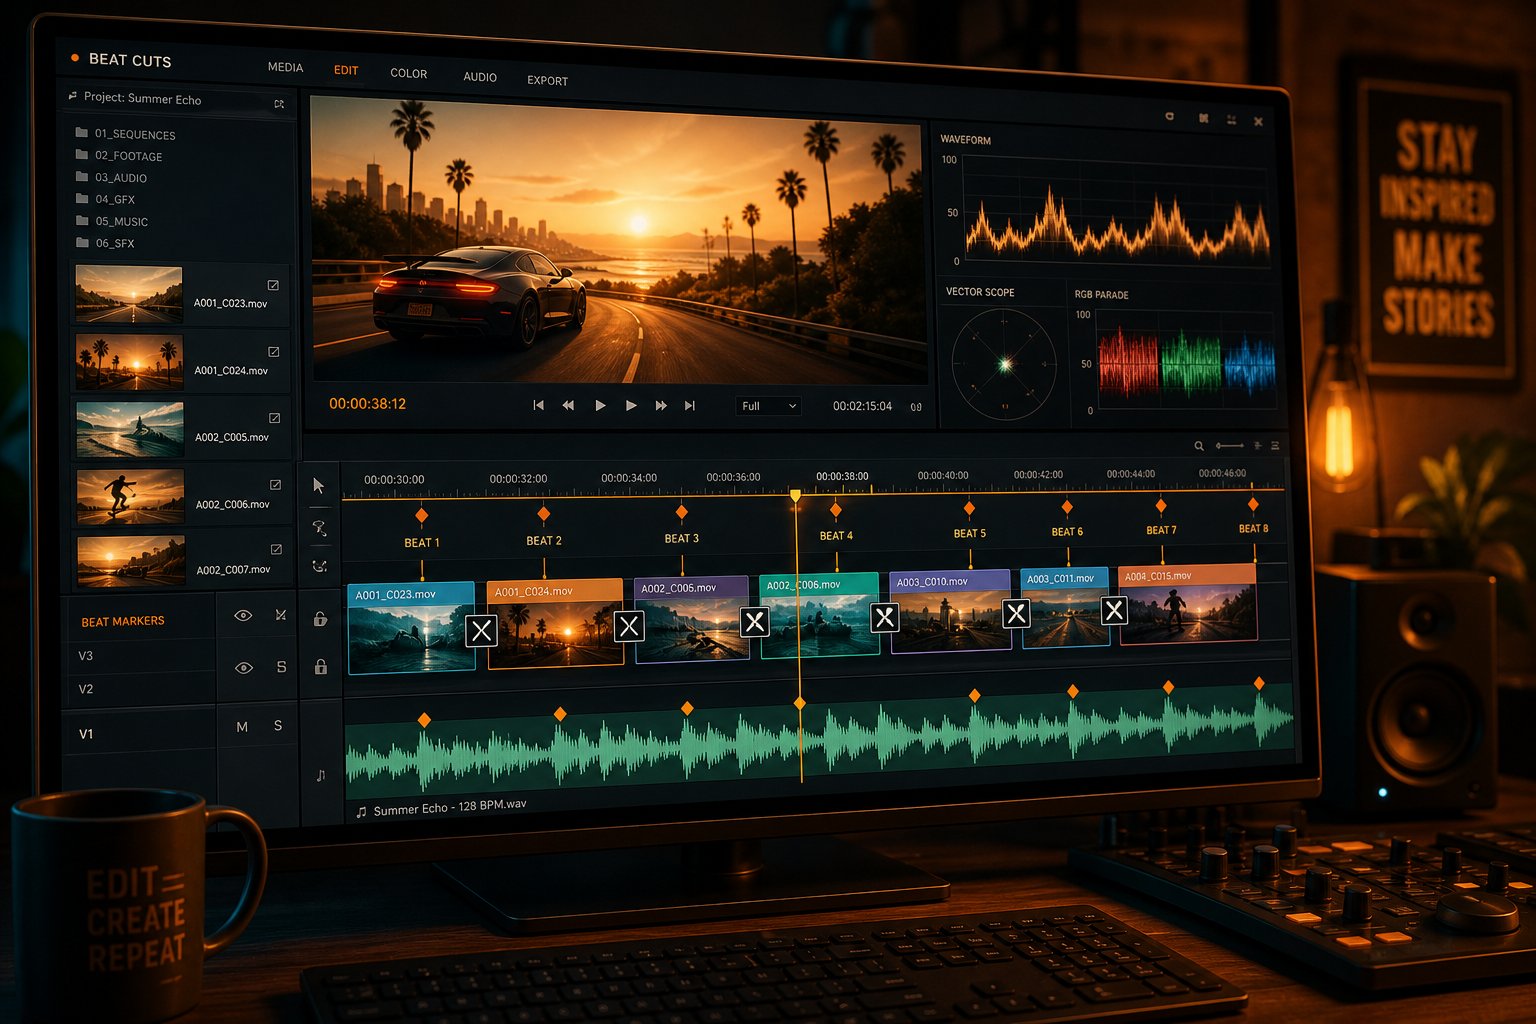
Beat sync is the single biggest factor separating amateur AI music videos from polished ones. When a visual transition lands precisely on a snare hit or a bass drop, it feels intentional. When it drifts even half a second off, the whole video feels disconnected from the track's energy.
Most platforms offer timestamp controls or keyframe markers where you can trigger scene changes. Use the section timestamps you mapped during audio preparation to align each visual shift with a structural boundary in your song. Verse-to-chorus transitions should coincide with the moment your arrangement opens up — the kick doubles, the vocal lifts, the synth pad enters. If your tool supports manual keyframe placement, set transition triggers directly on beat onsets rather than relying on the AI's auto-detection.
Pacing matters too. A verse with sparse instrumentation deserves longer, slower visual scenes that breathe. A dense chorus wants faster cuts, more visual variety, and reactive images that respond to the heightened energy. If your bridge drops to a single vocal and piano, let the visuals quiet down accordingly — slower camera drift, muted colors, less motion. The video should exhale where the music exhales.
Choosing and Refining Your Visual Aesthetic
Your first generation gave you a style direction. Refinement means pushing that direction further and making it consistent across the full video length.
Consider what serves your genre and audience. Trippy visuals work beautifully for psychedelic rock and electronic music — think morphing geometries, impossible architecture, and that signature trippy visuals white glow effect where bright edges bleed into surrounding space. Anime-styled clip frames appeal to certain fandoms and work surprisingly well for pop and hyperpop tracks. Photorealistic scenes suit storytelling-driven genres where you want viewers to follow a narrative. Abstract reactive imagery — shapes and particles that pulse with the frequency spectrum — fits ambient and instrumental tracks where the visual layer enhances rather than distracts.
The key to consistency is prompt repetition with variation. Keep your core style descriptors identical across all sections ("cel-shaded anime, warm color palette, soft lighting") while varying only the scene content. This prevents the jarring shifts where one section looks hand-painted and the next looks photorealistic. If you want to add a background of a music performance on AI for certain sections, describe it with the same stylistic language you've used throughout so it blends naturally into the video's visual identity.
Working With Frames and Clip Segments
AI video generation operates in discrete units — individual video frames grouped into clip segments. Understanding this structure gives you more control over the final output.
Frame rate affects smoothness directly. Most AI tools generate at 24fps (cinematic) or 30fps (standard video). Higher frame rates produce smoother motion but require more generation time and processing power. For music videos with fast cuts and aggressive energy, 24fps often works better because the slight motion reduction adds a filmic quality. For flowing, ambient pieces where the camera drifts slowly, 30fps prevents visible stuttering.
Clip length per prompt determines visual coherence. Shorter clips (3-5 seconds each) let you assign highly specific prompts to brief musical moments — a single bar, a vocal phrase, a drum fill. Longer clips (8-15 seconds) maintain better visual consistency within each segment since the AI doesn't need to establish a new scene as frequently. The trade-off: shorter clips offer more precision but risk looking choppy when assembled. Longer clips feel smoother but give you less granular control over beat sync. For creators who want to add a background to a band video with AI or integrate generated footage with existing content, matching the frame rate and clip duration of your AI output to your source material prevents jarring visual mismatches during editing.
When you've reviewed your full video and identified weak spots, use this refinement workflow:
- Review the complete video at full playback speed — watch it as a viewer would, noting emotional disconnects between audio and visuals
- Identify weak segments — mark specific timestamps where transitions miss the beat, styles clash, or generated content looks generic
- Adjust prompts for those timestamps — rewrite with more specific language, add style anchors, or change the scene description entirely
- Regenerate only the problem sections — most platforms let you replace individual clip frames without re-rendering the entire video
- Review again with fresh eyes — step away for an hour, then watch the revised version; problems invisible during editing become obvious after a break
This iterative loop is where your video transforms from "AI made this" to "I made this with AI." Each pass tightens the relationship between sound and image. Most creators find that two or three passes through this workflow produce a result they're genuinely proud to publish — and the sections that still feel off after three attempts likely need a fundamentally different prompt approach rather than incremental tweaks.
Step 6 - Troubleshoot Common AI Music Video Problems
Even after careful preparation and thoughtful prompting, AI music videos rarely come out perfect on the first render. Certain problems appear so frequently that recognizing them instantly — and knowing exactly what causes each one — saves you from wasting credits on blind regeneration attempts. These aren't edge cases. They're the issues nearly every creator hits within their first few projects.
Fixing Poor Beat Sync and Timing Issues
Your visuals look great individually, but transitions land between beats instead of on them. The chorus hits and nothing changes visually until a full second later. Sound familiar?
Beat sync failures almost always trace back to one of three causes. The most common: incorrect BPM detection. If your track has a half-time groove or a swing feel, the AI's tempo analyzer may lock onto the wrong rhythmic layer, placing markers at double or half the intended rate. Tracks with complex time signatures — 7/8, 5/4, or shifting meters — confuse algorithms trained primarily on 4/4 music. The fix is straightforward: manually input your BPM in the platform settings rather than relying on auto-detection.
Quiet or ambient intros cause a second class of problems. When your track opens with a pad swell or sparse atmosphere before the rhythm section enters, the analyzer has no percussive transients to lock onto. It guesses — and often guesses wrong, cascading that timing error through the rest of the video. The solution: trim your intro before uploading, or set your first visual transition marker manually at the exact moment your beat enters.
Platforms with manual keyframe control give you the most reliable path through timing issues. Rather than trusting the AI to detect every beat onset, you place markers at the exact frames where you want visual shifts. This takes more time upfront but eliminates the drift problem entirely. According to OpusClip's research on beat-sync tools, even a few frames of misalignment affects perceived synchronization — which means precision matters more than speed here.
Dealing With Low Video Quality and Artifacts
Blurry output, visual artifacts, inconsistent character appearance across frames, and unnatural motion — these quality issues plague AI-generated video regardless of which platform you use. The root causes vary, but the solutions follow predictable patterns.
Blurry or soft output often results from generating at maximum duration in a single pass. Most AI models produce sharper results with shorter clip segments. If your full 3-minute generation looks hazy, try generating in 15-30 second chunks instead. The model dedicates more computational attention to shorter sequences, producing crisper individual frames.
Temporal instability and flickering — where textures shimmer or details change inconsistently from one frame to the next — is the most characteristic flaw of AI-generated video. As Hedra's technical guide explains, this happens because each frame is technically a separate generation, and the model must "remember" what came before to keep subjects stable. Complex scenes with multiple subjects, long generation durations, and high motion all increase the chance of drift. Simplify your prompts, reduce motion complexity, and generate shorter clips to minimize the problem.
Inconsistent character appearance — a figure's hair color shifting mid-scene or clothing changing between cuts — stems from the AI losing track of visual details across frame gen cycles. Reference images help enormously where supported. If your platform doesn't offer image references, add extremely specific character descriptions to every prompt rather than assuming the model carries details forward automatically.
Unnatural motion — particularly visible in frame by frame walking animation or running animation frames where limbs move in physically impossible ways — remains one of AI video's hardest challenges. Abstract and semi-stylized visual approaches hide these weaknesses more effectively than photorealistic styles. If your video includes human movement, choosing an illustrative or anime aesthetic makes motion artifacts less jarring than attempting hyperrealism.
For footage that's conceptually right but technically soft, dedicated upscaling tools can rescue the result. Higgsfield's Sora 2 Enhancer is specifically trained to identify and eliminate frame instability and flicker characteristic of AI-generated video, analyzing motion across frames to produce a smooth, stable result. Standard upscalers just magnify problems — purpose-built AI video enhancers actually correct them.
When Style Doesn't Match Your Music
You prompted "cinematic and moody" but got cartoonish and flat. You wanted high-energy visual intensity but received something dreamy and slow. Style mismatch is frustrating because the AI technically generated a video — it just generated the wrong one.
This usually happens for one of two reasons. First, your prompt language was too vague. "Cinematic" means different things to different models. Specifying "cinematic in the style of a Blade Runner 2049 color grade, anamorphic lens flare, teal and orange palette" gives the AI concrete targets. Generic mood words get generic results.
Second, your chosen style preset may be overriding your text prompt. Many platforms apply style presets as a heavy filter over your written instructions. If the preset says "watercolor illustration" and your prompt says "gritty photorealistic," the preset often wins. Try removing the style preset entirely and relying solely on descriptive prompt language for more predictable control.
Where supported, negative prompts are your sharpest correction tool. Adding "negative: cartoon, flat lighting, pastel colors, soft focus" explicitly tells the model what to avoid. Not every platform supports this feature, but those that do give you a second axis of creative control that dramatically reduces style mismatch.
| Common Problem | Likely Cause | Solution |
|---|---|---|
| Transitions land between beats | Incorrect BPM auto-detection; half-time or complex meter confusing the analyzer | Manually input your exact BPM; use platforms with manual keyframe control |
| Visual shifts happen too late after the beat | Silent or ambient intro confusing the tempo tracker | Trim intro before upload; set first marker manually at beat entry point |
| Blurry or soft video output | Generating too-long clips in a single pass; low source audio quality | Generate in 15-30 second segments; upload WAV/FLAC source files |
| Flickering textures and shimmering details | Temporal instability — model losing consistency across frames | Simplify prompts, reduce motion, shorten clip length; use AI video enhancers for post-correction |
| Character appearance changes mid-video | No reference image anchoring; vague character descriptions | Use reference images where supported; repeat detailed character descriptions in every prompt |
| Unnatural walking or running motion | AI struggling with complex human biomechanics in frame generation | Choose stylized/abstract aesthetics over photorealism; avoid full-body motion sequences |
| Style looks cartoonish when cinematic was intended | Vague prompt language; style preset overriding text instructions | Use specific visual references (film names, color palettes); remove conflicting style presets |
| Energy level feels wrong (dreamy when energetic was requested) | Missing motion and camera descriptors; prompt focused on scene but not dynamics | Add explicit camera speed, cut frequency, and energy-level keywords to prompts |
Most of these problems resolve within one or two targeted adjustments — not wholesale re-generation. The key habit is diagnosing the specific cause before changing anything. Random prompt tweaks waste credits. Targeted fixes based on understanding why the output failed produce reliable improvement. And if something has failed the same way twice despite corrections, that's a signal to try a fundamentally different approach: swap the visual style, choose a different generation tool, or rethink the scene entirely rather than nudging the same prompt a third time.
With troubleshooting patterns in hand, the remaining challenge isn't generating quality footage — it's getting that footage off your hard drive and in front of an audience. Export settings, platform optimization, and publishing strategy determine whether your AI music video actually reaches listeners or sits in a downloads folder collecting digital dust.
Step 7 - Export and Publish Your AI Music Video Everywhere
A polished AI music video sitting on your desktop accomplishes nothing. The final step transforms a rendered file into discoverable content that reaches listeners across every platform where they already spend time. Export settings, metadata, and publishing strategy determine whether your video gets seen by ten people or ten thousand.
Export Settings for Different Platforms
Each platform compresses uploaded video differently, which means your export settings need to compensate. Upload something too compressed and the platform's encoder degrades it further. Upload something properly encoded and the final result stays sharp.
Here's what works for each destination:
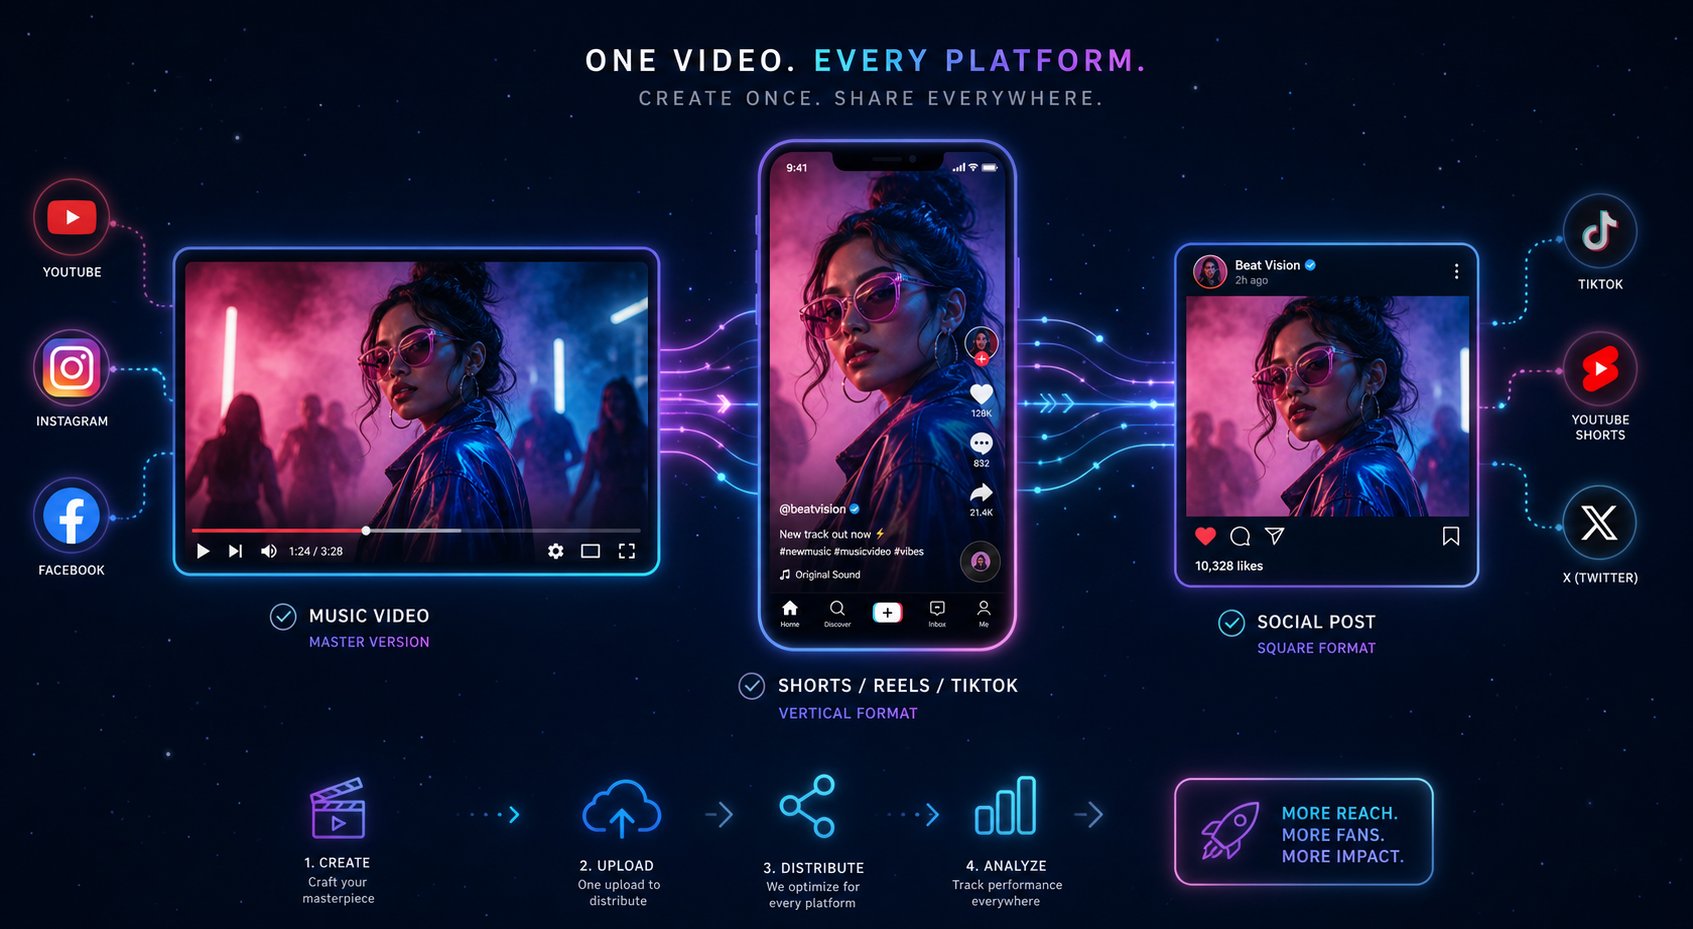
YouTube (full music videos and 4k clips on youtube): Export at 1920x1080 (Full HD) or 3840x2160 (4K UHD) in 16:9 aspect ratio. Use H.264 codec in MP4 container. Set bitrate to 8-12 Mbps for 1080p or 35-45 Mbps for 4K. Frame rate should match your AI generation settings — typically 24 or 30fps. Audio at AAC 320kbps, 48kHz. According to KirtanFX's export guide, uploading at a higher bitrate than strictly necessary ensures cleaner playback after YouTube's compression pass.
TikTok and Instagram Reels: Export at 1080x1920 (9:16 vertical) in MP4 with H.264 codec. Bitrate of 4-6 Mbps keeps file sizes manageable — TikTok performs best with uploads under 100MB. Frame rate at 30fps. Keep total duration under 3 minutes for TikTok and 90 seconds for Reels to maximize algorithmic distribution.
Instagram Feed: Use 1080x1080 (1:1 square) or 1080x1350 (4:5 portrait). Bitrate at 4-8 Mbps. Instagram compresses aggressively, so slightly over-delivering on quality preserves sharpness after processing.
YouTube Shorts: Same 1080x1920 vertical format as TikTok. Keep clips under 60 seconds. If you're figuring out how to post clips on youtube in Shorts format, the vertical export is identical to your TikTok render — one export serves both platforms.
If you plan to publish the same video across multiple platforms, export two versions from the start: one 16:9 horizontal for YouTube and one 9:16 vertical for short-form platforms. Cropping after the fact cuts off visual information you generated specifically for the frame edges.
Optimizing Your Video for Discovery on YouTube and Social Media
Publishing without optimization is like releasing a song without distributing it. The content exists, but nobody finds it. Understanding how to make a music video on youtube that actually ranks requires treating your upload as a piece of searchable content, not just a file drop.
Title formatting: Lead with your artist name and song title, then add a descriptor. "Artist Name - Song Title (Official AI Music Video)" or "Artist Name - Song Title [Visualizer]" tells both viewers and the algorithm exactly what they're looking at. Research from InClassics' YouTube SEO guide for musicians shows that optimized videos receive up to 60% more views than non-optimized uploads.
Description: Write 150-200 words summarizing the track, including timestamps for song sections, links to streaming platforms, and your social handles. YouTube indexes description text for search, so naturally include phrases your audience searches for — things like how to make music videos for youtube or the song's genre and mood keywords.
Tags: Use 5-10 relevant tags mixing broad categories ("music video," "indie pop") with specific long-tail terms ("ai music video 2026," your artist name, song title). Over-tagging dilutes relevance.
Thumbnails: A strong thumbnail drives click-through rate more than any other single factor. Pull a visually striking frame from your AI video, add bold legible text (song title or a short hook), and use contrasting colors. AI image generators can also create custom thumbnails — prompt for an eye-catching still that represents your video's aesthetic.
Category and music metadata: Set your upload category to "Music." If you have an Official Artist Channel through YouTube's Content ID system, link the video to your artist profile for additional discoverability in YouTube Music.
For TikTok and Reels, the optimization rules differ entirely. The first 3 seconds determine whether someone keeps watching or swipes past. Start your video with the most visually compelling moment — a beat drop, a dramatic visual transition, a striking color shift. Don't bury your hook after an intro. If you're wondering how to add your own music to instagram post content, note that Reels lets you use original audio directly from your upload, which followers can then reuse — turning your track into a discoverable sound on the platform.
Building a Consistent Visual Brand With AI
One video is a piece of content. A consistent visual identity across multiple releases is a brand. When viewers recognize your aesthetic before reading your name, you've built something that compounds with every upload.
Developing visual consistency with AI tools means establishing repeatable parameters: a signature color palette, recurring prompt language, consistent motion style, and predictable framing choices. Save your best-performing prompts as templates. Reuse your color descriptors across tracks. Choose one or two visual styles that represent your sound and commit to them across releases rather than experimenting wildly with every new single.
This is where knowing how to make a music youtube video sustainably — not just once, but repeatedly for every release — becomes a workflow question rather than a creative one. If producing visual content for each track requires hours of manual prompt engineering and editing every time, most independent artists eventually stop. The creators who maintain consistent output are those using tools that reduce per-video friction to something manageable alongside their music production schedule.
MakeBestMusic's AI Music Video Generator streamlines this workflow for creators publishing regularly to social platforms. Its upload-and-generate approach means you can produce a visual asset for every release without rebuilding your creative direction from scratch each time — making it practical to maintain a consistent visual presence across YouTube, TikTok, and Instagram without a dedicated video production budget. For artists releasing singles every few weeks, that consistency builds audience recognition faster than sporadic high-effort videos separated by months of visual silence.
Whether you're learning how to make a video with pictures videos and music for a multi-format release campaign or simply want how do i make a music video for youtube answered with a repeatable process, the combination of prepared templates, optimized export settings, and a fast-turnaround generation tool turns music video creation from an occasional event into a sustainable publishing habit.
Before you hit publish on your next AI music video, run through this final checklist:
- Export in platform-correct format: 16:9 for YouTube, 9:16 for TikTok/Reels/Shorts, 1:1 or 4:5 for Instagram feed
- Verify resolution and bitrate: 1080p minimum, appropriate Mbps for each platform's compression behavior
- Write an optimized title: Artist name, song title, video type descriptor
- Craft a keyword-rich description: 150-200 words with timestamps, streaming links, and social handles
- Design or select a thumbnail: High-contrast, legible text, visually representative of the video content
- Set correct category and tags: Music category, 5-10 relevant tags mixing broad and specific terms
- Check your first 3 seconds: Ensure the opening visual hooks attention immediately for short-form platforms
- Save your prompt templates: Document the prompts, styles, and color palettes used for brand consistency on future releases
- Schedule cross-platform publishing: Stagger uploads across YouTube, TikTok, Instagram, and any other channels within 24-48 hours
- Monitor early engagement: Watch retention graphs and comments in the first 48 hours to inform your next video's approach
The full pipeline — from raw audio to published, optimized video across every major platform — no longer requires a production team, a video budget, or months of turnaround time. With prepared audio, the right generation tool, refined prompts, and platform-smart publishing, you can turn every track into visual content that builds your presence where listeners actually discover music.
