
What You Need to Know Before Making a Free AI Music Video
You searched for how to make a free AI music video, and the good news is it can be done. The less obvious news? "Free" in the AI video space rarely means unlimited. Every platform defines free differently, and understanding those boundaries upfront saves you from hitting a wall halfway through your project.
What Free Actually Means Across AI Video Platforms
Imagine finding the perfect tool, generating two clips that look incredible, and then discovering you've already burned through your entire monthly allowance. That's the reality of most free tiers. AI video generation is computationally expensive, and platforms offset those costs by limiting what free users can do.
Here are the most common free-tier restrictions you'll encounter across platforms:
- Watermarks stamped on every exported clip
- Resolution capped at 720p instead of full HD
- Clip length limited to 3-5 seconds per generation
- Monthly credit budgets that cover roughly 15-25 seconds of total footage
- Time-limited access or credits that expire within 30 days
- Non-commercial use only, restricting monetization
- Lower processing priority and slower render times
For context, Runway ML's free plan offers roughly 25 seconds of generation. Pika provides 80 monthly credits. Luma AI Dream Machine outputs only draft-quality 720p on its free tier. None of these alone will produce a finished ai music video. But together? That changes things.
The key to getting a free ai music video that actually looks polished: combine multiple free tools strategically so each platform handles what it does best, bypassing the limitations of any single service.
The Full Zero-Cost Pipeline at a Glance
A finished music video isn't a single generation. It's a pipeline, and each stage has free options available. Here's the path you'll follow throughout this guide:
- Music: use your own track, royalty-free audio, or generate a song with free AI music tools
- Prompts: write scene-by-scene descriptions that produce cinematic, consistent visuals
- Generation: create AI video clips using free credits across one or more platforms
- Editing: assemble clips, sync to beats, and add transitions in a free editor like CapCut or DaVinci Resolve
- Export: render at the right resolution and aspect ratio for YouTube, TikTok, or Instagram
Each stage feeds the next. A music video maker ai free workflow is entirely possible when you treat it as a multi-tool assembly line rather than expecting one platform to handle everything. The trick is planning before generating, so you don't waste limited credits on clips that don't fit together.
Who This Guide Is For
This guide is built for independent musicians, content creators, and producers who want to learn how to make an ai music video for free without settling for a generic waveform animation. Maybe you've released a track and need visuals for social media. Maybe you're experimenting with a new sound and want a proof-of-concept video before investing real budget. Or maybe you just want to explore what a free ai music video creator can actually produce in its current state.
You don't need video editing experience or design skills. You do need patience, a willingness to iterate, and about two to three hours for your first project. The result won't rival a $50,000 production, but it can absolutely look intentional, stylish, and release-worthy for platforms where ai music videos free of cost compete alongside professionally shot content every day.
The starting point for any good music video, whether AI-generated or traditionally filmed, is a clear creative vision. That's exactly where the process begins.
Step 1 Plan Your Music Video Concept and Visual Direction
A clear creative vision is what separates a memorable music art clip from a jumble of AI-generated randomness. Before you open any tool or spend a single free credit, you need to decide what your video is actually about visually. Sixty seconds of planned, intentional content will always outperform three minutes of aimless generations, and planning costs nothing.
Choose a Visual Narrative Style
How can you make a music video that feels cohesive when AI generates each clip independently? By committing to a single narrative style before you start. Every music video falls into one of a few core approaches:
- Abstract visuals: Shapes, colors, and motion that mirror the energy of the track without telling a literal story. Think kaleidoscopic geometry or a synthwave animated background gif brought to life as full video.
- Story-driven: A sequence of scenes with characters, settings, and an emotional arc. Works well for ballads and narrative lyrics.
- Performance-based: A figure or band performing in a stylized environment. You can even add a background to a band video with AI to place performers in impossible settings.
- Lyric-focused: Text-forward visuals where the words themselves drive the imagery, layered over subtle motion backgrounds.
Pick one. Mixing styles across clips creates visual whiplash, especially when AI already introduces slight inconsistencies between generations. A single narrative thread gives your viewer something to follow.
Match Visuals to Your Music Genre
Genre is a creative shortcut. Audiences already associate certain sounds with certain looks, and leaning into those expectations makes your diy music video feel polished rather than random. The genre of your track should directly influence the aesthetic you describe in your prompts.
| Genre | Visual Style | Color Palette | Typical Elements |
|---|---|---|---|
| Electronic / EDM | Neon, geometric, abstract | Cyan, magenta, deep black | Pulsing shapes, digital environments, light trails |
| Hip-Hop / Rap | Urban, gritty, cinematic | Gold, dark tones, high contrast | City streets, close-up shots, slow-motion |
| Indie / Folk | Film grain, lo-fi, natural | Muted earth tones, soft light | Nature landscapes, handheld textures, warm interiors |
| Country | Landscapes, warm, pastoral | Amber, green, golden hour | Open fields, roads, rustic settings |
| Pop | Bright, high-energy, clean | Saturated primaries, pastels | Bold colors, dynamic movement, fashion |
| Anime / J-Pop | Cel-shaded, stylized, vibrant | Vivid, high saturation | Character-driven scenes, expressive motion |
If you're working with an anime music video maker tool or aiming for a retro synthwave look, that decision shapes every prompt you'll write later. Lock this in early.
Create a Simple Scene Breakdown
You don't need a Hollywood storyboard. A simple list of 4-8 scenes with one sentence each is enough to guide your generation process. Professional music video production relies heavily on storyboarding and visualization to ensure seamless execution, and even a lightweight version of this practice pays off.
Here's how to make a music video scene breakdown that works:
- Listen to your track and identify 4-6 distinct sections (intro, verse, chorus, bridge, outro).
- Assign one visual concept to each section. Keep it to a single sentence: "Silhouette walking through neon rain" or "Close-up of hands on piano keys, warm amber light."
- Note where the energy shifts. Beat drops and transitions are where you'll cut between scenes.
- Decide on a consistent element that ties scenes together: a recurring color, a character, or a motif.
This breakdown becomes your generation checklist. Instead of burning credits on random experiments, you'll generate with purpose, knowing exactly which scene each clip serves. Visual consistency, as highlighted in workflows for maintaining cohesive style across AI videos, starts with defining your color palette, camera perspective, and recurring motifs before a single frame exists.
With your concept locked and scenes mapped, the next piece of the puzzle is the audio itself. Whether you already have a finished track or need to create one from scratch determines which tools you'll reach for first.
Step 2 Prepare or Generate Your Music Track for Free
Every music video starts with audio, and your track is the backbone that determines pacing, mood, and every visual decision that follows. You have two paths here: bring your own music or generate something new with AI. Both are viable at zero cost, but each comes with different creative tradeoffs and practical considerations.
Use Your Own Track or Royalty-Free Music
If you already have a finished song, you're ahead of the game. Upload your MP3 or WAV and move straight to preparation. But if you're working with someone else's music, or pulling from a library, copyright matters more than most creators realize.
AI-generated visuals don't change music licensing laws. As Bensound's licensing guide makes clear, the person publishing the video is legally responsible for the music used, not the AI platform that generated the visuals. Using a popular song without a license can result in content takedowns, demonetization, or copyright strikes, regardless of how the video itself was made.
Your safe options for free music:
- Your own original recordings: Full rights, no restrictions. The simplest path.
- Royalty-free libraries with video-friendly licenses: Services like Bensound, Pixabay Music, and Free Music Archive offer tracks cleared for online video. Always verify the license explicitly allows commercial use and platform distribution.
- Public domain music: Usable only when both the composition and the specific recording are in the public domain. Many modern performances of classical works are still copyright-protected.
- Creative Commons tracks: Check the specific CC license type. Some require attribution, some prohibit commercial use.
One critical detail: "royalty-free" does not mean unrestricted. Some licenses prohibit paid advertising, client work, or monetized content. Read the terms before building an entire video around a track you can't legally publish.
Generate a Song From Scratch With Free AI Music Tools
No existing track? No problem. If you've ever wondered how do you make a song without instruments, studio time, or music theory knowledge, AI music generators have made it surprisingly accessible. Two platforms dominate this space: Suno and Udio.
Suno is built for speed. Type a text prompt describing your desired genre, mood, and lyrical theme, and it returns a complete song with vocals, instrumentation, and structure in under a minute. Its free tier provides roughly 50 credits per day, enough to generate several full tracks and pick your favorite. For creators exploring how to use Suno AI for free, the workflow is straightforward: describe what you want, generate multiple versions, and download the best result.
Udio leans toward higher audio fidelity and deeper customization. You get more control over song sections, tempo, and instrumentation. Its free tier currently offers generous monthly generations, making it ideal for creators who want to fine-tune their track's structure before pairing it with visuals. According to a detailed comparison of both platforms, Udio's tracks tend to sound cleaner and more polished out of the box, while Suno excels at rapid full-song output with automatic lyrics.
Both platforms produce music you can use in your videos under their respective license terms. Paid tiers grant full commercial rights, while free-tier outputs may carry some restrictions. Check each platform's current terms before publishing monetized content.
If you're curious about how to produce music without traditional tools, these AI generators represent some of the best music making apps available at no cost. They won't replace a professional studio session, but they'll give you a release-ready track that sounds surprisingly polished for a text prompt's worth of effort. Tools like Canva's AI music generator also offer basic audio creation, though with less control over song structure and genre specificity than dedicated platforms like Suno or Udio.
Prepare Your Audio File for Video Generation
Whether you recorded it yourself, pulled it from a library, or generated it with AI, your track needs preparation before it's ready for the video generation stage. AI video tools analyze audio structure to sync visuals with musical moments, so the cleaner your file, the better your results.
Here's the preparation workflow:
- Choose or generate your track using one of the methods above. Download it as a high-quality audio file.
- Trim to your target length. If your full song is 3:30 but you're making a 60-second video for social media, cut to the strongest section. Free tools like Audacity or the browser-based AudioTrimmer handle this quickly. Shorter videos also mean fewer clips to generate, stretching your free credits further.
- Mark key timestamps. Listen through and note the exact seconds where beat drops, chorus transitions, tempo shifts, and quiet moments occur. These are your visual sync points, the moments where scene cuts will feel intentional rather than random. A simple text list works: "0:00 intro, 0:12 verse starts, 0:28 first chorus, 0:45 beat drop."
- Export as MP3 or WAV. Most AI video generators accept MP3 (smaller file, universally compatible) or WAV (higher quality, larger file). MP3 at 320kbps is sufficient for nearly every platform. If you need to know how to make an audio file in the right format, Audacity exports to both with a single click under File > Export Audio.
Those timestamp markers you noted in step three are critical. They become your editing roadmap later, telling you exactly where to cut between generated clips so transitions land on beats rather than floating awkwardly between them. AI video platforms like Lovart analyze audio structure automatically, detecting BPM, beat positions, energy curves, and section boundaries to sync visuals to your track's rhythm.
A well-prepared audio file is the difference between a music video that feels synchronized and one that looks like random clips stitched over a soundtrack. With your track trimmed, timestamped, and exported, you're ready to translate those planned scenes into the language AI video generators actually understand: prompts.
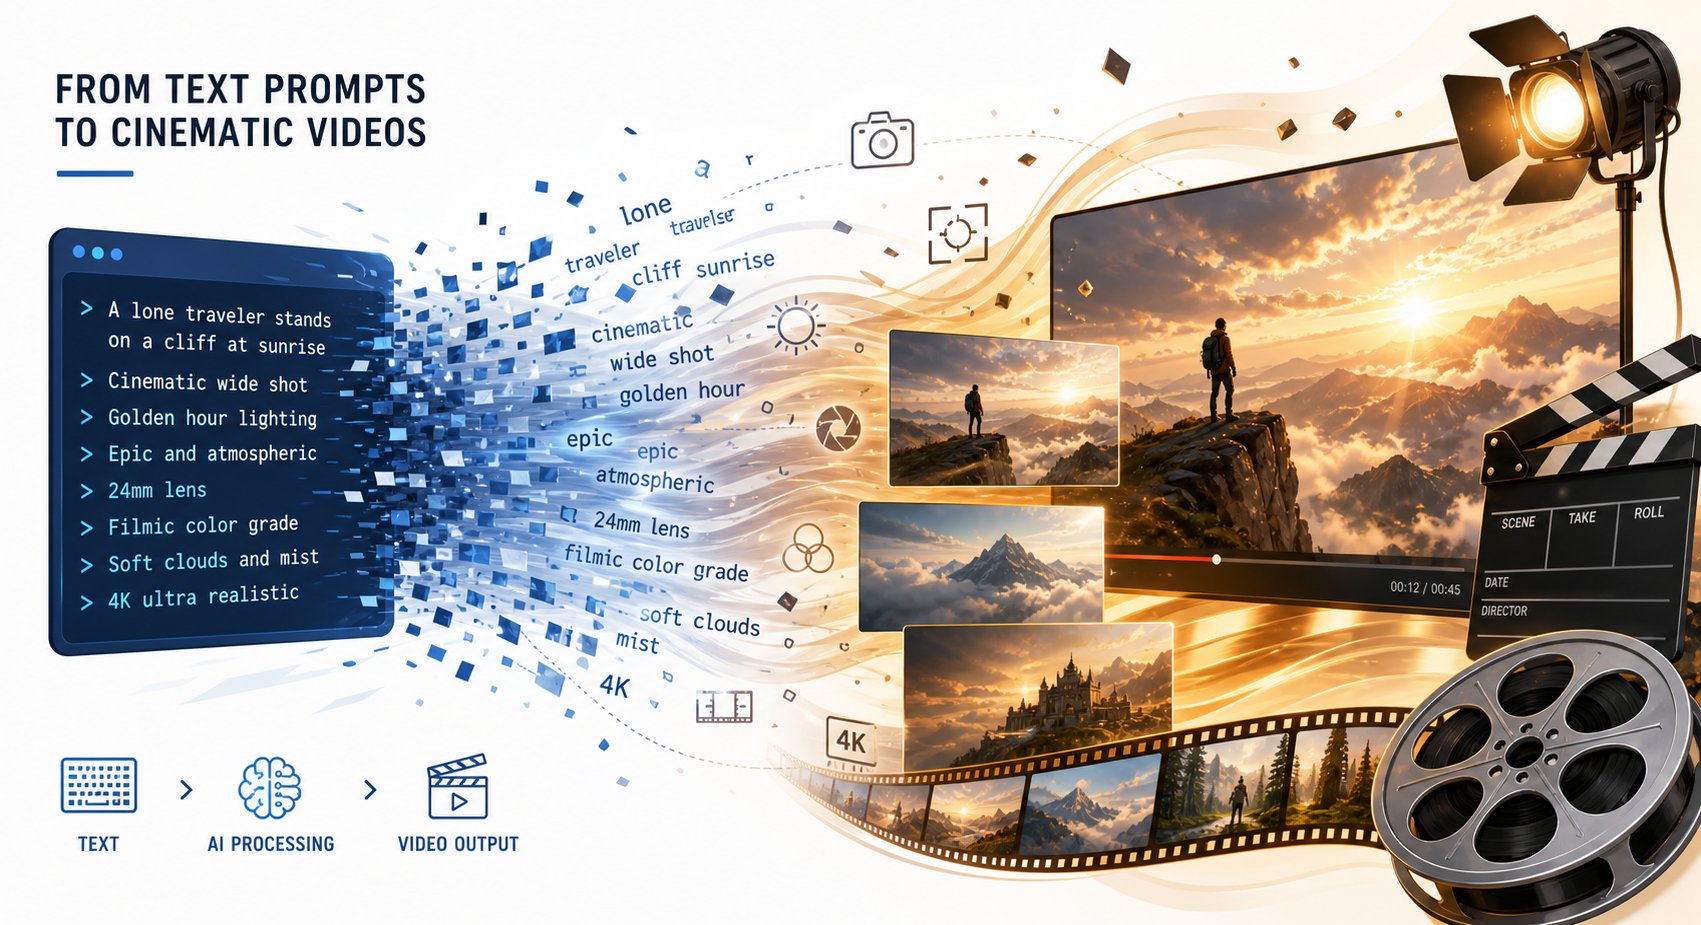
Step 3 Write Prompts That Produce Cinematic AI Visuals
Your audio is prepped and your scene breakdown is ready. The bridge between that plan and actual video clips is prompting, the single skill that determines whether your output looks cinematic or generic. AI video models are trained on professional film data, which means they respond to cinematography language far better than casual descriptions. Learning how to make a music video with AI is largely about learning how to speak to these models in their native vocabulary.
Anatomy of an Effective AI Video Prompt
Think of every prompt as a set of instructions you'd give a camera operator and a lighting crew simultaneously. A strong prompt contains five layers, each adding specificity that guides the model toward your intended look:
- Subject and action: Who or what is in frame, and what are they doing? Be specific about movement direction and emotional energy.
- Shot type and framing: Wide shot, medium, close-up? Low angle for drama, eye level for intimacy, overhead for abstraction?
- Camera movement: Static, tracking, dolly in, slow pan? Slow deliberate motion reads as cinematic. Fast movement reads as chaotic energy.
- Lighting and atmosphere: Golden hour warmth, neon-lit darkness, overcast diffusion, studio rim lighting? This sets mood instantly.
- Style and technical specs: Film grain, 35mm lens, shallow depth of field, anamorphic bokeh? These details push output from "AI video" to "intentional visual storytelling."
Here's what this looks like in practice. Compare a weak prompt to a structured one:
Weak: "A singer performing on stage." Strong: "Medium tracking shot of a woman singing into a vintage microphone on a fog-filled stage, slow dolly movement from left to right, blue and purple stage lighting, 85mm lens, shallow depth of field, cinematic film grain, 16:9 aspect ratio."
The second prompt gives the model concrete visual anchors. Every layer narrows the output space until the model can only produce something close to your vision. This is what separates people who create ai music videos that look directed from those who get random, disconnected clips.
Keep Visual Consistency Across Multiple Clips
Here's the challenge when making music video with AI: every clip generates independently. The model has no memory of what it produced for your previous scene. By the fifth clip, colors shift, character details drift, and the overall aesthetic starts fragmenting.
The fix is systematic. Create a "style block" that you copy into every prompt. This block contains your locked aesthetic choices, the constants that should never change between clips:
Style block example: "Cinematic anime style, cel-shaded, high saturation, neon pink and teal color palette, soft bloom lighting, 16:9, consistent female character with short black hair and white jacket."
Paste this block at the end of every prompt, then change only the subject, action, and camera movement for each scene. According to long-form AI video production workflows documented by AI Magicx, batching similar shot types together and reusing identical style descriptors across generations is the most reliable method for maintaining coherence without paid character-locking features.
If your video features a recurring character, describe them with the same specific details every time: hair color, clothing, build, and distinguishing features. Vague descriptors like "a man" will produce a different person in every generation. "Tall man with a shaved head, black leather jacket, silver chain necklace" anchors identity across clips.
Prompt Templates for Common Music Video Scenes
You don't need to reinvent the wheel for every scene. These formulas work like a music video prompt generator, giving you a repeatable structure to fill in with your specific details:
Wide establishing shot: "Wide aerial shot of [environment], slow descending camera movement, [time of day] lighting, [color palette], cinematic, [lens type], [style block]." Close-up performance: "Close-up shot of [character description] [action], static camera, [lighting type], shallow depth of field, [mood], [style block]." Abstract transition: "Abstract [geometric/fluid/particle] motion, [color palette], slow morphing movement, no subject, [texture], black background, [style block]."
Fill in the brackets with your specific choices and you'll get results that feel cohesive when cut together. The best ai for music video creation is whichever model you're using, given the right prompt. The tool matters less than the instructions you feed it.
Here are the most common prompting mistakes that waste your limited free credits, drawn from documented failure patterns across major AI video platforms:
- Overloading with competing elements: Describing five subjects and three camera movements simultaneously. The model averages competing signals instead of committing to either. Fix: one subject, one action, one camera behavior per clip.
- Contradictory descriptors: Requesting "fast-paced slow motion" or "dark scene with bright sunlight." The model can't resolve logical conflicts. Fix: pick one speed, one lighting direction, one mood.
- Ignoring aspect ratio: Generating 16:9 clips when your final video is 9:16 for TikTok, or vice versa. Fix: specify your target aspect ratio in every prompt so you don't crop away important visual content later.
- Treating video prompts like image prompts: Listing static attributes without describing motion or temporal change. Video needs chronological action. Fix: describe what happens over time using progressive language like "begins with," "then," "as the camera moves."
- Skipping style descriptors: Writing only subject and action, then wondering why each clip looks completely different. Fix: always append your style block.
When you create a music video with AI, each prompt is essentially a micro-script for a 5-second shot. Precision and consistency in that script are what make the difference between a collection of random clips and a unified visual piece. To make a music video with ai that looks intentional, treat your prompt library the same way a director treats a shot list: specific, organized, and built for the final edit.
With your prompts written and your style block defined, the next decision is which tool will actually turn those words into moving pictures without costing you a cent.
Step 4 Pick the Right Free AI Video Generation Tool
Your prompts are ready, your audio is prepped, and your scene breakdown exists on paper. The question now is which tool actually turns those words into video clips without charging you. The answer depends on whether you want a platform that understands music natively or a general-purpose video generator you'll adapt to music video workflows yourself.
Purpose-Built Music Video Generators vs General AI Video Tools
Not every AI video tool treats audio the same way. General-purpose generators like Kling, Pika, and Runway produce stunning visuals from text prompts, but they weren't designed around music. You feed them a prompt, get a clip, and handle the sync yourself in post-production. That works, especially with the advanced scene-by-scene approach. But it means more manual editing and more creative decisions during assembly.
Purpose-built music video generators flip the workflow. You upload a song, and the platform analyzes tempo, structure, and energy to generate visuals that already move with your track. The trade-off is less granular control over individual shots, but the payoff is speed and automatic beat synchronization.
For creators who want the fastest path from finished song to finished video, a dedicated free ai music video generator built for song-to-video conversion saves significant time. MakeBestMusic's AI Music Video Generator is designed specifically for this workflow. You upload your track, the system interprets its structure, and you receive matched visuals without needing to craft complex prompts for every scene. It's particularly useful for musicians and YouTubers who want a music to video generator free of the steep learning curve that general tools require.
General AI video tools, on the other hand, give you maximum creative control. If your vision demands specific camera movements, exact character descriptions, and precise lighting setups, these platforms let you direct every frame. The best ai video generator for music videos ultimately depends on how much time you're willing to invest and how specific your creative vision is.
Free Tier Comparison of Top AI Music Video Platforms
Here's an honest look at what each platform offers for free. Every tool below has been evaluated based on its current free-tier offering, including limitations that matter for music video production specifically.
| Tool | Free Tier Limits | Output Quality | Max Clip Length | Music Sync | Best Use Case |
|---|---|---|---|---|---|
| MakeBestMusic | Free generations available | Up to 1080p | Full song length | Built-in audio analysis | Song-to-video with automatic sync |
| Kling AI | ~66 credits/day, refreshing daily | 720p (free), 1080p (paid) | 10 seconds | None (manual sync) | Smooth motion, daily free use |
| Pika | ~150 credits + daily refresh | Up to 1080p | 4 seconds | None (manual sync) | Stylized effects and transitions |
| Neural Frames | Limited free trial | Up to 1080p | Full song length | Beat-synced with audio analysis | Frame-by-frame control with music interpretation |
| Runway | 125 one-time credits | Up to 1080p | 16 seconds | None (manual sync) | Physics realism, cinematic quality |
| Luma Dream Machine | Limited monthly generations | 720p draft | 5 seconds | None (manual sync) | Fast drafts, HDR color |
| Freebeat | Limited free generations | Up to 1080p | Full song length | Beat-synced agent workflow | Emotional continuity across full tracks |
Notice the pattern: tools with built-in music sync tend to produce full-length videos but offer less per-shot control. Tools without music sync give you cinematic individual clips but require you to handle all timing and assembly manually. A free ai song video generator like MakeBestMusic or Neural Frames handles the sync layer automatically, while Kling and Runway hand that responsibility to you.
Which Tool Fits Your Skill Level and Timeline
Your choice comes down to three factors: how much time you have, how specific your vision is, and how comfortable you are with video editing.
- Under 30 minutes, minimal editing experience: Use a purpose-built music video ai generator free option like MakeBestMusic. Upload your song, pick a style direction, and let the platform handle sync, pacing, and scene transitions.
- 1-2 hours, some editing comfort: Combine Kling's generous daily free credits with a free editor. Generate individual clips using your prompt templates, then assemble and sync them manually in CapCut or DaVinci Resolve.
- 3+ hours, strong creative vision: Use multiple general-purpose tools. Generate establishing shots in Runway for physics quality, character shots in Kling for motion smoothness, and stylized transitions in Pika. Edit everything together scene by scene.
If you're looking for the best ai music video generator free of complex setup, the purpose-built route gets you from song to shareable video fastest. If you want maximum creative control and don't mind spending time in an editor, the general-purpose tools produce individually superior clips that you assemble into something uniquely yours.
For most creators making their first ai music video generator free online project, starting with a purpose-built tool to see immediate results, then experimenting with general tools for specific scenes that need more polish, is the most practical path. You get a complete video quickly and learn which scenes benefit from the extra effort of manual generation.
With your tool selected, the real fun begins: feeding your prompts into the generator and watching your planned scenes come to life clip by clip.
Step 5 Generate Your AI Video Clips and Sync to the Beat
You've picked your tool, your prompts are written, and your audio is trimmed with beat markers noted. This is where ideas become moving images. The generation process itself varies dramatically depending on how much control you want, and how much time you're willing to invest. Three distinct methods cover the full spectrum from effortless to hands-on.
The 5-Minute One-Click Method
Want to make an ai video from a song for free without spending an hour learning prompt syntax? The one-click method exists for exactly this situation. You upload your track, choose a broad style direction, and let the platform handle scene segmentation, visual generation, and beat synchronization automatically.
MakeBestMusic's AI Music Video Generator is a clear example of this approach. Upload your MP3, select an aesthetic direction, and the system analyzes your track's structure, tempo, and energy shifts to produce a synced video without requiring individual scene prompts. It's the fastest path from a free ai music video generator from mp3 to a finished, shareable result.
- Upload your prepared audio file (MP3 or WAV) to the platform.
- Select a visual style or mood that matches your genre (cinematic, anime, abstract, retro).
- Hit generate and let the AI analyze your track's beats, sections, and energy curve.
- Preview the output. Most song to video ai free tools deliver a rough cut within minutes.
- Download or share directly if the result meets your needs.
This method works best for creators who need visuals fast, whether for a social media post, a streaming visualizer, or a proof-of-concept before investing more effort. The trade-off is less granular control over individual scenes, but the speed-to-quality ratio is hard to beat when you just need something that looks intentional and moves with the music.
The 30-Minute Guided Generation Method
If the one-click output feels too generic for your vision, the guided method adds a layer of creative input without requiring you to build everything frame by frame. You still upload your song, but now you provide style prompts, scene descriptions, or reference images that steer the AI toward your specific aesthetic.
- Upload your audio to a platform that accepts both music and text prompts (Neural Frames, Freebeat, or similar tools).
- Describe your overall visual direction: color palette, camera style, recurring motifs.
- Assign scene-level prompts to different sections of your track. Map your verse prompt to the verse timestamps, your chorus prompt to chorus sections.
- Generate the full video and review each section for coherence.
- Regenerate any weak sections with revised prompts. Adjust descriptors that produced inconsistent results.
- Export the final version once all sections feel cohesive.
This is the sweet spot for most creators learning how to use a music to video ai free workflow effectively. You retain creative influence over the look and feel without manually generating dozens of individual clips. The AI still handles beat synchronization, but your prompts shape what appears on screen at each musical moment.
The Advanced Scene-by-Scene Approach
Maximum creative control means generating each clip independently using general-purpose ai video generator free to music tools like Kling, Pika, or Runway. You treat each scene in your breakdown as a separate generation task, then assemble everything manually in an editor.
- Open your scene breakdown and corresponding prompt list from Step 3.
- Generate your first scene using the prompt template for that shot type. Set your aspect ratio before generating.
- Review the output against your vision. Does the camera move correctly? Does the lighting match your style block?
- If the clip misses the mark, adjust one element at a time and regenerate. Change the camera movement or the lighting, not both simultaneously.
- Generate 2-3 variations of each scene so you have options during editing. More raw material means better choices later.
- Repeat for every scene in your breakdown, maintaining your style block across all prompts.
- Download all clips and organize them by scene number for the editing stage.
The advanced method is where a song to ai video generator free workflow becomes genuinely cinematic. You're directing every shot, choosing camera angles, and curating only the best outputs. It takes longer, sometimes two to three hours for a 60-second video, but the results can rival paid productions when your prompts are precise.
A few practical tips that apply regardless of which method you choose:
- Generate more clips than you need. Aim for 30-50% more footage than your final video requires. Having options during editing prevents you from settling for a mediocre clip because it's all you have.
- Vary camera angles between consecutive scenes. Cutting from a wide shot to another wide shot feels flat. Alternate between wide, medium, and close-up to create visual rhythm that mirrors musical dynamics.
- Create transition-friendly clips. Clips that start or end on darker frames, simple shapes, or motion blur cut together more smoothly than those with hard-edged subjects filling the frame at both ends.
- Don't over-iterate on a single clip. If a prompt hasn't produced usable results after 4-5 generations, the issue is likely the prompt itself rather than bad luck. Rewrite your description using different visual language and try again with a fresh approach.
Whether you used the 5-minute song to video ai free path or spent three hours generating scene by scene, you now have raw video material that moves with your music. The clips exist. They look good individually. But individual clips aren't a music video. Turning a collection of generated footage into something that flows, breathes, and holds attention requires editing, and that's a different skill set entirely from prompting.
Step 6 Assemble and Edit Your Clips Into a Finished Video
Individual clips sitting in a folder aren't a music video. They become one in the editor, where timing, pacing, and visual flow transform raw AI-generated footage into something that feels directed. The editing stage is also where you compensate for the slight inconsistencies that AI inevitably introduces between separate generations. A good cut hides a lot.
Free Video Editors That Handle AI-Generated Clips Well
You don't need expensive software to turn an mp3 to video with professional pacing. Several free editors handle AI-generated clips without choking on unusual codecs or short clip lengths:
- CapCut (Desktop and Web): Best for beginners. Drag-and-drop timeline, built-in beat detection that auto-marks your audio's rhythm, and a library of transitions. Handles short clips gracefully and exports up to 4K without watermarks.
- DaVinci Resolve (Desktop): Best for color grading and polish. Professional-grade color correction tools let you unify the look across clips that generated with slightly different palettes. Steeper learning curve, but unmatched power at zero cost.
- Clipchamp (Windows/Web): Best for speed. Lightweight browser-based editing with simple timeline controls. Good for quick social media cuts when you don't need advanced color work.
- iMovie (Mac/iOS): Best for Apple users who want simplicity. Preset themes and transitions work well for straightforward narrative edits. Limited compared to DaVinci Resolve, but fast to learn.
CapCut's beat detection feature deserves special mention. It functions like a free music visualizer for your timeline, automatically placing markers where the rhythm hits. This means you don't have to tap out beats manually. Import your audio, let CapCut analyze it, and you'll see every snare hit and kick drum marked on the timeline, ready for clip placement.
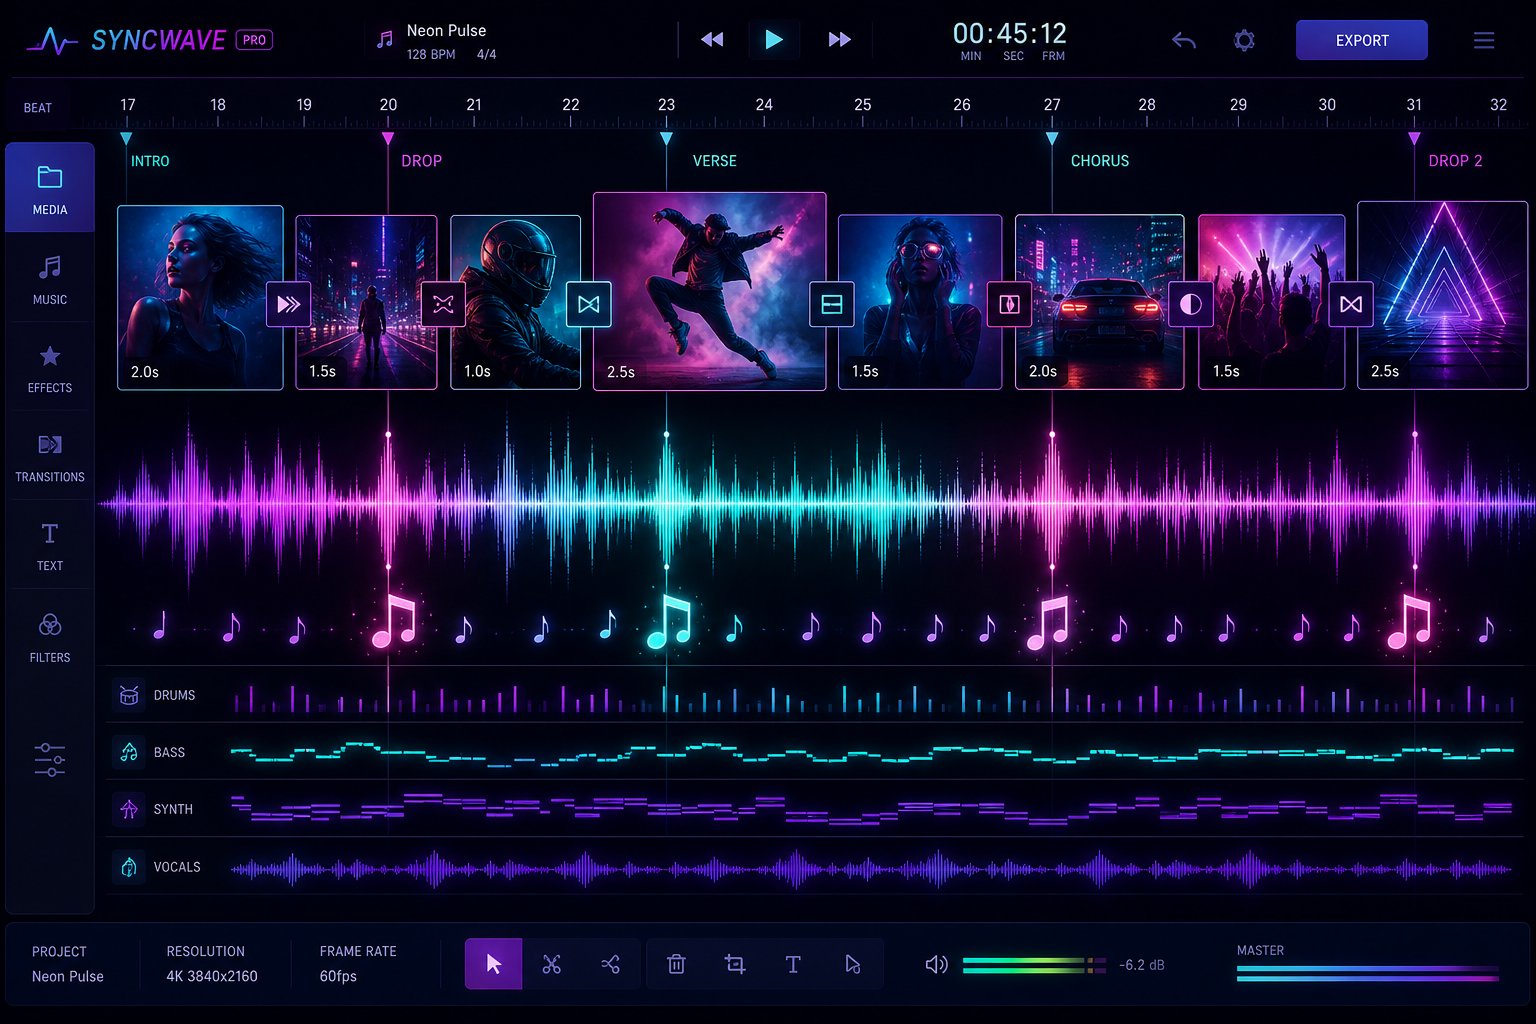
Sync Cuts to Beat Markers for Professional Pacing
Pacing separates amateur edits from professional ones. The core principle is simple, but it takes discipline to follow consistently:
Cut on the beat, never between beats. Every scene transition should land precisely on a rhythmic hit. When cuts float between beats, the video feels disconnected from the music, no matter how good the visuals are.
Beyond that foundational rule, energy matching drives your cut frequency. As Sound On Sound's guide to music video editing explains, the pace of cutting should reflect the difference in energy between song sections. Verses carry lower intensity, so hold shots longer, around two to four bars per clip. Choruses explode with energy, so cut faster, every one to two beats if the track demands it. Bridges and breakdowns often benefit from a single sustained shot that lets the viewer breathe before the next surge.
Here's a practical approach to the editing workflow:
- Import all generated clips and your audio file into the editor. Arrange clips in scene order on the timeline.
- Use beat markers (auto-detected or manually placed) as your cut points. Snap each clip's start and end to these markers.
- Trim clips to their strongest frames. AI generations often have slightly awkward starts or ends. Cutting the first and last half-second usually helps.
- Alternate shot types between cuts: wide to close-up, static to motion, dark to bright. This creates visual rhythm on top of musical rhythm.
- Add brief crossfade or dip-to-black transitions between clips that don't cut cleanly together. Keep transitions under half a second. Anything longer feels sluggish.
If you generated clips with the advanced scene-by-scene method, you'll likely have multiple takes of each scene. Scrub through them on the preview monitor and pick the frames with the most energy or the cleanest motion. An ai beat visualizer approach to editing means letting the audio's waveform literally dictate where each visual lives on your timeline.
Add Lyrics, Titles, and Finishing Touches
Lyrics on screen can elevate a music video from visual accompaniment to a fully immersive experience. If you're wondering how to make a lyric video, the process is straightforward in any of these free editors: add a text layer, type your lyrics, time each phrase to its vocal delivery, and style the font to match your video's aesthetic.
CapCut and DaVinci Resolve both offer animated text presets that work well as a lyrical video maker. You can make lyric videos free of any additional tools by using built-in text animation, controlling fade-in timing, positioning, and font choice directly on the timeline. For a free lyric video that looks intentional, keep the font consistent throughout and position text where it won't compete with the visual action, typically lower third or center-screen with a subtle drop shadow for readability.
Beyond lyrics, consider these finishing touches:
- Color grading for consistency: In DaVinci Resolve, apply the same color correction node across all clips to unify temperature and contrast. In CapCut, a single filter applied to the entire timeline achieves a similar effect more quickly.
- A title card: A simple 2-3 second opening frame with your artist name and song title sets a professional tone.
- A subtle free music visualiser overlay: Some editors let you add waveform or spectrum animations as a layer. This works especially well over abstract sections or quieter visual moments where the screen needs additional movement.
Once your cuts are synced, your colors are unified, and your text is timed, you have a complete music video sitting on your timeline. The creative work is done. What remains is getting it out of the editor and onto screens, which means choosing the right export settings for wherever your audience actually watches.
Step 7 Export and Share Your AI Music Video Everywhere
Your timeline looks great, cuts land on beats, and the visual story holds together. The final step is getting that video out of the editor and onto the platforms where people actually watch. Wrong export settings mean compressed quality, cropped frames, or rejected uploads, so matching your render to each platform's specs is worth the extra two minutes of attention.
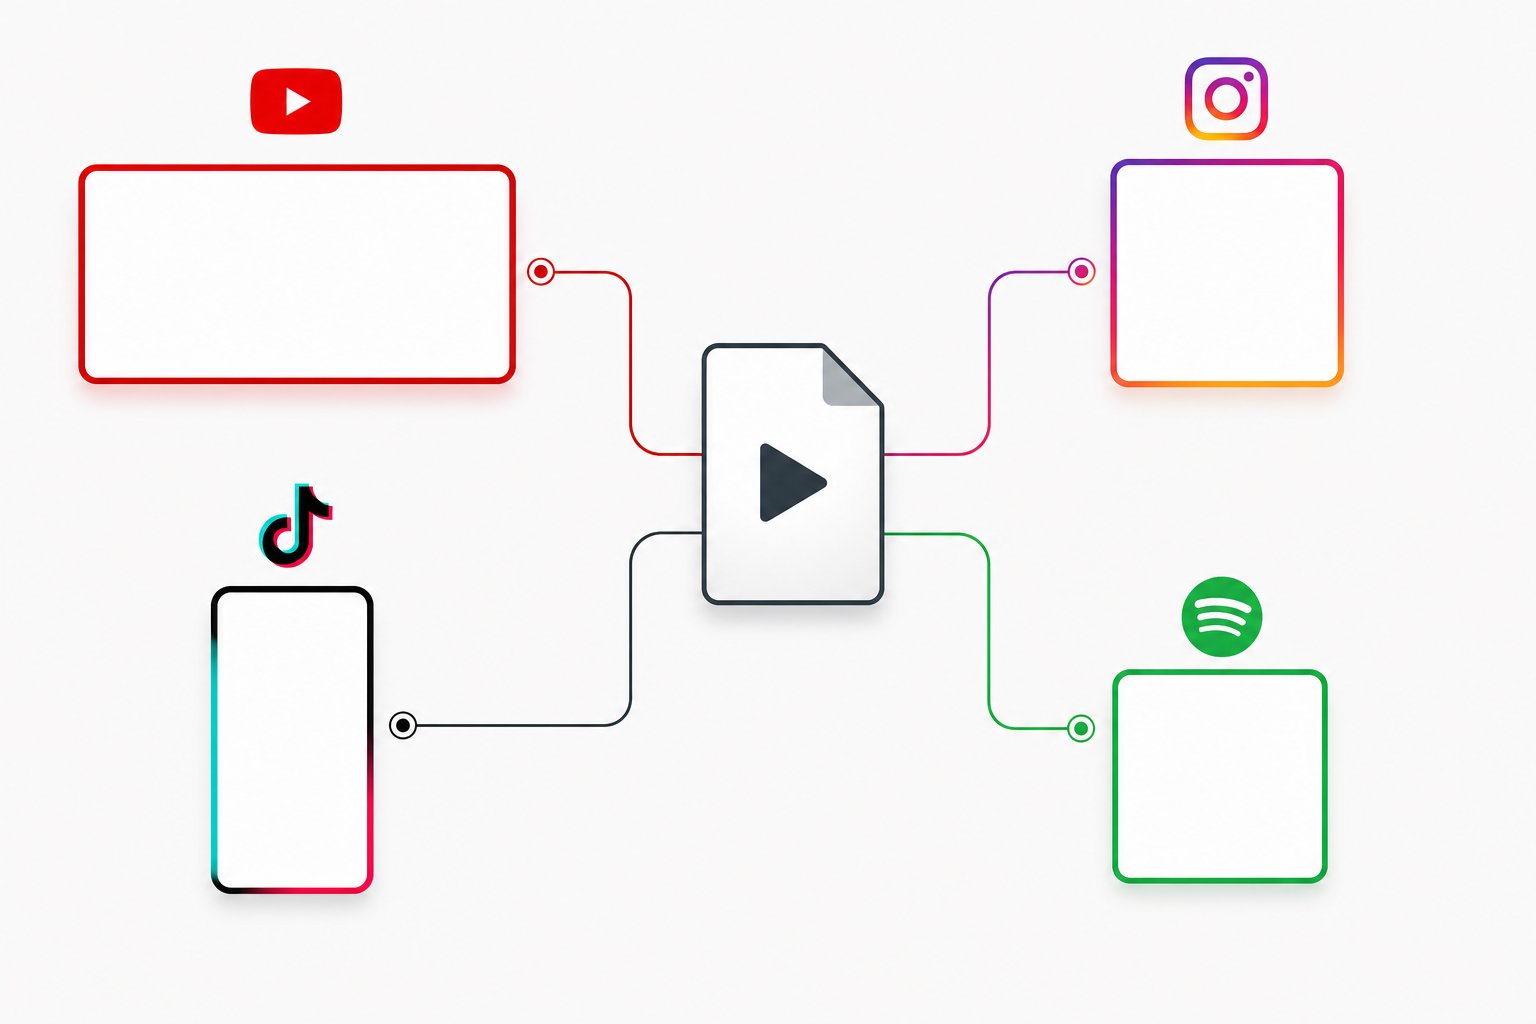
Export Settings Optimized for Each Platform
Each platform enforces different technical requirements. Exporting a single master file and uploading it everywhere sounds efficient but produces subpar results. A landscape video cropped into a vertical frame loses its composition entirely. Instead, export separate versions tailored to where your audience lives.
Here are the specs that matter most, based on current platform requirements:
| Platform | Aspect Ratio | Resolution | Max Length | Format | Recommended Bitrate |
|---|---|---|---|---|---|
| YouTube (standard) | 16:9 | 1920x1080 minimum | No practical limit | MP4 (H.264) | 8-12 Mbps |
| YouTube Shorts | 9:16 | 1080x1920 | 3 minutes | MP4 (H.264) | 8-12 Mbps |
| Instagram Reels | 9:16 | 1080x1920 | 15 minutes (uploaded) | MP4 | 5-8 Mbps |
| TikTok | 9:16 | 1080x1920 | 10 minutes (uploaded) | MP4 or MOV | 5-8 Mbps |
| Spotify Canvas | 9:16 | 720px-1080px tall | 3-8 seconds (loop) | MP4 or JPG | N/A |
For YouTube, export at 1080p minimum. Higher resolution preserves youtube music sound quality during the platform's recompression. YouTube re-encodes every upload, so starting with a higher bitrate source file means less visible degradation in the final stream. If your free editor supports it, exporting at 1440p gives YouTube's encoder more data to work with, even if your AI clips were generated at 1080p.
For Spotify Canvas specifically, you're creating a 3-8 second looping visual that replaces album artwork in the Now Playing view. Pick your most visually striking clip, trim it to a seamless loop, and export as a vertical MP4. Avoid text overlays since the app already displays your song and artist name. This functions as a spotify background video that plays on repeat while listeners stream your track.
Upload Workflow for YouTube, Instagram, and TikTok
Rendering the file is half the job. How you upload and present it determines whether anyone actually finds it.
YouTube: When you upload music to YouTube as a music video, the metadata matters as much as the visual. Write a title that includes your song name and artist name. Fill the description with relevant keywords: genre, mood, visual style, and production details. Add tags covering your genre, similar artists, and terms like "AI music video" or "official visualizer." Choose a custom thumbnail that captures a visually striking frame rather than relying on YouTube's auto-generated options. If you're wondering how to add music to youtube video content that's already uploaded, YouTube Studio lets you swap audio tracks post-upload, but for a dedicated music video the audio should be baked into your export.
Instagram Reels: The video instagram length limit for uploaded Reels currently extends to 15 minutes, but shorter performs better algorithmically. A 30-60 second cut of your strongest section tends to outperform a full-length upload on this platform. Use trending audio hashtags alongside your own artist tags. Post during your audience's peak hours.
TikTok: Upload your vertical export directly. TikTok's algorithm favors watch-through rate, so front-load your most visually impressive footage in the first three seconds. Add 3-5 relevant hashtags. Cross-post the same vertical file to YouTube Shorts for additional reach without extra rendering.
For an mp3 youtube upload workflow where you just want your song on YouTube without a full video, a single looping visual from your AI generation paired with your track creates a simple music video download destination for fans. It's not the cinematic piece you just edited, but it establishes presence on the platform quickly.
Honest Expectations and Next Steps for Quality Growth
Your free AI music video is going to look impressive. It's also not going to look like a $50,000 production, and that's completely fine. The visual quality of free-tier AI generation in its current state sits somewhere between a polished lyric video and a mid-budget indie production. For building an audience on social platforms, where content volume and consistency matter more than Hollywood-grade polish, this quality level competes effectively.
A few realistic benchmarks: AI-generated clips occasionally show subtle artifacts, slight flickering, or inconsistent physics. Short clips (3-5 seconds) hide these issues better than longer holds. Fast-paced edits synced to energetic music mask imperfections that would be obvious in slow, lingering shots. Your editing choices in Step 6 already account for this.
Cross-posting strategically multiplies your effort. One generation session produces material for a full YouTube video, a 60-second Reel, a TikTok clip, a Spotify Canvas loop, and a thumbnail. That's five pieces of content from a single creative session. Each platform's audience discovers your music differently, and presence across all of them compounds over time.
As your audience grows and your tracks gain traction, reinvesting into paid tiers unlocks higher resolution, longer clips, and watermark-free exports. But the creative skills you've built here, prompting, visual planning, beat-synced editing, transfer directly to any budget level. The zero-cost version isn't a lesser version of the process. It's the same process with tighter constraints, and constraints often produce more creative results.