


Everything You Need to Make an AI Music Video
Imagine turning a finished track into a full visual experience without booking a location, hiring actors, or spending weeks in post-production. That's the reality of making a music video with AI in 2025 and beyond. The technology has matured to the point where independent creators can produce videos that genuinely look directed, not just algorithmically assembled.
This guide walks you through the entire process, from planning your visual concept to publishing across platforms. By the end, you'll have a repeatable workflow for creating an ai music video that matches your sound and stands out in feeds.
Who This Guide Is For
You don't need a film degree or a production budget to follow along. This guide is built for three types of creators:
- Independent musicians who want visuals for their releases but can't justify hiring a director for every single or EP track.
- YouTubers and podcasters who create music-driven content and need video assets that feel polished without eating into upload schedules.
- Social content creators who produce short-form video for TikTok, Reels, or Shorts and want original visuals synced to original or licensed audio.
If you've ever wondered how to make a music video with ai but felt overwhelmed by the tool landscape, you're in the right place. The approach here is tool-agnostic: we focus on principles, workflows, and decision-making rather than locking you into a single platform.
What to Expect From AI-Generated Music Videos
Let's set realistic expectations. Current artificial intelligence music video generators produce clips at 720p to 1080p resolution, with most leading models delivering around 4 to 8 seconds of footage per generation. That means a full-length video is assembled from multiple generated clips stitched together in sequence, not rendered in one pass.
Style consistency across scenes is achievable but requires deliberate prompting strategy. Temporal coherence, meaning how well a subject holds together from frame to frame, has improved dramatically. Models like Google's Veo 3 now produce clips where characters move naturally and environments stay stable throughout the shot. Still, you'll encounter occasional artifacts: morphing details, inconsistent lighting between scenes, or garbled on-screen text. Planning and iteration smooth these out.
The bottom line: music video ai tools won't replace a Hollywood VFX team, but they can deliver results that look intentional, stylized, and professional enough for streaming platforms and social distribution.
Prerequisites You Need Before Starting
Before jumping into generation, gather these basics:
- A finished song or audio file — mastered or at least mixed to a listenable standard. AI tools respond better to clean, well-balanced audio.
- A clear visual concept — even a loose idea of mood, color palette, or story gives the AI something meaningful to work with.
- Access to an AI video generation tool — several options exist across free and paid tiers, and we'll cover how to choose the right one later in this guide.
- A basic video editor — for assembling clips, syncing to your track, and exporting the final file.
Many creators want to know how to make an ai music video for free, and it's entirely possible. Several platforms offer free tiers with limited generations, letting you make an ai video from a song for free before committing to a paid plan. A free ai music video won't always match paid-tier resolution or generation speed, but it's more than enough to learn the workflow and produce something shareable.
With these pieces in place, the real creative work begins: translating your song's energy, structure, and emotion into a visual language that AI can interpret and render.
Step 1 Plan Your Visual Concept Around the Song
Every strong music video starts with a plan, even when AI handles the rendering. Skipping pre-production is the fastest way to end up with a scattered collection of clips that don't feel like a cohesive piece. The goal here is to turn your song's emotional arc into a visual roadmap that guides every prompt and generation decision you'll make later.
Analyze Your Song Structure for Visual Mapping
Before you type a single prompt, listen to your track with fresh ears and break it into sections. Most songs follow a recognizable pattern: intro, verse, chorus, verse, chorus, bridge, final chorus, outro. Each section carries a different emotional weight, and that weight dictates what the viewer should see.
Play through the song and write one sentence per section describing its feeling. Something like "Verse 1 feels isolated and searching" or "Chorus 2 explodes with defiance." These emotional notes become the foundation of your visual plan. A music video storyboard guide from Orphiq recommends mapping emotional function to each section before sketching a single frame, and that principle applies equally when creating a music video with AI tools.
Pay attention to tempo shifts, instrumentation changes, and dynamic peaks. A bridge with stripped-back piano calls for a different visual treatment than a drop-heavy chorus. The more granular your structural notes, the more intentional your final video will feel.
Match Visual Styles to Musical Mood and Genre
How do you translate sound into something you can see? Start with genre conventions and color psychology. Research shows a strong correlation between musical tone and color perception, with specific hues evoking distinct emotional responses:
- Ambient or electronic — abstract visuals, flowing gradients, purple and cyan tones that evoke mystery and creativity.
- Indie rock or alternative — grainy film textures, warm reds and yellows, handheld camera movements.
- R&B or soul — rich, warm lighting, deep blues and golds, slow cinematic pans.
- Lo-fi hip hop — anime-style illustration, muted earth tones, cozy interior scenes.
- Singer-songwriter or folk — nature imagery, greens and light blues, lyric-focused overlays.
When figuring out how to create a song video that resonates visually, think beyond literal lyric illustration. A song about heartbreak doesn't need someone crying on screen. It might work better as a slow dissolve between empty rooms bathed in cool blue light. Let your visuals complement the emotion, not narrate it word for word.
If you're interested in how to create an animated music video, this is where style decisions matter most. You might draw inspiration from a storyboard Ghibli fans would recognize: lush environments, expressive character movement, and soft natural lighting. That hand-painted aesthetic translates surprisingly well into AI prompts when you use specific style keywords consistently.
Create a Simple Scene-by-Scene Storyboard
You don't need drawing skills or expensive software. A text-based storyboard works perfectly for AI-driven workflows because your storyboard entries will eventually become the prompts themselves. Think of this as a storyboard Ghibli-level creators and bedroom producers alike can use: functional, clear, and focused on emotional intent over technical polish.
Follow this template for each section of your song:
- Identify the song section — label it (intro, verse 1, chorus 1, etc.) and note its timestamp and duration.
- Assign a mood and color palette — choose 2-3 dominant colors and one emotional keyword that captures the section's feel.
- Describe the visual action or scene — write what the viewer sees. Keep it specific: "A figure walking through fog toward a distant light" beats "something moody."
- Note transitions between sections — decide how one scene flows into the next. A hard cut? A dissolve? A color shift? Planning transitions prevents jarring jumps in the final edit.
For a typical 3-4 minute track, you'll end up with roughly 6-10 scene descriptions. That's your entire visual blueprint for making music videos with AI. Each entry gives you a clear generation target rather than hoping random prompts somehow cohere into a watchable piece.
The specificity of your storyboard directly determines the quality of your AI output. Vague plans produce vague results. Detailed scene descriptions with defined moods, colors, and actions give generative tools the constraints they need to produce footage that actually looks directed.
Step 2 Prepare and Structure Your Music File
Your storyboard maps the creative vision. Your audio file delivers the technical foundation that AI tools actually interpret. Feeding a poorly formatted or unstructured track into a generator is like handing a script full of typos to an actor and expecting a flawless performance. The quality, format, and segmentation of your audio directly shape how coherent and polished the generated visuals turn out.
Audio Format and Quality Requirements
Most AI video generation platforms accept three standard formats: MP3, WAV, and FLAC. Each serves a different purpose depending on your workflow and priorities.
- WAV — uncompressed, lossless audio. This is the gold standard for quality. If you have a mastered WAV file, use it. AI tools that analyze frequency data and dynamic range extract the most information from uncompressed sources.
- FLAC — compressed but lossless. Smaller file size than WAV with no quality loss. A solid middle ground when upload bandwidth is limited.
- MP3 — compressed and lossy. Universally compatible and lightweight, but strips subtle audio detail. For a free ai music video generator from mp3 workflow, aim for 320kbps bitrate at minimum to preserve enough data for meaningful AI interpretation.
Why does audio quality matter for video output? Many generation tools analyze waveform characteristics, spectral data, and energy peaks to inform visual decisions. Clean, well-mastered audio produces distinct peaks and valleys that AI can map to scene transitions, color intensity shifts, and motion pacing. A muddy, clipped, or overly compressed file blurs those signals, leading to generic or erratic visuals.
If your track isn't mastered yet, at least run a basic limiter and ensure levels don't clip. You'll notice a meaningful difference in how responsive the generated footage feels to your song's dynamics.
How BPM and Tempo Affect Visual Generation
Tempo is the invisible director of your AI music video. A track at 70 BPM naturally calls for slow pans, gradual transitions, and lingering shots. A track at 140 BPM demands faster cuts, rapid motion, and high-energy scene changes. AI tools that offer beat-synced generation use BPM data to pace their output, so knowing your track's tempo upfront gives you more control over the result.
How do you find your BPM? Most DAWs display it in the project file. If you're working with a bounced audio file, free tools like AudioKeychain or the built-in BPM counters in apps like Ableton or Audacity can detect it in seconds.
Here's how tempo typically translates to visual pacing when you create a video from a song:
- 60-80 BPM (ballads, ambient) — hold scenes for 4-8 bars. Slow zooms, dissolve transitions, minimal camera movement.
- 80-120 BPM (pop, R&B, indie) — cut every 2-4 bars. Mix static shots with gentle movement. Balance variety with cohesion.
- 120-160 BPM (dance, electronic, punk) — cut every 1-2 bars during high-energy sections. Rapid motion, quick camera swaps, bold color shifts.
Knowing these relationships before generation lets you set appropriate clip durations and transition timing. You're not guessing how long a scene should last; you're deriving it from the music itself.
Segment Your Track for Better Results
Here's a step many creators skip, and it costs them coherence. Instead of uploading your full track as a single file and hoping the AI figures out where the verse ends and the chorus begins, split your audio into labeled segments first.
This approach works because AI tools generate more focused, section-appropriate visuals when they process shorter, emotionally consistent clips. A 30-second verse segment prompts different visual outputs than a full 3-minute track where the tool has to interpret constantly shifting moods.
Tools like Soundverse Section Analysis automate this process by detecting section boundaries, labeling them (intro, verse, chorus, bridge, outro), and exporting timestamps. You can then split your audio file along those boundaries using any DAW or even a free editor like Audacity.
Label each segment clearly: "01_Intro_0-15s.wav," "02_Verse1_15-52s.wav," and so on. This naming convention keeps your workflow organized when you're generating visuals for each section independently and assembling them later.
Different platforms handle audio input differently. Some let you upload local files directly, others accept links from streaming platforms, and a few work purely from text descriptions of your music. Each method has tradeoffs:
| Input Method | Quality | Ease of Use | Best Use Case |
|---|---|---|---|
| Direct file upload (WAV/FLAC/MP3) | High — full waveform data available for analysis | Moderate — requires file prep and segmentation | Serious projects where visual-audio sync matters |
| Platform link (SoundCloud, YouTube) | Medium — limited by platform compression | High — paste a URL and go | Quick drafts or testing a song to video ai free workflow |
| Text description of music | Low — AI interprets your words, not actual audio | Very high — no audio file needed at all | Concept exploration or when audio isn't finalized yet |
For the best results, direct upload gives you maximum control. If you're exploring a music to video ai free tool for the first time, platform links offer convenience without requiring file management skills. Text descriptions work in a pinch but produce visuals based on the AI's interpretation of genre keywords rather than your actual song's dynamics.
A free music to video generator that accepts direct uploads will almost always outperform one limited to URL parsing, simply because it has richer audio data to work with. When choosing tools, prioritize input flexibility alongside visual quality.
With your audio properly formatted, BPM documented, and track segmented into labeled sections, you've given the AI everything it needs to generate visuals that feel musically intentional. The next decision is which generation method to use for turning those prepared segments into actual footage.
Step 3 Choose Your AI Video Generation Method
Your audio is prepped, your storyboard is mapped, and your segments are labeled. The question shifts from "what do I want?" to "how do I get there?" The generation method you choose shapes everything: how much creative control you retain, how much time you invest, and how closely the final output matches the vision in your head.
Four primary approaches exist for using ai to make music videos, and each serves different creators at different stages of their workflow. Understanding the tradeoffs helps you pick the right path, or combine paths, for your specific project.
Text-to-Video Generation for Maximum Creative Control
This is the most hands-on method. You write detailed text prompts describing exactly what you want to see: subjects, environments, camera movements, lighting, color palettes, and artistic style. The AI interprets your words and generates footage from scratch.
Text-to-video gives you the highest creative latitude. Every scene is custom-crafted through language, meaning you can iterate endlessly until the output matches your storyboard. Tools like OpenAI Sora, RunwayML, and Kling AI lead in this space, each offering different strengths in realism, motion quality, and stylistic range.
The tradeoff? Skill and time. Writing prompts that produce cinematic results requires practice. You'll generate multiple variations before landing on scenes worth keeping. For creators who want to create a music video with ai that feels truly original, though, this method delivers the most distinctive results. Even Adobe Firefly AI text to video capabilities have expanded to support this workflow for creators already embedded in the Creative Cloud ecosystem.
Image-to-Video for Consistent Visual Style
Instead of starting from text alone, you feed the AI a still image and ask it to animate that frame into motion. The source image can be AI-generated artwork, a photograph, concept art, or even a frame from an existing video you want to extend.
Why does this matter for music videos? Consistency. When you generate a key frame as a still image first, you lock in the composition, color grade, and subject appearance before any motion is introduced. The AI then animates within those visual constraints rather than inventing everything from a text description.
This is the frames-to-video approach that's gaining traction among creators who need tight visual control. You can define a start frame and an end frame, letting the AI generate the motion between them. For best results, ensure your keyframes share consistent lighting direction, color temperature, and subject scale so the generated transition feels coherent rather than jarring.
Creators who already use AI image generators like Midjourney or DALL-E find this workflow natural: generate a series of stunning stills that match your storyboard, then animate each one into a 4-8 second clip.
Music-Link-to-Video for Speed and Simplicity
Some platforms let you paste a URL to your track on SoundCloud, YouTube, or another hosting service, and the AI handles everything: analyzing mood, detecting beats, selecting visual styles, and generating scenes automatically. You skip prompt writing entirely.
This method works well when speed outweighs precision. You'll get a complete video in minutes rather than hours, making it useful for quick social content, early concept exploration, or testing how your track translates visually before investing in a more controlled approach. The creative control is lower since the AI makes most stylistic decisions, but the barrier to entry is essentially zero.
A fourth variation, script-to-video, sits between text-to-video and music-link approaches. You provide a full scene-by-scene script with descriptions, and the tool generates corresponding footage in sequence. It's more structured than single-prompt generation but less labor-intensive than crafting individual prompts for every clip.
Which Method Fits Your Skill Level
Choosing the best ai for music videos depends less on which tool is "objectively best" and more on which method aligns with your skills, timeline, and creative goals. Here's how the four approaches compare:
| Method | Creative Control | Skill Required | Time Investment | Best For |
|---|---|---|---|---|
| Text-to-Video | High | Intermediate to advanced prompt writing | High (multiple iterations per scene) | Artists who want a unique, hand-crafted visual identity |
| Image-to-Video | High | Intermediate (image generation + animation) | Medium-high (image creation + animation passes) | Creators prioritizing visual consistency across scenes |
| Music-Link-to-Video | Low | Beginner-friendly | Low (minutes, not hours) | Quick social content or first-time experimenters |
| Script-to-Video | Medium | Beginner to intermediate | Medium (write once, generate in sequence) | Storytelling tracks with clear narrative arcs |
When evaluating the best ai for making music videos, consider that no single method or tool covers every scenario perfectly. The best ai video generator for music videos might be a combination rather than a single platform. Many experienced creators use a multi-tool workflow: generating key frames as still images in one tool, animating them with an image-to-video model, and then using text-to-video for transitional or abstract scenes that don't require rigid visual anchors.
This hybrid approach is where the best ai for music video creation currently lives. Imagine generating your chorus visuals as bold, consistent key-frame animations while letting an AI freely interpret your bridge section from a text prompt describing abstract emotion. The combination produces variety within coherence, which is exactly what a directed music video feels like.
Adobe Firefly AI text to video tools integrate naturally into this kind of hybrid pipeline for creators already using Premiere Pro or After Effects, since generated clips drop directly into existing editing timelines without format conversion headaches.
Whichever method you choose, the next challenge stays the same: writing prompts or providing inputs that translate your musical vision into visuals worth watching. The generation method decides the vehicle; prompt quality decides the destination.
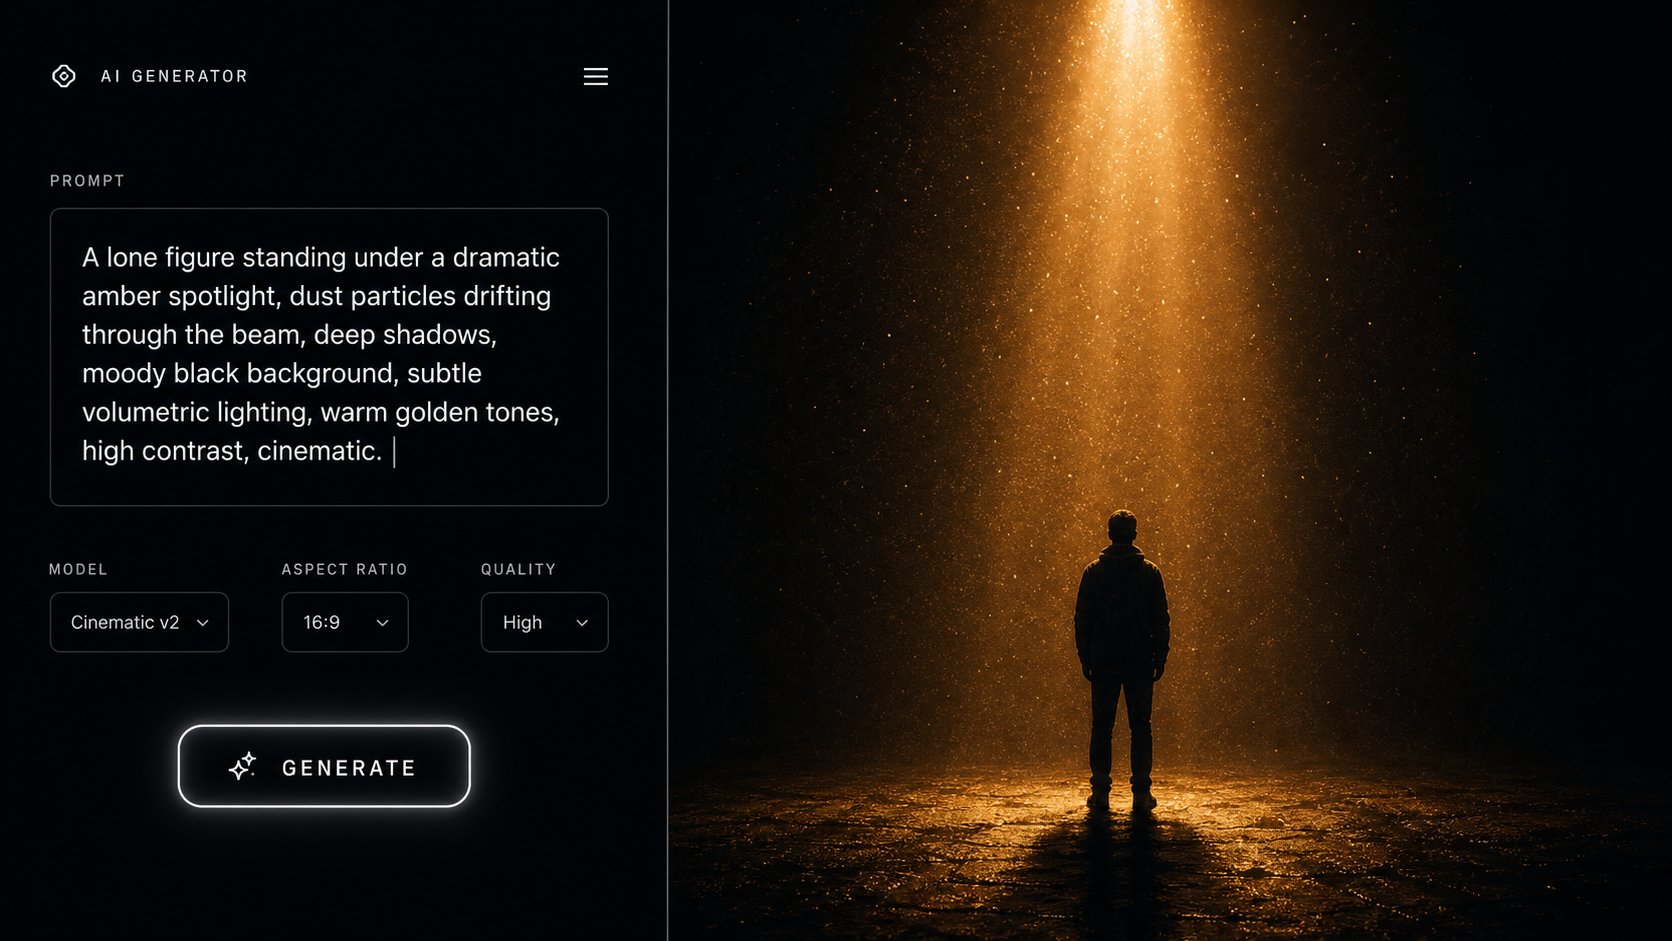
Step 4 Write Prompts That Produce Stunning Visuals
Your generation method is chosen. Your storyboard has clear scene descriptions. The gap between a mediocre AI music video and one that looks professionally directed almost always comes down to one skill: prompt writing. A vague prompt produces generic, forgettable footage. A precise, well-structured prompt generates scenes with intentional mood, movement, and cinematic quality that viewers actually feel.
Think of prompts as the director's instructions to a cinematographer. You wouldn't say "film something cool." You'd describe the shot type, the lighting, the movement, and the emotion you're after. The same principle applies when writing for AI video generation, whether you're using a music video prompt generator or crafting prompts manually.
Anatomy of an Effective Music Video Prompt
Every strong prompt follows a layered structure that gives the AI enough information to render something specific without overloading it with conflicting details. Adobe's prompting guidelines recommend this order: Shot Type Description + Character/Subject + Action + Location + Aesthetic. For music videos specifically, expand that formula into six layers:
- Subject — who or what appears on screen. Be specific about appearance, clothing, and defining features.
- Action — what the subject is doing. Use dynamic verbs with directional intent: "walks toward," "turns slowly," "reaches upward."
- Environment — where the scene takes place. Include spatial details, weather, time of day, and surrounding objects.
- Camera and movement — shot type (close-up, wide, low-angle) and camera behavior (tracking, static, slow dolly in). This is where many music video prompts fall short.
- Style and mood — the aesthetic quality of the footage. Cinematic, dreamy, gritty, neon-lit, anime-style, grainy 16mm film.
- Technical parameters — lighting specifics, depth of field, color temperature, and any motion pacing cues.
The key insight from LTX's research on common prompt mistakes is that video prompts need temporal structure. Unlike image prompts where you list attributes in any order, video prompts should describe events chronologically because the model must maintain consistency across frames over time. Describe what happens at the start, then what changes, then where the clip ends.
Translate Genre and Mood Into Visual Language
Here's where your musical knowledge becomes a creative advantage. Each genre carries visual conventions that audiences instinctively associate with the sound. Tapping into those associations while adding your own twist is how you produce an ai music video that feels cohesive rather than random.
Consider how different genres translate into prompt language:
- Lo-fi hip hop — anime-style illustration, warm lamplight, cozy interior with rain on windows, muted earth tones, slow camera pan. If you're going for an anime music video maker aesthetic, include keywords like "hand-painted cel animation, soft outlines, warm amber glow." Sing animation characters work well here: think cartoon singers images of a figure with headphones nodding at a desk, pencil-sketched and softly animated.
- Electronic or synthwave — neon-lit cityscape, geometric patterns pulsing with the beat, cyan and magenta color scheme, fast camera movement, volumetric fog catching laser light.
- Indie rock — grainy 16mm film texture, warm natural lighting, handheld camera with subtle shake, outdoor settings, golden hour, desaturated reds and yellows.
- R&B or soul — slow dolly in on a subject bathed in golden backlight, deep shadows, warm skin tones, shallow depth of field, intimate framing.
- Pop or dance — high-contrast studio lighting, bold primary colors, wide-angle lens, energetic movement, dynamic camera tracking the subject.
For tracks featuring vocal performance, you might want a singing character as the visual anchor. An ai character singing in your video can be rendered in any style: photorealistic, illustrated, or abstract. The prompt should specify the character's appearance and emotional expression clearly so the AI maintains consistency across frames. A singing graphic with stylized motion works particularly well for lyric-focused sections where the visual needs to support rather than distract from the words.
Common Prompt Mistakes and How to Fix Them
The difference between an amateur result and a professional-looking scene often comes down to avoidable errors. Here are the most common ones:
Mistake 1: Being too vague. Generic descriptions produce generic footage. The AI defaults to the most statistically common interpretation of your words.
Weak prompt: "A person singing in a dark room, cinematic, high quality."
Strong prompt: "Close-up profile shot of a woman singing with closed eyes, illuminated by a single warm spotlight from above. The rest of the room is lost in deep shadow. Dust particles drift through the light beam. Camera holds static. Shallow depth of field, 35mm film grain, amber and black color palette. The mood is vulnerable and intimate."
Mistake 2: Overloading with competing elements. Prompts describing five subjects, three camera movements, and conflicting moods simultaneously confuse the model. Focus on one subject, one action, one camera behavior per clip.
Mistake 3: Ignoring motion and camera direction entirely. Without explicit camera and movement instructions, most models default to a gentle drift or static mid-shot. If you want dynamic footage, specify it. Terms like "tracking shot," "slow dolly in," "low-angle looking up," and "handheld with subtle sway" directly influence the output's cinematic quality.
Mistake 4: Inconsistent style language across scenes. This one kills visual coherence in music videos specifically. If your verse scenes use "grainy 16mm film, warm amber tones, shallow depth of field" but your chorus prompts switch to "clean digital look, cool blue lighting, sharp focus," the assembled video will feel disjointed rather than directed.
The fix: create a style anchor phrase. This is a set of 3-5 consistent descriptors you append to every prompt in your project. Something like "cinematic, dreamy soft focus, muted warm palette, 35mm film texture" becomes your visual signature across all scenes. Variation happens in the subject, action, and environment layers while the style layer stays constant.
When your style keywords stay consistent, even scenes with completely different subjects and environments feel like they belong to the same video. That's the difference between a collection of AI clips and a directed music video. The AI doesn't know it's making a cohesive piece unless you enforce coherence through repeated stylistic language.
With your prompts structured, genre-tuned, and error-proofed, you're ready to feed them into your chosen tool and start generating real footage. The iteration process, selecting the best outputs and refining what doesn't land, is where those carefully written prompts meet the realities of AI generation.
Step 5 Generate Your AI Music Video Scenes
Prompts are written. Your storyboard has timestamps, moods, and scene descriptions mapped to each song section. The planning phase is over. This is where your project shifts from concept to reality: uploading audio, configuring generation settings, and watching AI turn your words into moving footage for the first time.
Expect this step to be iterative, not instant. Your first generations rarely nail the vision on the first pass. The workflow here is generate, evaluate, refine, regenerate. Each cycle gets you closer to scenes worth keeping.
Upload Your Audio and Configure Settings
The generation process typically begins with three inputs: your audio file (or a link to it), your prompt or style selection, and your output specifications. Here's the practical sequence most platforms follow:
- Upload your audio segment — use the labeled sections you prepared earlier. Start with your chorus or the highest-energy section since these tend to produce the most visually striking results and give you immediate feedback on whether your prompts are working.
- Enter your prompt or select a visual style — paste the scene description from your storyboard. Some tools offer preset style menus (cinematic, anime, abstract) as shortcuts when you want to create ai music videos quickly without writing custom prompts for every clip.
- Set resolution and aspect ratio — match your output to your distribution platform. Choose 16:9 for YouTube, 9:16 for TikTok and Reels, or 1:1 for Spotify Canvas and Instagram grid posts.
- Configure clip duration — most generators produce 4-10 second clips per generation. Align clip length with your song section's natural phrasing. A 4-bar phrase at 120 BPM lasts 8 seconds, so that's a natural clip boundary.
One practical tip: generate your most important scenes first. Chorus visuals set the tone for the entire video. Once you have chorus footage you're happy with, verse scenes become easier to dial in because you have a visual benchmark to match.
Generate Your First Scenes and Iterate
Your first batch of results will likely be a mix of "almost perfect," "interesting but wrong," and "what happened there." That's normal. The iteration strategy matters more than the initial output quality.
When evaluating generated clips, ask three questions:
- Does the mood match? — Does the visual energy align with what you hear in this section of the song?
- Is the motion coherent? — Do subjects hold together across frames without warping, morphing, or disappearing?
- Does it fit the style anchor? — Will this clip look like it belongs next to the other scenes you're building?
For clips that are close but not quite right, refine rather than rewrite. Adjust one variable at a time: change the lighting descriptor, swap the camera movement, or add a single modifier. Changing too many elements between generations makes it impossible to learn what's working and what isn't.
Generate 3-5 variations for each scene in your storyboard. You'll rarely use the first generation, and having options lets you choose the strongest clip for each section during editing. Some creators generate 10+ variations for hero moments like the final chorus or opening shot, then cherry-pick the single best result.
If a prompt consistently produces unusable results after 3-4 attempts, the prompt itself may be the issue. Revisit your scene description and simplify. Remove competing elements, reduce the number of subjects, or break a complex scene into two simpler clips you can combine in post.
Tools That Streamline the Process
The tool landscape for generating AI music video content has grown significantly, with different platforms excelling at different parts of the workflow. When you want to make a music video with ai, choosing the right tool for your specific needs saves hours of frustration. Here's how the current options break down by use case:
| Tool Category | Best For | Key Strength | Input Method |
|---|---|---|---|
| MakeBestMusic AI Music Video Generator | Musicians and creators who want a streamlined song-to-video workflow | Designed for turning finished songs into visual content without complex editing steps | Audio upload and song link |
| Professional cinematic generators (Runway, Kling AI) | Filmmakers and editors with post-production skills | Industry-leading clip quality with physically coherent motion and lighting | Text prompts, reference images |
| Beat-sync focused tools (Freebeat, Neural Frames) | Artists who need visuals that respond to song structure and BPM | Audio-reactive generation that maps scene changes to musical events | Direct audio upload, platform links |
| Lyric video makers (Veed, Canva Video) | Singer-songwriters and content creators needing text-forward visuals | Typography animation and text timing synced to vocals | Audio upload with lyric text input |
For independent musicians who want to make a music video with ai from a finished track without learning complex editing software, MakeBestMusic's AI Music Video Generator offers a direct path from song to shareable video. Its strength is the streamlined workflow: upload your track, and the tool handles the visual generation process without requiring you to manually prompt, render, and assemble clips in a separate editor.
If you're searching for a music video ai generator free option, several platforms offer limited free tiers that let you test their approach before committing. A music video maker ai free plan typically caps resolution at 720p or limits generation credits, but it's enough to evaluate whether a tool's output style matches your creative vision.
The best ai music video maker for your project depends on where you want to invest your time. Creators comfortable with prompt writing and video editing get maximum control from cinematic generators like Runway or Kling. Those who want the AI to handle more of the heavy lifting, particularly beat synchronization and scene-to-section mapping, benefit from audio-reactive tools. And the best ai music video generator from audio is one that actually analyzes your track's structure rather than simply playing audio over disconnected visuals.
Combining tools often produces the strongest results. You might generate your performance scenes in a beat-sync tool, create abstract transition footage with a text-to-video generator, and handle lyric sections in a dedicated typography platform. The generated clips all meet in your editing timeline regardless of their source.
With your scenes generated and your best variations selected, the raw material for your video is ready. The next challenge is assembling those clips so transitions land exactly where the music demands them: on beats, on downbeats, and at the precise moments where your song's energy shifts.
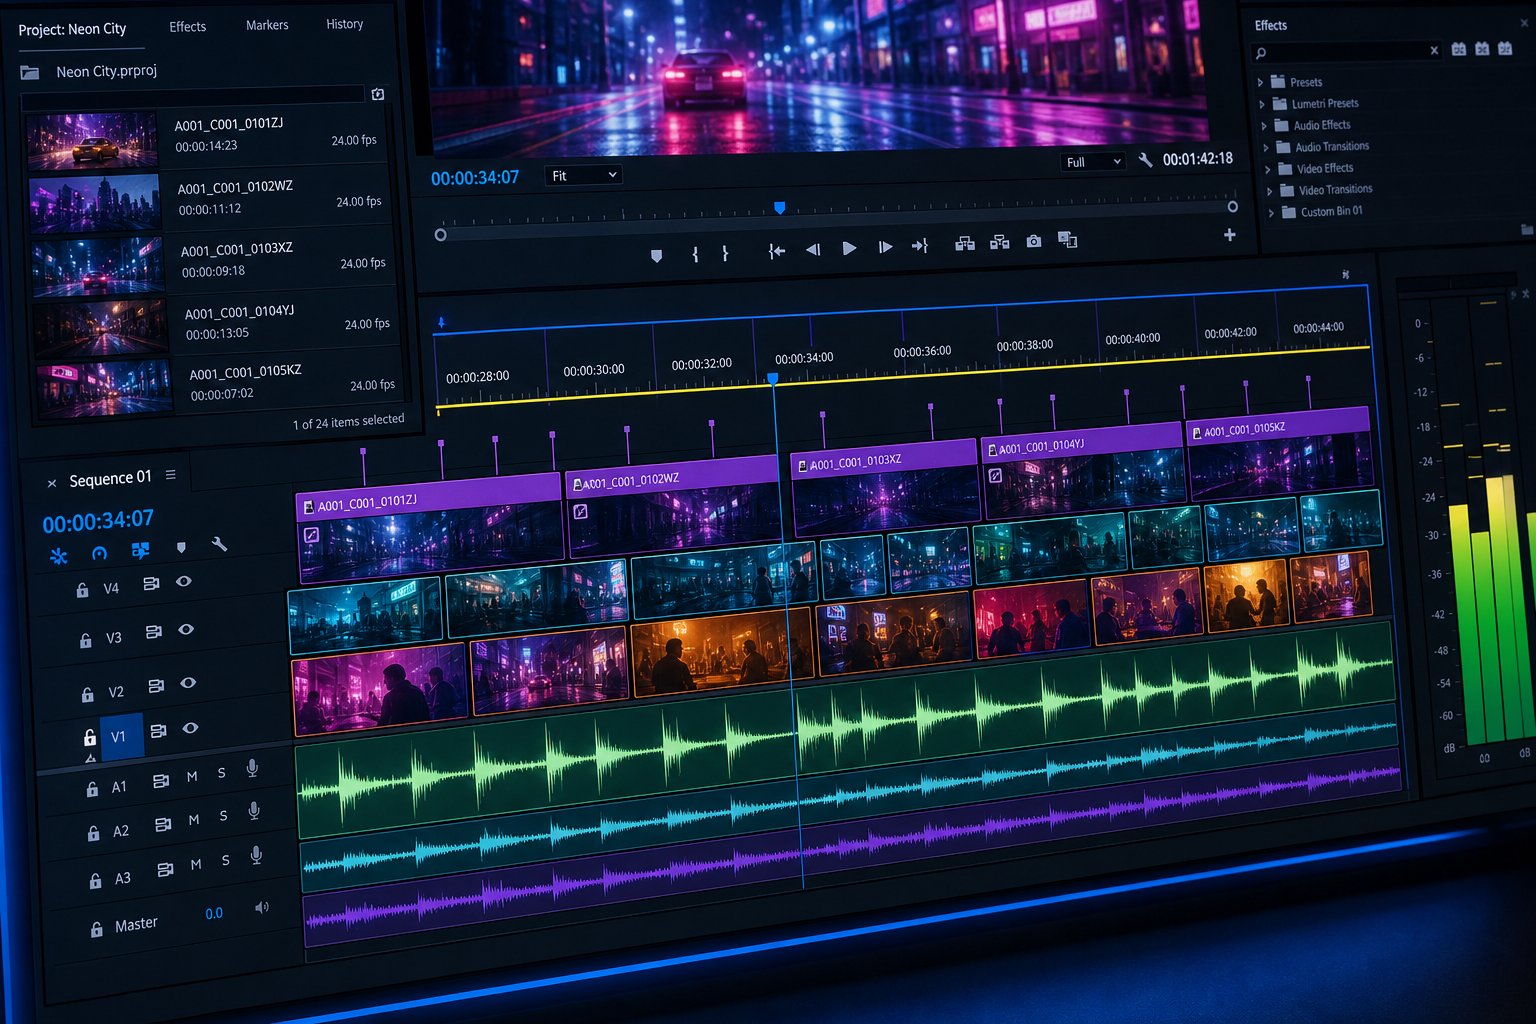
Step 6 Sync Visuals to Your Music Structure
A collection of beautiful AI-generated clips doesn't feel like a music video until the visuals move with the song. Scene changes that land a beat too early or too late break the illusion of intentional direction. Synchronization is what transforms isolated clips into a flowing visual narrative, and it's where the "how can i make a video with music that actually feels professional" question gets answered.
Match Scene Transitions to Musical Beats
The simplest rule in music video editing: cuts should happen on rhythmically meaningful moments. Downbeats, snare hits, vocal entries, and section transitions are your natural cut points. Professional music video editors use markers on the timeline to map out bars, beats, and key changes before placing a single clip.
In practice, this means:
- Mark strong downbeats — press M (in Premiere Pro) or use your editor's marker tool to flag the first beat of every 2 or 4 bars. These become your primary cut points.
- Identify section boundaries — the moment a verse transitions into a chorus is always a visual change opportunity. These structural shifts carry more weight than individual beats.
- Use waveform peaks — zoom into the audio track visually and align clip start points with the percussive transients you can see in the waveform.
Not every beat needs a cut. Oversyncing creates an exhausting, mechanical feel. Think of beats as available options, not obligations. Place your strongest footage on the strongest beats and let quieter moments breathe without interruption.
Pacing Techniques for Different Song Sections
Pacing is how your video mirrors the emotional arc of the song. Fast sections demand fast editing. Slow sections need stillness. Here's a practical framework:
- Verses — cut every 4 bars. Hold scenes longer to let the imagery settle and build narrative. Slower motion, subtle transitions, or simple hard cuts.
- Choruses — cut every 2 bars or even every bar. Increase energy with faster scene changes, bolder visuals, and more dynamic camera movement.
- Bridges and breakdowns — hold a single scene for the entire section. These moments benefit from visual stillness that contrasts with what came before and builds anticipation for the final chorus.
- Drops or climactic moments — hit with a hard cut or rapid-fire sequence of 1-bar clips. Stack your most visually intense generated footage here.
This framework adapts to any tempo. A 70 BPM ballad with 4-bar verse cuts produces long, lingering shots of 8+ seconds. A 140 BPM electronic track with 2-bar chorus cuts produces rapid 3-4 second clips. The formula scales because it's tied to musical structure, not arbitrary time durations.
Manual vs. Automatic Beat Synchronization
You have two paths for syncing clips to your track: doing it by hand in a video editor or letting a dedicated app to make a video with music handle the alignment automatically.
Manual syncing gives you full control. Import your audio into any timeline-based editor (Premiere Pro, DaVinci Resolve, CapCut desktop, or even a free option like Shotcut), place beat markers, then drag your AI-generated clips onto the timeline so each clip's start aligns with a marked beat. The advantage is precision: you decide exactly which beat triggers which scene. The drawback is time. A 3-minute video at 120 BPM has around 360 beats, and even with only cutting on strong downbeats you're placing and trimming dozens of clips individually.
Automatic beat-sync uses AI to detect your track's tempo and rhythmic structure, then aligns your clips accordingly. Modern beat-sync tools analyze waveforms, identify percussive transients, and place cuts at musically appropriate moments without manual intervention. Tools like CapCut's "Auto Beat Sync" feature or dedicated platforms handle this in seconds.
For AI music videos specifically, there's a practical middle ground. Use automatic beat detection to generate your initial marker grid, then manually adjust clip placement based on your storyboard priorities. This hybrid approach gives you speed without sacrificing intentionality. A song to video ai generator free workflow often includes basic auto-sync, which you can then fine-tune in a separate editor.
One common challenge: AI-generated clips rarely arrive at the exact duration you need. A 6-second generated clip needs to fit a 4-bar phrase that lasts 8 seconds at your tempo, or vice versa. Handle this with three techniques:
- Trim excess — find the strongest 4 or 5 seconds within a longer clip and cut to that. AI clips often have weaker starts or ends where motion hasn't fully resolved.
- Speed ramp — subtly slow down a clip by 10-20% to stretch it into a longer section. Small speed changes are invisible to viewers but can bridge timing gaps cleanly.
- Cross-dissolve between clips — overlap the end of one clip with the start of another by a few frames. This buys you time while adding a transition that hides the seam.
When using a music to video generator free tool that handles sync automatically, test whether its beat detection matches your song's actual rhythm. Tools trained on pop and electronic music occasionally misread syncopated rhythms, odd time signatures, or tempo changes. Always preview the auto-synced result against your original track before committing, and manually fix any cuts that land off-beat.
A free ai song video generator might limit your ability to fine-tune timing, so consider using it for initial assembly and then importing the result into a dedicated video with music app or desktop editor for frame-level adjustments. The combination of automated speed and manual polish produces results that feel rhythmically locked in without requiring hours of frame-by-frame work.
With your visuals synced to the beat and your pacing matched to the song's emotional dynamics, the raw assembly is complete. The footage moves with the music. The remaining work is refinement: color-grading for consistency, adding text or lyric overlays, and exporting at the right specs for every platform where your audience watches.
Step 7 Edit, Refine, and Export Your Final Video
Your clips are synced, your transitions land on beats, and the visual arc follows the song's emotional structure. The raw assembly exists. What separates this rough cut from a finished ai video music video that looks intentionally directed is post-production refinement: color grading that unifies disparate AI-generated clips, text and lyric overlays that add another visual dimension, and export settings tuned for each platform where your audience watches.
Assemble and Color Grade for Visual Consistency
AI-generated clips almost never share identical color temperatures, contrast levels, or saturation, even when prompted with the same style language. One clip might skew warmer, another might have deeper shadows, a third might oversaturate blues. Viewed individually, each looks fine. Placed next to each other on a timeline, the differences become distracting.
Color grading is the single most effective way to make a collection of separately generated clips feel like one cohesive video. The workflow is straightforward:
- Choose a hero clip — pick the scene that best represents your intended look. This becomes your color reference for everything else.
- Match all clips to the hero — in DaVinci Resolve (free) or Premiere Pro, use the color matching tool to align each clip's white balance, exposure, and saturation to your reference.
- Apply a unifying LUT or grade — a subtle film emulation LUT or custom curve adjustment layered across your entire timeline ties everything together. Think of it as the visual equivalent of mastering a song: it glues independent elements into one coherent piece.
- Fine-tune outliers — some clips resist automatic matching. Adjust these individually until they sit comfortably alongside their neighbors.
You can also add a background to a band video with ai by generating environment scenes separately and compositing them behind performance footage. This technique works particularly well when your AI-generated performance clips have simple or inconsistent backgrounds that distract from the subject.
Add Lyrics, Text, and Overlay Elements
Lyric overlays transform a visual-only piece into something viewers engage with on multiple levels. For vocal-driven tracks, timed lyrics give audiences a reason to watch rather than just listen. A free lyric video doesn't require expensive motion graphics software. Tools like CapCut, Canva Video, or dedicated lyrical video maker platforms handle text timing and animation with minimal learning curve.
When adding lyrics, follow these principles:
- Time text to syllable delivery — lyrics should appear as they're sung, not a beat early or a word late. Most editors let you snap text timing to audio waveform peaks.
- Keep typography consistent — choose one font family and one text color scheme that complements your color grade. Changing fonts between scenes breaks cohesion as much as mismatched color.
- Position text in safe zones — leave the top 15% and bottom 20% clear for platform UI elements if you plan to distribute on vertical platforms.
- Use motion sparingly — gentle fade-ins or kinetic typography on key phrases add energy, but every word bouncing or spinning becomes unreadable fast.
If you want to make lyric videos free without dedicated software, CapCut's desktop version handles text animation, timing, and export at no cost. For creators who need more control, a free ai lyric video generator can produce animated text sequences you composite over your AI-generated footage in any timeline editor.
Export Settings for Different Platforms
Your finished ai video music video needs different export profiles depending on where it lives. Uploading a horizontal YouTube master to TikTok crops your carefully composed scenes. Exporting at the wrong resolution means your platform compresses the file further, introducing artifacts that undermine the visual quality you spent hours achieving.
Here are the recommended export settings per platform based on current platform specifications:
- YouTube (standard video) — 1920x1080 (1080p) or 3840x2160 (4K), 16:9 aspect ratio, MP4 with H.264 codec, 30fps, bitrate of 10-20 Mbps for 1080p or 35-68 Mbps for 4K.
- YouTube Shorts — 1080x1920, 9:16 aspect ratio, MP4, up to 3 minutes, same codec and frame rate.
- Instagram Reels — 1080x1920 minimum (1440x2560 recommended), 9:16, MP4 or MOV, up to 15 minutes for uploads, 30fps.
- TikTok — 1080x1920, 9:16, MP4 or MOV, up to 10 minutes when uploading from file, 30-60fps.
- Facebook Reels — 1080x1920, 9:16, MP4, 3-90 seconds, 24-60fps.
- LinkedIn — 1920x1080 for landscape or 1080x1920 for vertical, MP4, up to 10 minutes, 60fps max.
Export your full-length master at 1080p or 4K in 16:9 first. Then create derivative exports: vertical crops for short-form platforms and trimmed highlight clips for Stories and Reels. This top-down approach means you only edit once and adapt the output for each destination.
Legal Considerations for AI-Generated Music Videos
Before you hit publish, understand three legal dimensions that apply to AI-generated visual content:
Copyright of AI visuals. The legal status of AI-generated imagery remains unsettled in most jurisdictions. In the U.S., copyright protection generally requires human authorship, meaning purely AI-generated frames may not qualify for full copyright protection. However, your creative choices in prompting, selection, arrangement, and post-production editing likely qualify as copyrightable expression. The safest approach: treat your finished video as your creative work while acknowledging the legal landscape is evolving.
Music licensing. If you're using your own original music, you're clear. If your video uses someone else's track, you need a sync license regardless of whether the visuals are AI-generated or traditionally filmed. AI visuals don't change music licensing requirements. Platforms like YouTube will still issue Content ID claims on unlicensed audio.
Platform disclosure requirements. This is the most immediately actionable concern. Major platforms have implemented disclosure rules for AI-generated content. YouTube mandates that creators disclose any content that is meaningfully altered or synthetically generated and appears realistic, with the option to add this during upload. Meta requires labeling of AI-generated photorealistic video across Facebook and Instagram. TikTok requires disclosure for realistic AI-generated images, video, and audio. Creators who consistently fail to disclose risk content removal or suspension from partner programs.
The practical takeaway: when uploading your finished video, check each platform's AI disclosure option and enable it. For stylized or obviously non-photorealistic content (anime-style, abstract visuals), disclosure is generally encouraged but less strictly enforced than for photorealistic AI output. When in doubt, disclose. Transparency builds audience trust rather than undermining it.
With your video color-graded, overlaid, exported at the right specs, and cleared for platform compliance, you have a finished piece ready for the world. The final step is putting it in front of people: optimizing uploads for discovery, repurposing across platforms, and building a visual content strategy that compounds with every release.
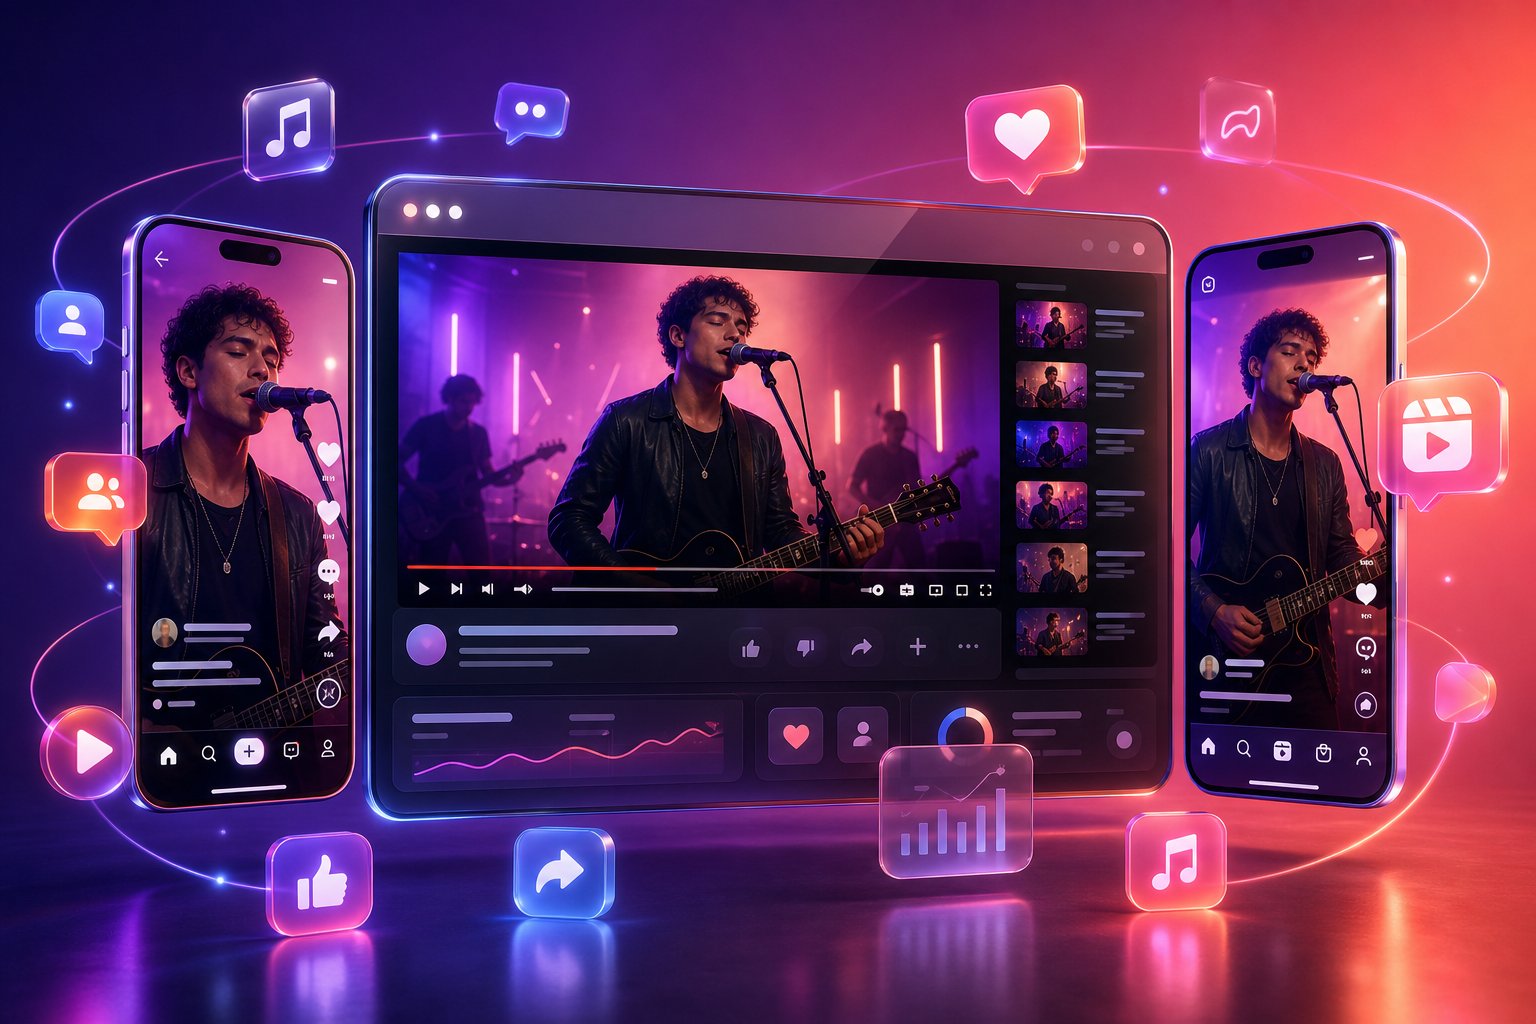
Step 8 Publish and Promote Your Music Video Everywhere
Your video is exported, color-graded, and ready. But a finished file sitting on your hard drive does nothing for your music career. The distribution strategy you follow in the next 48 hours determines whether your work reaches dozens of viewers or thousands. Knowing how to make a music video on youtube is only half the equation. Getting it discovered, shared, and embedded in platform algorithms requires deliberate optimization at every step.
Optimize Your YouTube Upload for Discovery
YouTube remains the primary destination for full-length music video consumption. YouTube's algorithm rewards three signals above all others: click-through rate, watch time, and engagement. Your upload metadata directly influences the first two before a single viewer presses play.
When you're figuring out how do i make a music video for youtube that actually gets found, focus on these elements:
- Title — lead with your artist name and song title, then add a descriptor. Format like: "Artist Name - Song Title (Official Music Video)" or "Artist Name - Song Title [AI Visual]." Keep it under 60 characters so nothing gets truncated in search results.
- Description — front-load the first two lines with your song title, genre, and a one-sentence hook. Include timestamped sections if your video has distinct visual chapters. Add links to your streaming profiles, social accounts, and credits.
- Tags and hashtags — use your artist name, song title, genre, and relevant terms like "music video" and "visual." YouTube's search engine weights keywords more heavily than other platforms, so precise tagging matters.
- Thumbnail — pull the single most visually striking frame from your video or generate a custom image that represents the video's mood. High contrast, readable text (if any), and a clear focal point outperform busy or cluttered thumbnails.
- AI disclosure — check YouTube's synthetic content label during upload. Transparency builds trust and keeps your channel compliant.
Hook viewers in the opening seconds. If your intro section is visually subdued, consider starting the video from the chorus or a visually intense moment, then cutting back to the intro. This approach improves watch time because viewers who are grabbed immediately are far more likely to stay through the full track.
Repurpose for TikTok, Reels, and Shorts
Your full-length video is one asset. From it, you can generate weeks of short-form content across every platform where your audience scrolls. Repurposing isn't posting the same thing everywhere. It's adapting one creation for each platform's format and audience behavior.
YouTube Shorts, TikTok, and Instagram Reels all favor 9:16 vertical video under 60 seconds. Pull the most visually compelling 15-30 second segment from your full video, re-export it in vertical format, and you have a standalone piece of content that drives viewers back to the full upload.
For each short-form clip, adjust the opening hook. Short-form content needs to capture attention in the first five seconds with a visual or narrative payoff that makes viewers want the rest. A clip might open with your chorus visual, your most dramatic scene transition, or a striking single frame that makes people pause their scroll.
Platform-specific considerations when making music video with ai content for short-form distribution:
- TikTok — post the original vertical clip first. Give it 24-48 hours of exclusivity before cross-posting.
- Instagram Reels — move text away from the bottom of the frame since Instagram shows captions there. Use the original file, never a watermarked version from another platform.
- YouTube Shorts — optimize the title for search since YouTube Shorts appear in search results. Include your song title and a descriptive keyword.
Space your posts across the week rather than dropping everything simultaneously. A staggered schedule maintains daily presence without requiring daily creation, turning one video into a full week of content.
Build a Visual Content Strategy Around Your Music
One video is a release. A consistent stream of visual content is a strategy. Independent musicians who treat every single, every loosie, and every remix as a visual opportunity build artist identity faster than those who only produce videos for "important" releases.
The beauty of ai music videos free tools and affordable generation platforms is that you can create a music video free of the traditional production bottleneck. Every track in your catalog becomes a candidate for visual content without requiring budget approvals or crew availability.
Here's a release strategy that maximizes each video's reach:
- Upload the full video to YouTube with optimized metadata, a compelling thumbnail, and proper AI disclosure. This becomes your canonical visual asset for the song.
- Create 15-30 second vertical clips for TikTok, Reels, and Shorts. Pull 2-3 different segments so you have multiple posts from one video.
- Share behind-the-scenes of your AI creation process — show your storyboard, share prompt iterations, or record a screen capture of generation in progress. This content performs well because it satisfies curiosity about how to make a music youtube video using AI tools.
- Engage with comments and community — respond to feedback, ask viewers which section looked best, and use audience input to guide your next video's visual direction.
Algorithms across every major platform reward consistency and momentum. Releasing new content every 4-6 weeks signals that you're active and worth surfacing to more viewers. Tools like MakeBestMusic's AI Music Video Generator help creators maintain that steady flow of visual content for ongoing promotion without requiring video production skills for every release. When the barrier to creating visuals drops low enough, every track becomes a visual story waiting to be told.
The question shifts from "how to make music videos for youtube" to "which song gets a video next." That shift in mindset, from video as a special occasion to video as a standard part of your release workflow, is what separates artists who build visual audiences from those who remain audio-only in an increasingly visual discovery landscape.
